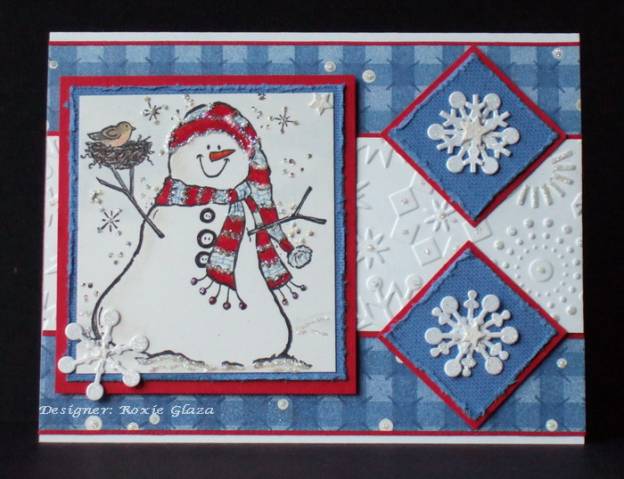
Measurements for red panels: with image – 3 x 3 ¼”, with snowflakes - 1 3/8” square, with embossed panel – 2 1/8” wide.
I had to do a robin with the snowman because we usually have one robin that stays behind and toughs out the cold Michigan winter when all the others fly south. Silly bird!
I am loving the glitter this holiday season. I apply glue with a very fine metal tip which you can see here. I found mine at a stamp store in Burton Michigan. Then I sprinkle on the glitter to give just enough sparkle with out over powering with the shiny stuff!
-Red and Brocade marker for the snowman wardrobe and Prismacolor pencils for the shading, bird, nest and hint of sky.
-Cuttlebug - snowflakes and stars die cuts and embossed panel.
-Square punches for the small panels.
-Tool distressing on the blue layers.
-The red 1/16” border of the designer paper is cut and glued down to avoid bulk on the card. Besides that sure would be a waste of cardstock!
-Foam squares/dimensionals for mounting the image panel.
-To achieve all over same height for the squares: I punched a red and white square, run the white through the Cuttlebug to emboss it. Now cut both colors corner to corner and glue together and then to the card to act as the dimensionals. Now the square panels are at an even height on the card and it also gives nice dimension!
Date: Tuesday, November 6, 2007 GMT Views: 5202
Favorited:82
Registered: July 17, 2005 Location: Staying inky in eastern Connecticut Posts: 79205
Tue, Nov 06, 2007 @ 9:15 PM
the edit button is not working.....in my comment above, I meant to say robin not cardinal but the site wouldn't let me edit......wonkiness rules, I guess.......