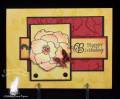
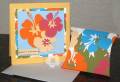
I stamped the Camellia onto white cs and airbrushed it with masks, then cut it out and mounted it onto the rectangle which was stamped with the flourish. The red panel was stamped with the same Camellia using Versamark ink and clear embossed. The card front was stamped with the flourish and the matching ink to create my own dp. I colored the pearls with a black Copic marker. The butterfly is punched from a piece of the red cs which was stamped with the flourish. I added stickles to the body and popped it up.
Thanks for looking!
Date: Tuesday, July 13, 2010 GMT Views: 962
Favorited:5
Registered: December 4, 2009 Location: Southern Utah's Dixie Posts: 20557
Wed, Jul 14, 2010 @ 5:19 AM
This coloring combo is so pretty for the camellia you used! I like how you used the camellia for the bg piece. Your coloring n the main camellia is beautiful!
Splitcoast Dirty Dozen Alumni Creative Crew SU Design Team Alumni Demo Challenge Leader Splitcoast Challenge Host
Registered: February 8, 2004 Location: South of Oklahoma, North of DFW Airport = North Texas! Posts: 44405
Wed, Jul 14, 2010 @ 6:54 AM
Oh my word ....
"Another" fabulous Camelia! If only you knew how I truly adore those blossoms & their scent! Aaaaaaaaahhhhh!
Many thanks for this beautiful eye-candy!
Registered: August 21, 2007 Location: Wayland MA Posts: 105130
Wed, Jul 14, 2010 @ 8:33 AM
Love the embossing and soft coloring, Karen!!
------------------------------ Anne HarmonFS154, QFTD58, PROUD FAN CLUB MEMBER (photo of our Great Granddaughter Elise, just 6 months old) and me, even older.