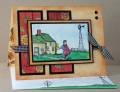
Measurements: Red panels 1 1/4 x 3 ½”, 1/8” black border, Image panel 3 3/8 x 2 ¼” all thee borders total ¼"
-Prismacolor pencils, baby oil and paper stumps were used to color the image using the Gamsol Technique.
-I stamped the girl, masked off to add the house which I masked off to add the windmill and grass line. The masks will be stored for future use in the stamp set. The masks were created with a sticky note.
-The sky on the image panel was sponged using my handmade template. All those acetate packages sure come in handy so I save all the pieces I can.
-The card base and yellow border panels were stamped using this procedure which I just made up today but it might have been done and have a name IÂ’m not familiar with: I applied the ink to the rubber with a sponge so it wouldnÂ’t have a solid coverage. I then placed my cardstock on the rubber, placed a piece of paper over the two and pressed until all areas of the paper have been covered. I was really happy with the results.
-The edges of the yellow panels were also ink distressed.
-The ribbon was tied first, positioned on the card and wrap completely around the card base front and taped under the image panel. This assures a good tight fit.
-The nail heads were attached with Diamond Glaze
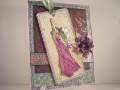
-For the inside I cut some flowers and leaves from scrap and glue to the card base.
Registered: March 18, 2004 Location: New Hampshire Posts: 7021
Wed, Jul 29, 2009 @ 3:30 AM
Love the aged look of the base!
------------------------------ "Life is much too important to be taken seriously." Oscar Wilde Proud to be a member of Mo's Digital Pencil Challenge DT! My BlogMy Gallery
Registered: April 27, 2007 Location: South,GA Posts: 59576
Wed, Jul 29, 2009 @ 3:33 AM
Roxy this is just fantastic. Love your coloring. Love that dp too and the inside looks as fantastic as the outside does. Thanks for another great layout to play with.