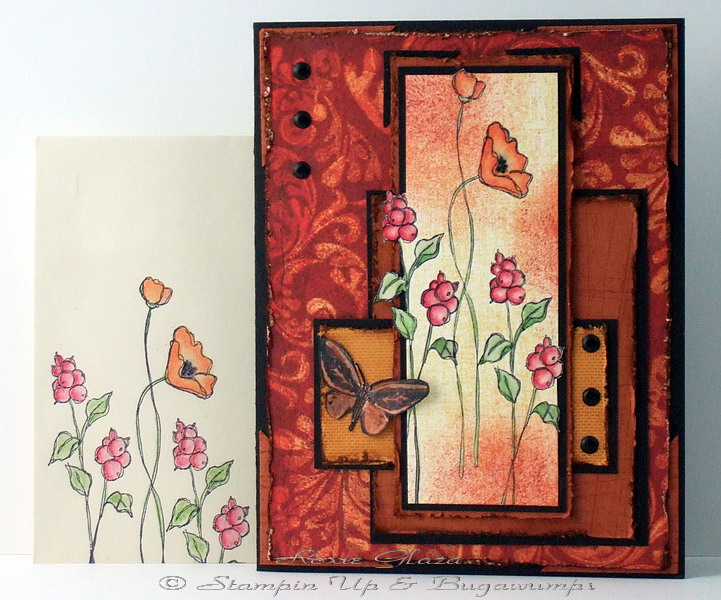
Measurements: Image panel before borders – 1 ½” x 4 ¼”, *butterfly/brad panel before border – 1 3/8” x 2 7/8”, *rust Sanded panel before border2 5/8” x 3 7/8”.
*I would make these two a little wider.
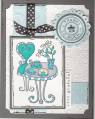
-Image panel is colored with Prismacolor pencils and mineral spirits.
I used the out of the box technique when cutting by holding the image to a light source and marking the image on the back that you will cut to. Use any type of cutter and cut to the image on the front, flip it over and cut to the mark on the back. If you need to cut between images and Coluzzle template works fine. This one didnÂ’t need that tool.
-Using a VersaMark pen I inked over the images and heat embossed with clear powder. I only inked the wider sections of the stem. This acts as a resist for the next step.
-The background is stamped with the grid pattern from the Oh So Lovely set multiple times staggering and turning a complete 180 between stampings until the image is covered.
-I then sponged on rust with a fine sponge and cranberry with a sea sponge.
-The tool distressed edges were also ink distressed. The designer paper has a white core that just didnÂ’t look nice on the card.
-The butterfly is colored with an H2o brush and Brilliance pad ink the heat embossed with clear and a black marker applied on the edges to cover the light cardstock.
-Corners under the panels are squares cut corner to corner.
Date: Tuesday, March 25, 2008 GMT Views: 5664
Favorited:53
Visit myStampin' Up Website - where you will find all the latest greatest from Stampin' Up. The new catalog is GORGEOUS with alot of new fun stuff - and you can get it for free. Contact me for details.