Registered: February 18, 2004 Location: pontiac, Michigan Posts: 1250
Sun, Sep 26, 2004 @ 5:27 PM
Ok I must say I was replying to all the requests and some came back as no email so I figured I would just post all my directions for all my pop up/ sliders here.. I hope this helps you all.. thanks so much for inquiring about my card/ cards ... and most of all what a privilege it is to know I could share some of my cards with you... also would like to send out a great big thanks to all my stampin friends that help guide my way in making my creative side come through and giving me help along my stampin way to many to list but a few that come to mind are ... Diane, Debby, Sandy, Susan , Heidi, Ok I must thank the academy too :-)enough on the speach just thanks to everyone that has givin me such inspiration.. All you stampin gals ROCK!!!
rubber hugs
Dawn
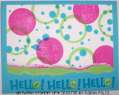
1. Pop up explosion card
5x5 square
fold in half
open
fold in half other way
open
and fold one corner to the matching other corner
( this fold will be the sides of explosion card so when you are mounting the
exposion part to your card it should look like a triangle)
open
now make the side folds fold inward to the center of card should look like a mountain peak
then fold the whole explosion part into a triangle and attach to card front
to keep explosion card closed until you want to read message punch 2 holes at bottom of triangle ( top piece )
and 2 on Card front ( bottom )
and mono ribbon to inside of triangle and weave in and out through rest of punched holes ...
this explosion part of your card will hold your card message inside ...
2.TUNNEL POP UP CARD :
for inside of card ...
cut CS at 5 1/2 X 8 1/2
then trim this down on top 1/4 inch and bottom 1/4 inch
fold card in half
then score the ends at 2 inches ( both ends )
fold card in half again
Now on the folded part of card make your pencils marks at...
from top 1/2 " down toward center
from 2 "scored mark, make a mark inward towards fold at 3/4 "
from bottom make pencil mark at 1 1/2 in from bottom
( make all your lines to meet up and make a square in the center of the 2" score marks )
Cut the square out and set this square aside to be stamped on later ..
crease all your folds when you sit the tunnel part on the table you should see a W when looking
at it from the top ( looking down at it ) ... make the center fold peak like a mountain
proceed to stamp on the inside of the your tunnel cs
and then stamp square with image to be in center of inside your tunnel card
fold cs in half and mono one side to the main card about 1/4 in from ends of main card
put image inside the main crease of card and then mono the other side of the pop up tunnel card
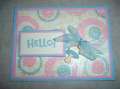
3. SECRET MESSAGE POP UP CARD:
Base of pop up is 4 1/4 X 11
Score at 1"~ 2 3/4 "~ 3 3/4"~ and 5 1/2
flip it around and measure the other end with Same measurements as above
Cut slit on the 5 1/2 " measurment with hobby knife about 3 1/4" or how ever wide you want your
pop up to be
fold all scored lines crisp with bone folder ...
cut out a strip for pop up mesuements of 3 "X 5 1/2" ( this will depend on how wide your slit is cut
this can be smaller or a little larger just make sure pop up message slider can slide thur the slit)
now slide pop up slider part in between the base thats folded in half through the slit and glue the pop up part
in between the (2) 1" inch scored lines thats it :-)
4. SNOW MUCH FUN POP UP :
Inside ....
white CS cut at 5 1/2 X 8 1/2
trim off side and top 1/4inch
fold CS in half
cut (2) notches right on the fold part ( make even cuts )
the 2 notches should be pretty close together ... but enough to add something to it .. no bigger than an inch ...
open card
push the notched area forward inside the card should look like a step...
This will be your pop up...
extras ..... window sheets for movement
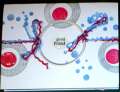
5. MONKEY SLIDER CARD :
base of card is measured at 5 1/2 X 11
Score on this part at 3 1/2"~ 3 1/2"~ 3 1/2"
when finishe you should have about 1/2 left over at one of your ends ..
Fold all scored lines
set aside ...
SLIDER PARTS:
Cut 2 pieces of white CS 3 " wide X 5 1/2" long
NOTE~ (one piece will be for top slider stamp images towards top and one will be for bottom slider ( stamp images towards bottom)
cut one strip of a plastic grocrey bag about an inch wide or so ...
should be long enough to wrap around your 5 1/2 " base
BACK TO BASE OF CARD :
you should have 3 panels of 3 1/2 " wide... On the last panel ( this will be inside your card to make slider ..)
wrap the grocrey bag plastic around this panel and attach it together ( plastic to plastic ...this step is very important) and mono the plastic to plastic together at the bottom of panel keeping it close to edge BUT not on the edge ) very important ....
next take one of your slider pieces ( 3" X 5 1/2") for the top slider glue this to the top of the plastic with stamped image facing up and out towards the front of card NOTE glue on plastic 1st at bottom and then attach the slider to that ( very important )
next open that panel we will attach the bottom slider flip the slider piece backwards and glue to the top are of panel of plastic ( glue plastic 1st then attach the slider part to plastic.. ( very important )
Now give it a test run...
when looking at your card when you pull the top ... both top and bottom should slide out at same time ...
if this is what happened
use sticky strip to attach the 1/2 end piece to close up your card making sure to keep slider working at all times
now punch hole into the top slider and attach ribbon to be able to pull and see message ...
Rubber hugs
Dawn Griffith http://1HappyStamper.stampinup.net
Hi DawI would love to have a copy of the instructions--i just love your cards--great job. Thank you and have a wonderful day.
Lorraine
email: [email protected]
I would love to have the directions on how you made your secret message card. My email is [email protected] The picture was a little dark but, it looks really interesting. Many thanks.