I started off by making a hot glue stencil - her inspiration is fab. But DH and I are both home sick again today...and we were meant to be hot-desking: I could have a couple of hours in the morning to make a card and he could have my desk for the afternoon to work remotely. But he had an emergency and banished me from my desk, so I worked on putting this together in a small corner.
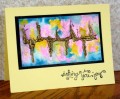
The base is from my scrap box - it was, I think, Brusho acrylic mists and silver shimmer spray.
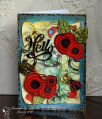
The next layer was also from my scrap box, a quarter sheet of Tyvek coloured with watercolours. I drew little circles on it with my hot glue gun (knowing that the heat would already start distorting it), and used various embossing powders. Then I heated it very carefully to set the powders and continue distorting it. Love how a little hole melted just in the middle of a red circle of EP to let the underneath layer show through - serendipity.
Because it's so dimensional, I made a little coiled spring from wire to pop the ladybird up on, gluing it at the back and then gluing the panel to the base layer.
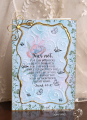
I added some poppies and the ladybird which were in a dish on my desk, and then die-cut the sentiment to add a focal point. I went through several experiments with the edge of the base layer - black stitching lines, a silver pen - but in the end I added Icicle Stickles, and that finished it off so that I was happy with it. This is going to be hard to mail but it sure was fun to make.
The tutorial for Hot Glue Embossing can be found HERE.
Date: Friday, January 19, 2018 GMT Views: 1368
Favorited:6
Accessories: watercolour paints, Sakura stardust pens, silver pen, Stickles, glue gun, Prima leaves, Serendipity word die, Elizabeth Crafts ladybird die, ep in silver, gold, copper and chinese red