Registered: September 20, 2007 Location: Nebraska Posts: 18884
Sun, Nov 25, 2007 @ 11:31 AM
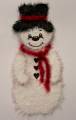
khara's tear bears
Tear Bear Instructions
List of items you will need to make your Tear Bear
Pattern of choice
Mulberry paper (see below for discussion of papers), usually 2 colors
Thin paintbrush or cotton swab
Dish of water
Glue (see below for discussion of glues)
Black fine-point pen
Optional supplies to further embellish your creation
Chalk (usually same color as paper in darker shade)
UniqueScraps Tear Bear Faces
Opaque white pen
Toothbrush or similar brush
Pop dots or other dimensional adhesive
UniqueScraps Fibers, ribbons, silk flowers, etc.
Before you begin ...
Assemble all of your materials. You may want to protect the surface you are working on as you will be wetting the papers. Cut out your pattern pieces. At this point, you can "rough up" the paper by brushing it with a toothbrush before you begin if desired. This will give a fuzzier edge. (I prefer to use the toothbrush on the edges of the piece after it is torn out.) Consider experimenting with a scrap or edge of the paper to see how to get the fuzziest tear with your particular paper ... first wet the paper as explained below and then see whether pulling the piece apart or tearing toward you gives the edge you like best.
Tear Bear Instructions
(Instructional Photos coming soon, please BOOKMARK us (control-d) and check back soon!)
Begin by laying your largest pattern piece (generally the body) over the paper, leaving at least 1/2 inch between the pattern piece and the edge of the paper (finer grained papers will allow you to place the pattern nearer the edge; you will learn as you work with a particular paper how much to allow)
Dip your paintbrush (a cotton swab also works, but a small paintbrush will give a better result) into a container filled with clean water, and begin to "paint" around the edge of the pattern. You want the fibers of the paper to be wet through ... don't worry, it's only water and it will dry with no ill effects.
If you work fairly quickly, you will be able to outline the entire pattern piece and tear it before it dries too much. However, if you find that the paper dries too much before you finish tearing, don't worry. Just place the pattern piece back over the paper and re-wet in the same manner.
Begin tearing the paper away from the pattern piece. It pays to experiment first with a scrap of the paper. Many papers tear well and leave nice fuzzy edges by simply pulling the excess away from the body, with the whole thing still flat on your work surface. Some papers work better by tearing the paper toward you.
After you finish the first pattern piece, tear out the other pieces in the same manner, making sure to use the preferred color of paper if you are using more than one color. If you prefer that any piece NOT be fuzzy, you may trace it onto regular cardstock and cut it out. (Tip: place the pattern piece upside-down on the wrong side of the cardstock before tracing, then any lines at the edge will be on the bottom of the piece.)
If you plan to rough the edges with a toothbrush, go ahead and do that now. As with tearing, you can experiment with a scrap piece that you have torn before trying this with your Tear Bear pieces. I usually like to brush from the bear out, using a medium pressure. You may want to feather the edges of the face piece more lightly than the others.
Chalking can add extra dimension and definition to your TearBear. If you want to chalk the edges of your Tear Bear, make sure it is completely dry first. This may happen as you work with the pieces if you are using a lighter paper, or can take up to 30 minutes or more if you are using a heavier paper. We definitely recommend practicing on a scrap piece for this technique. A good color choice for chalk is often the same color as your bear's body parts in a darker shade. You can also try a lighter tint of the same color. White or very light colored bears can be edged in practically any color ... a brownish color will make them look more natural, while pink or blue will make them more typical baby girl or boy accents, or any color may be used to make them complement your layout.
When all Tear Bear pieces are ready, lay them out as you would like them. Legs and arms can generally be placed in any position. Heads can be straight or tilted. The legs usually look better if placed under the body, and the arms are usually placed on top of it. The head is usually placed just a bit overlapping the body. Try out various positions until you find the one you like best.
If you skipped chalking, do make sure your bear is completely dry before gluing. Various glues can be used, depending on the thickness of the paper you select. See our brief discussion of glues below. (coming soon!)
Glue your Tear Bear together.
Arrange the face pieces to your liking, and then glue them down. You may want to arrange them on a scrap piece of paper and try drawing various facial lines before adding the face to your bear.
The mouth is drawn in with a fine line black pen. Most people prefer simple line mouths. You may also like to make stitch-type lines for the mouth.
Whisker dots may be added beside the mouth. Odd numbers of dots are more visually pleasing. Most people find 3 dots on each cheek to be enough.
Add highlights to the eyes using the opaque white pen (make sure the eyes match each other as closely as possible!).
Add other embellishments, such as a tiny ribbon or fiber bow, a silk flower, fiber stitching, or a die-cut or paper-pieced object for your Tear Bear to "hold" or otherwise interact with. The possibilities are limited only by your imagination, and this step is the most fun!
Now sit back and enjoy your adorable Tear Bear creation! Although we listed many steps above, in order to make the process as understandable as possible for nervous scrapbookers making their first tear bear, it really is very easy and a very forgiving technique. You may look at your pieces when you are half-finished and think that it just isn't working, only to be amazed at how cute the little guy is when you are finished! Tear Bears are very addictive too ... after you have made one, you will want to make many more, and perhaps try out other kinds of Tear Animals as well!
------------------------------ My Gallery Proud fan club member and one of Kota's Kids
live well,laugh often, love much!