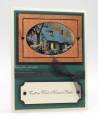
I just created this card to accompany the tutorial on Faux Ruffles for my blog.
All images are from www.ginakdesigns.com and can be purchased from www.stampingfreak.com
To begin cut a strip of cardstock 1 x 11. Rub it against the edge of either a table or a ruler until the fibers of the cardstock break down enough to separate the piece into two layers as seen here. Attache the two strips making sure to layer both smooth layers facing up.
Once you have separated the strip and attached them so both smooth edges are facing up begin to fold from the bottom to the top of the strip making small folds about one eighth to one quarter of an inch deep... the paper will have small creases...do not worry about that once it is all folded you will not notice the creases all that much...
Now that you have begun, continue the folding until you have the entire strip folded as seen here.
Once you have finished the folds all the way to the end apply the folded ruffle to the bottom edge of your card. I use Scotch Quick Dry Glue in all my projects and I find it allows me enough time to adjust the ruffle as needed. If you are using monoadhesive just don't press the ruffle down until you have it situated just the way you want it.
Now apply the card stock strip to the back of the patterned paper so that your entire piece is ready to be adhered to the card front.
Now that you have your entire piece ready to be applied to your cardfront...get out the foam mounting tape... I LOVE FOAM MOUNTING TAPE!!! If you have never noticed before I use it like it is going out of style because I find that it is a WONDERFUL adhesive and it is cheap!!! I love that it allows for the ruffles to be very dimensional but holds them in place at the same time.
Now apply this to the front of the card so you can finish off your card.
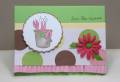
Ok now for the faux leaves part of the tutorial! Super easy...
Take any silk flower and either use the existing hole or create your own hole. I am using a Bazill Bitty Blossom in this pic. You will also need a small length of ribbon.
Tie a knot into the piece ribbon trying to get it in the middle. Do not pull it tight, you don't want it to get too flat or pulled into a scrunch.
Pull both ends of the ribbon through the hole in the flower.
Trim the ends to create "flower leaves" and adhere it to your card front. Adhere main image and stamp sentiment in top right to finish the card.
Date: Friday, June 8, 2007 GMT Views: 604
Favorited:5