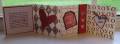
My upline and sidelines and I are planning a stamp camp promoting the Polka Dots & Paisley set, paper and wheel. These are some of the projects we have so far - on the far right, that is a magnetic bookmark. We are also going to make a steno pad and RSVP pen, and an acrylic post-it holder. I'll upload those as soon as I have pics.
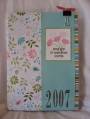
The corkboard is the same as the one of the SU website. I was inspired by the thread started by Lori Craig (stamp_momma). Here is a link to the directions on the SU site - you have to be logged in first before the link will work - http://www.stampinup.com/us/enu/4063_7421.asp
The link above is in the Leadership Conference Highlights.
I've had a bunch of PM's so I thought I would answer some of the common questions --
The cardstock backing is 6x6, the designer paper is 5 3/4 x 5 3/4, the corkboard itself is 5x5. I cut the corkboard down from a 12x12 square which can be found at Walmart in the office supply section and many other places, I'm sure. I used sticky strip to adhere the corkboard to the cardstock, and mono to adhere the designer paper and celery cardstock. I did not use any adhesive on the top "title" border - just lined up the 2 paper and used staples to stick them in. I did not use any adhesive on the cut-out flowers at the bottom either -- just used the colored brads like tacks and stuck them through. There is a magnet on the back - we used business card magnets which I bought at Walmart also, but I'm sure you can find lots of other places as well.
Date: Monday, February 26, 2007 GMT Views: 3220
Favorited:251