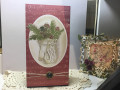
| | I began with an A2 size card base made from smooth with card stock. I then used another piece of white cardstock and ran it through the Mitten Garland embossing folder and used the coordinating mitten dies to cut out each mitten from the panel. I then colored the mittens in using copic markers and a white detail gel pen to add extra highlights.I then took the embossing folder and inked up the flat inside with distress oxide. I added the ink directly to the folder with the ink pad and also used a brayer to smooth it out. I add another piece of white cardstock and ran it through the die cut machine. I added the copic colored die cut mittens to the front of the inked panel.I wrapped some natural twine around the inked panel a few times and tied on a tiny tag that I had stamped my sentiment onto and adhered the whole panel to the card base.
DT member for
Simon Says Stamp
For more details:
https://btarayao.blogspot.com/2023/1...nder-blog |
|
Date: Wednesday, October 18, 2023 GMT
Views: 87
Favorited: 0
|
|
Additional Info
|
|
Keywords: simonsaysstamp timholtz
|
|
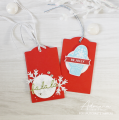
Stamps: Simon Says Stamp Mitten Garland embossing folder
|
|
Paper: 80lb card stock, white
|
|
Paper Size: A2 Standard
|
|
Ink: Tim Holtz distress oxide inks and copic markers
|
|
Accessories: tim holtz tag
|
|
Techniques: copic coloring, die cutting and embossing
|
|
|
|
Difficulty (1-Easy 5-Advanced): 2
|