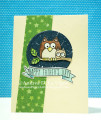
I stamped the image from "Li'l Hoot" onto 140 lb. watercolor paper & painted it with my watercolors. I was undecided if I wanted to leave the background the plain white of the watercolor paper, paint it like a night sky (going around the image), or fussy cut the image and glue it to another paper. I finally opted to fussy cut & glue, but then had to decide if I wanted a solid or patterned paper. Choices! I ended up die cutting a circle from navy cardstock & splattered it with white paint for the look of stars - and got some streaks that I thought could be comets or shooting stars.
I have had the banner for some months now. I even forget what I created it for, that it apparently turned out not to work on. But I recently found it in my leftovers box, so decided to pull it out and finally try to find something to use it on. At any rate, I tested the greeting against it, & it fit like a glove! I figured it was kismet, so I stamped that in Onyx Black ink, using my MISTI to help me get the greeting curved - and stamped - accurately.
I adhered a cream cardstock panel to my white card base, & added a strip of patterned paper that I had found in my scrap stash. (I thought the stars went well with the night sky I'd created, even if they are green!) I made the strip longer than I needed to make sure it would be long enough, and cut the excess off the top & bottom. I lightly taped my focal circle to my grid mat, to help me center the greeting banner at the bottom. I used liquid glue to tack the banner to the bottom center of the circle. When the glue had dried enough that the banner wouldn't fall off, I picked up the circle & now-attached banner & glued them to my card.
Date: Thursday, April 28, 2022 GMT Views: 310
Favorited:3