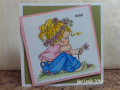
Love this fun new (to me) card design that I made as end of the year thank you cards for my kids' teachers. Here is a video tutorial (instructions for this card start at about 16:30): .
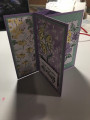
Two things I learned when making this - it's 4-sided, so figuring out what to put on each side is essentially like designing 4 separate cards. Not a quick process and I would recommend laying all the sides out before starting to attaching them to the card, so you don't inadvertently attach similar things next to each other (ask me how I learned this...). Also, when the finished card folds down, it's quite thick I only used dimensionals on one side and no embellishments (just layers), and it barely fit into a regular envelope. I would bet that it will need additional postage when I mail it. Still, it was a great way to show off the beautiful Hand Penned DSP!
The instructions in the YouTube video are in metric, so I had to play with the measurements a bit to make it a 5-1/2" x 4-1/4" (A2) size card - here's what I came up with (I can't promise that these are exactly right, but they worked for me):
Base - 4-1/4" x 6-1/4", Score at 1/2", 1-1/2", 2-1/2" and 3-1/2"
Wings (need 3) - 4-1/4" x 2-3/4"
Large panel (4) - 4" x 2-1/2", inside (DSP) layer 3-7/8 x 2-1/8
Small Panel (4) - 4" x 1-1/2", inside (DSP) layer 3-7/8" x 1-1/8"
Date: Monday, June 21, 2021 GMT Views: 687
Favorited:3