Dynamic Die-Cutting by Lydia Evans is my second Altenew Academy online class in level 3 of the Altenew Educator Certification Program. One topic was "Partial Paneling Die-Cutting" which I have not seen done this way before. Normally, the way I am familiar with this is to move one of the cutting plates a bit and only die-cut there where both cutting plates overlap. However, Lydia Evans replaces one of the cutting plates with a small cutting plate from the "Altenew Mini Blossom Die Cutting Machine" and it creates a whole new set of possibilities to use the dies, especially the cover dies.
Note: Please always first make sure that the particular "package" will easily and smoothly run through your die cutting machine so that the machine is not damaged. I have a Big Shot and my mini die cutting machine is the Sidekick. I mistakenly thought that all mini die cut machines have the same size and the same cutting plate thickness. Therefore, I just replaced one of my cutting plates with the mini cutting plate of the Sidekick and the new package got stuck in the Big Shot. Thank goodness I only tried it gently.
The Altenew Mini Blossom Die Cutting Machine is larger than the Sidekick and has three cutting plates, one of which has the same thickness as the one from the Big Shot which makes it easy to replace the cutting plates. The Sidekick has two mini cutting plates of the same thickness, but they are thicker than the Big Shot cutting plates and therefore the technique doesn't work as shown in the video.
I didn't want to give up and tried it again: If you use the base plate that you use to emboss regular embossing folders, plus the two Mini Sidekick cutting plates, you have exactly the height you need for the Big Shot. However, it's a bit more complicated to get the two mini cutting plates exactly on top of each other through the Big Shot. I used washi tape to attach one mini cutting plate on top of the cover die, attached both to the paper and held the whole thing up to the light to attach the second mini cutting plate from underneath just below the other cutting plate with washi tape.
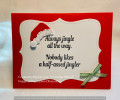
For the project, I chose a Christmas card where I die cut the Cover Die Layered Snowflake A from Altenew using this technique and the Cover Die B I die cut normally (see pictures). I glued both die cuts to each other. I die cut the letters using Altenew's Bold Alphabet in gold mirror and in black cardstock and glued them to each other slightly offset. I embossed with gold embossing powder and Versamark the snowflake from the Altenew mini stamp set Small Moments twice and die cut them. I then added a little penguin from Marianne Design.
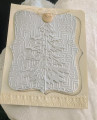
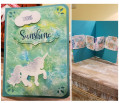
I attached two pictures of other attempts. For the Christmas card, I used the cutting plate I placed horizontally on the cover die, but it also works vertically or extending beyond the edge of the cover die.
Have fun trying it out and stay healthy. Gabriele
Date: Tuesday, December 22, 2020 GMT Views: 160
Favorited:2