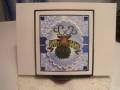
This holiday card was made in hopes we get snow this Christmas here in Idaho when my daughter and her family from California visit.
The card base is a standard 5.5"x 8.5" piece of Stampin' Up! (SU) Pool Party cardstock folded in half to form an A2 size card.
The main panel was created by cutting a beautiful snowflake sky piece from SU's retired "All is Calm" Designer Series Paper to a 5"x 2.5" piece (to give me extra room for gluing the torn white "snow banks" onto it). Then I cut a piece of SU Whisper White cardstock to 5"x 2.5", and tore a jagged edge along one long side to form the top-most snow bank. I glued the torn edge with Tombow, then sprinkled it with Judikins Prisma glitter. After pressing the glitter down into the glue with my fingers, and allowing it to dry for five minutes, I glued this at the bottom of the snowy sky pattern piece so that the finished main panel would measure 5"x 4.75". The additional foreground snow banks were created by tearing scrap pieces of SU Whisper White cardstock, then gluing and adding glitter before gluing them on top of the main snow bank. I didn't worry about width of the scrap pieces as long as they were at least 5", so I could trim them to fit the main panel after I glued them down to the card front.
I then cut a 4"x 5.25" panel of SU Silver Foal paper to serve as the matting. Because I'm a thrifty card maker, I used one of my large square rectangle dies to die cut the center of the silver panel just slightly smaller than the main panel of this card. That way, I could glue the silver matting piece onto the card base, and save the die cut rectangle for a future project!
Atop the silver matting "frame" I glued the main panel.
The two snowflakes were created using my SU "Seasonal Layers" dies from 2mm thick craft foam. I then rolled a thin layer of Tombow glued on top of each and sprinkled liberally with the same Judikins glitter. The points of each snowflake were decorated with SU rhinestones, then the two snow flakes were glued to the lower right corner of the card front. Because gluing to a glittered surface is sometimes difficult, I used a small piece of the super strength red double-sided tape to glue the smaller snowflake on top of the larger one.
The sentiment was created by inking up the top three lines of stamp with SU Pool Party ink. To make this easier, I used my MISTI, then covered the part of the sentiment on the stamp that I DID NOT want with painter's tape. I inked the stamp, removed the painter's tape, then stamped onto a scrap of SU Whisper White cardstock. I repeated this three times (using NEW tape each time) until the sentiment was dark enough. I then hand-cut the sentiment out to look like a cloud. I created the cloud matting by using a temporary glue tape runner to attach the cloud to a scrap piece of SU Pool Party cardstock, then using paper snips, I cut around the entire white cloud leaving about a quarter inch border. The cloud was then glued with Tombow to its mat, and the entire matted sentiment attached to the card front using adhesive foam strips.
This card was pretty straight forward to make, so I am giving it a difficulty level of "2" out of a possible "5". Be aware that you will have glitter EVERYWHERE when you are finished with this card! But that's part of the fun, isn't it???
Date: Monday, November 12, 2018 GMT Views: 1144
Favorited:2