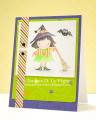
My SIL celebrated her 40th birthday over this past weekend. I had previously seen a video on making an "impossible" card on YouTube. Then I saw this one by Sam at Mixed Up Craft that uses acetate for the base. The acetate not only makes it a bit sturdier, but also adds a "floating" appearance to the pop-up panel. I always love the "wow" factor with special occasion cards, and since she loves engineering, I figured this would be perfect!
I stamped the cake (it's an old stamp, and I don't know who made it) with Soft Granite ink onto a panel of bristol paper. I colored it with my markers, using the Tombow blender pen to pull the color out to add highlights. I also used a silver paint pen for the triangle details on the cake plate.
I cut & folded a piece of acetate as per the instructions in the tutorial. For the patterned paper pieces on the base, I ended up having to cut one of them twice, since I messed up the first time! Thankfully, I had enough, because I really wanted to use that particular paper. I matted them with green cardstock, and adhered them to the base. I also cut 2 more green pieces, and adhered them to the underside. This not only provided a bit more stability, but also hid the adhesive from the matted pieces.
The only really tricky part to the tutorial was adhering the focal panel correctly. It was hard with the camera angle in the video to see exactly how she did it. I did have to take the panel off and reapply it a few times; likewise for the panel that sits on the backside of the piece that pops up. To get the "floating" effect, you have to adhere the cardstock panels about 1/4" above the bottom edge of the acetate piece. But getting everything lined up just proved to be tricky. I persevered, though, & like how it finally came out! My SIL was very impressed, too--bonus!
I stamped a greeting on a strip of white cardstock with Paris Dusk ink, & matted it with pink. I adhered that over the gap in the front bottom of the card. This not only adds a greeting place, but also helps steady the card design. It folds flat to go into an envelope, and then pops up (and stays up) when the recipient takes it out. A really neat design, and one I may do again!
Date: Monday, October 1, 2018 GMT Views: 430
Favorited:2


 My SIL was very impressed, too--bonus!