I've had a request for more details, so I will give it a try.
Cut 2 scalloped circles, one from the "plate" color and one from the "crust" color--mine (from the SU Circles Collection) are about 5 inches.
Cut 2 "pie" colored pieces--the second piece is just for depth.
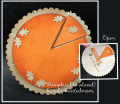
The pie slices were the hardest parts for me (I am not inclined toward geometry). I started with a piece of scratch paper and cut another circle the same size as the pie circles. I folded this in half and played around with measurements until I came up with something I thought was acceptable. It would have been easier to score the pie in eighths instead of sixths. I'm sure there is a YouTube video somewhere showing me how to do this, but I am not inclined toward details, so I didn't look it up. (Oh look, here is help! ) After I was satisfied with the pie "slices", I scored my pie top.
Add sponging on one of these circles to give some dimension--try sponging 2 shades of the same color as the top. I used Pumpkin Pie and Cajun Craze, leaving the middle mostly untouched for highlights. I also did a little sponging on the crust.
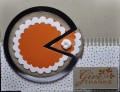
Cut out one slice of pie on both circles.
Mount one pie circle on top of the other pie circle with dimensionals. Then mount the "pie" on the crust using dimensionals. Carefully cut out the piece of crust for the missing pie piece--then mount the cut piece of pie to the crust, also using dimensionals between each layer.
Return to the whole pie. Score the crust on one piece of pie straightening out the curve where pie meets crust. This will give you a straight place to attach the pie to the plate and make a fold. Mine is attached with multipurpose glue. When you are finished gluing the pie should fold back from the plate. You might want to do a better job of choosing the place for the fold than I did. Mine was chosen at random and it is a little awkward to open.
Now glue your cut piece of pie to the "plate" making sure to leave space for the card to swing open.
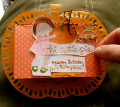
Finally, decorate your pie top. I also added widened cuts in the crust at each scored piece.
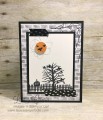
Stamp sentiment inside and enjoy!
Date: Saturday, October 28, 2017 GMT Views: 911
Favorited:4