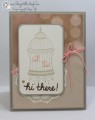
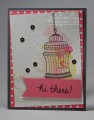
This is a panel for a card which I'm posting now as I can't decide whether to keep the sentiment on the front, move it elsewhere or change it to different words......mmm....decisions.
This was influenced by a video I watched where a lady had made a beautiful panel depicting a tree and she had also added flowers on her twine which looked amazing.
As I had attempted to recreate the same look with my previous post (Card #1), and failed, I carried on with this attempt. When I asked my hubby what he thought of my efforts and what he could see, he said "a green thing and a chair". He obviously needs an eye test LOL.
It's clearly a green blob and didn't quite turn out as expected but boy did I have fun.
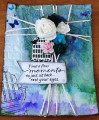
Clear gesso on the panel first, tissue paper pasted and gesso added again. White cotton....lots twirled and laid on the front. This time where the green blob is, then covered in white gesso. Inks sprayed, squirted, dabbed....lots of times until I was happy. Unfortunately me being me, I get too carried away and never know when to stop so the green blob started out looking ok, but eventually creeped down the panel. Oops.
It was at this stage that I noticed that not only had I very inky fingers, but that the left side of my panel was covered in splatters. Doh...this was meant to be kept white. Now what and why wasn't my green blob looking like the lady's panel in the video?
Gesso out and I'm covering the ink...isn't that what gesso is for...to cover up mistakes LOL. It looked white...well whiteish...and was a bit streaky but it could work, when I remembered my TH stencil. So TH to the rescue, paste out and voila...I've now got a wall. Love that stencil and as you can see, it's great for covering up white spots .
The bottom of the panel also was way too inky, so more gesso and surely I can create a flower bed. I spotted a flower stencil in my stash and before I know it, I'm spreading gesso through the stencil. Yep I can see flowers but it's still not right and maybe I should have left it as it was. After all, these parts weren't in the video.
Typical me, I'm now spraying again...lots more and squirting and dabbing and even the green blob gets another go. I'm thinking when do I stop but I like the purple, pink and green , and where's those flowers gone?
Those who have viewed my gallery, also know I like busy. CAS is not in my dictionary LOL. I'm thinking some butterflies would look good on this b/g so out comes another stencil and I'm pasting away. Maybe some tiny little birds too. Those butterflies also need some sparkle ...stickles out.
Phew that took longer than I expected, but I'm happy and time to put on the string. First more gesso over the top.
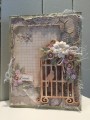
Now for the paper flowers...which aren't showing up so well in the photo. I did some twirling on some of the metal stems. Out comes the chipboard and after lots of moving and removing, I'm just about to stick it all down when I thought this would look much better in white.
Gesso back out and on the chipboard followed by lots of white embossing powder...that's better. Flowers added and more twirling of stems.
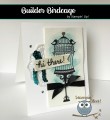
Time to find a sentiment, but nope....I'm looking at the birdcage thinking a tiny bird would look so cute on there. Stamped, fussy cut, clear embossed and a white eye added. That's better.
Gosh even I could sit in this place.....when I remembered I had just the thing. A chair stamp LOL. Pity the wall got in the way but you get the idea.
Sentiment stamped, distressed and now where to place it. Before that, let's add some rhinestones.
After more time moving and removing the sentiment, it was at this stage that I decided I would post it anyway. The sentiment is simply placed on top of the string. I may not even use the sentiment so any suggestions are gladly welcomed.
The photo doesn't do the green blob justice as the texture with the cotton peeking through is yummy and even the white gesso looks ok.
Thanks for taking time to look and read this very long description....as I mentioned before, I'm not a CAS person but sometimes wish I was LOL.
Happy day
Date: Wednesday, August 2, 2017 GMT Views: 466
Favorited:2
Splitcoast Dirty Dozen Alumni Creative Crew SU Design Team Alumni
Registered: October 5, 2006 Location: Maryland Posts: 15790
Wed, Aug 02, 2017 @ 9:32 AM
Wow, love your tissue background and all of the elements! The flowers look beautiful with the twine and I beleive that the scene looks like an enchanted evening :-) Our hubbies generally do not have an eye for art- this is a work of art for sure! Thanks for sharing and I am thrilled that you were able to use some of your stash- hugs!
Splitcoast Dirty Dozen Alumni Proud Fan Club Member Splitcoast Challenge Hostess Teapot Tuesday TEAm
Registered: April 18, 2011 Location: Melbourne, Aus Posts: 51844
Wed, Aug 02, 2017 @ 10:36 PM
Oh wow Jayne, I enjoy reading your fun story and details as much as I love your cards. This is mixed media magic!!! I love that your DH was brave enough to give you an answer. I agree 100% about CAS, it should come with its own 'degree of difficulty' rating. Don't stop what you are doing. Jayne your work is brilliant!!!
------------------------------ Susie
Please don't take your organs to heaven - heaven knows we need them here.


 and didn't quite turn out as expected but boy did I have fun.