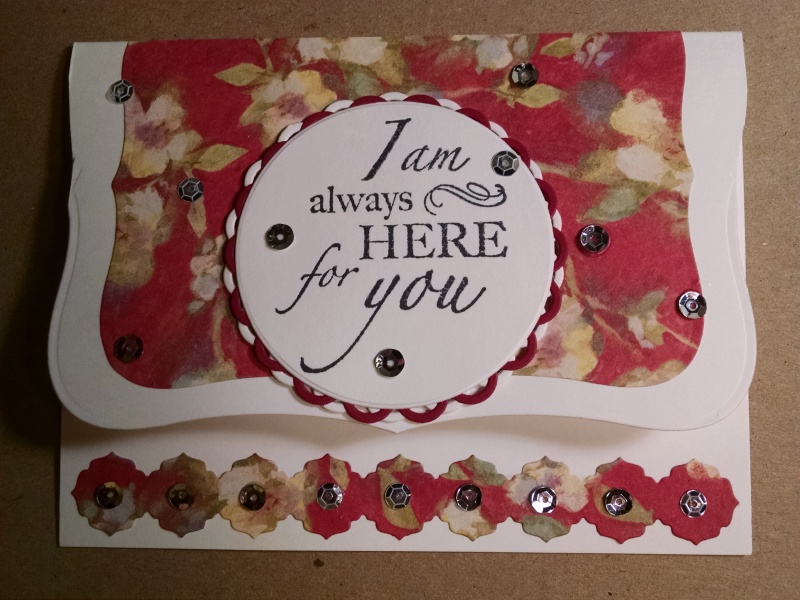
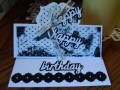
After cutting and scoring my base to a typical A2, I carefully lined up the top flap and my base plates to cut a partial label shape (Don't cut past the fold!). I cut another label shape a bit smaller from pp, adhered it to the top flap and cut off the extra with scissors (bout all the fussy cutting this girl can handle...lol). I used the same pp and die cut the border piece as well. Then I die cut two lacy circles (one white, one maroon) of the same size and adhered them together in an offset manner. (I love that stitched look it gives me!) I cut the circle a bit smaller, stamped on it and stuck it on top. I adhered the circlie sentiment and the border and then went sequins happy! Yee-hee!!! (Maybe that's what I should've called this card. Sequins happy, not yee-hee.)
Date: Wednesday, October 12, 2016 GMT Views: 280
Favorited:2
Splitcoast Dirty Dozen Alumni Proud Fan Club Member Splitcoast Challenge Hostess Teapot Tuesday TEAm
Registered: April 18, 2011 Location: Melbourne, Aus Posts: 51844
Wed, Oct 12, 2016 @ 4:11 PM
Thanks so much for the detailed description Angie, everything about this looks terrific. You are going to bring lots of smile to a lucky person when they receive this gem.
------------------------------ Susie
Please don't take your organs to heaven - heaven knows we need them here.