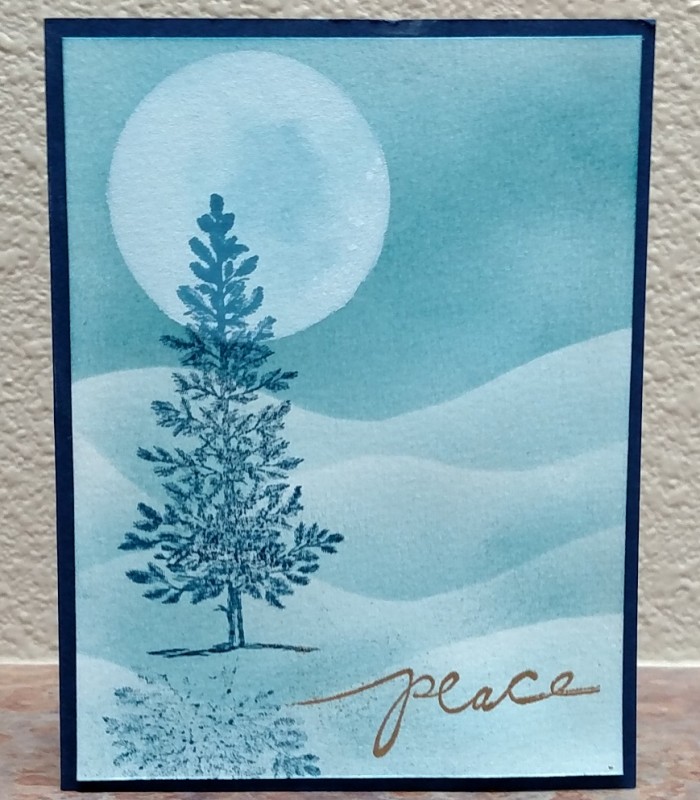
I cut out a curving template using two Post-It Notes taped side-to-side to ensure the template was wider than my card (allows you to move the template from side to side to ensure snow drifts are not a repeating pattern). Make sure your template for the drifts includes the sticky strip of the Post-It Notes so you can stick them down when sponging to prevent accidental shifting.
Since I wanted a 2" moon, I placed the first template position just below where the moon would go, then used a sponge and Island Indigo ink to sponge a sky. I wanted it darker than the snow drifts, so sponged several times. Then moved the template down and lightly sponged the the next set of drifts, repeating until the card was full of drifts.
For the moon, I used a 2" punch to cut out a circle in a scrap piece of cardstock, the placed it in the "sky" above the horizon, and used a sponge to fill in the moon unevenly to mae it appear more real (rather than just a big white ball in the sky).
Lastly, I stamped the pine tree so it overlapped the moon using the navy ink, and mirrored the tree onto a blank polymer stamp to stamp in as the tree shadow on the card.
The sentiment was heat embossed in gold.
Date: Saturday, July 30, 2016 GMT Views: 3055
Favorited:7