Hello Crafters!
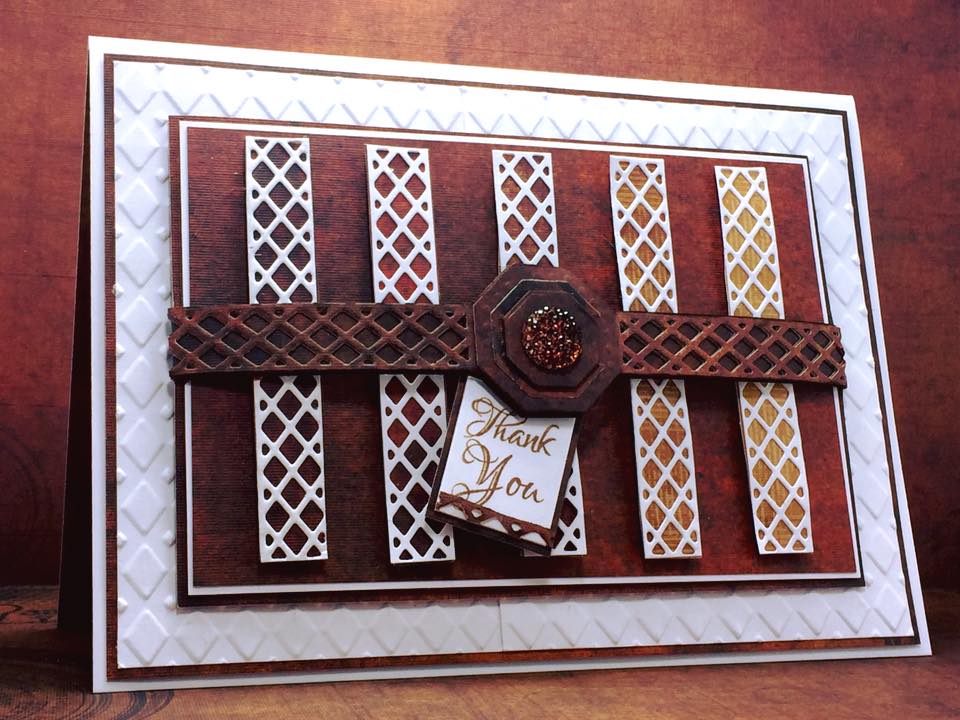
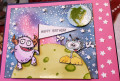
I've been super excited about the buckle dies that could be used in so many ways! For this make, I've cut the buckle and scalloped edges to create my separate paneled background and a tiny section to accent my tag here.
Just having fun with it and imagine these buckle dies working great layered and placed in center of makes like I've done here. This row/belt-like across the center almost looks leather-ish, heh? ;)
(Tip 1 - Use and Cut portions of your same die-cuts -like I've done here to place on my sentiment tag here for a matching accent)
(TIP 2 - Color your clear blings with matching color markers- like Ive done here to match the my Designer Paper Colors)
(Tip 3 - BUCKLES dies folded and buckled would work great as pretty napkin holders too! Also for using as handles on Easter baskets. And what about for creating a scene's fence? Or by lining up the buckle ends in straight lines you can create new octagon geometrical looks. The ends of buckles like these could also work as award medallions. Or just Creatively cut die pieces into separate parts for using as fun backgrounds - like I've done here. Lots of fun possibilities...
TFL & Happy Creating!
America
Date: Friday, February 5, 2016 GMT Views: 526
Favorited:4
Stamps: Creative Expressions - Petite Lavish Sentiments
Paper: Heavy White Cardstock and Basic Grey DP
Paper Size: 6x7
Ink: Brilliance Browns, Marvy Markers (inked all edges of Buckle across center)
Accessories: Creative Expressions Craft Dies by Sue Wilson; Finishing Touches Collection Scalloped Lattice Buckle Bar Die, Sizzix Cuttlebug Embossing Folder, Dazzler (colord with Markers to match paper colors)