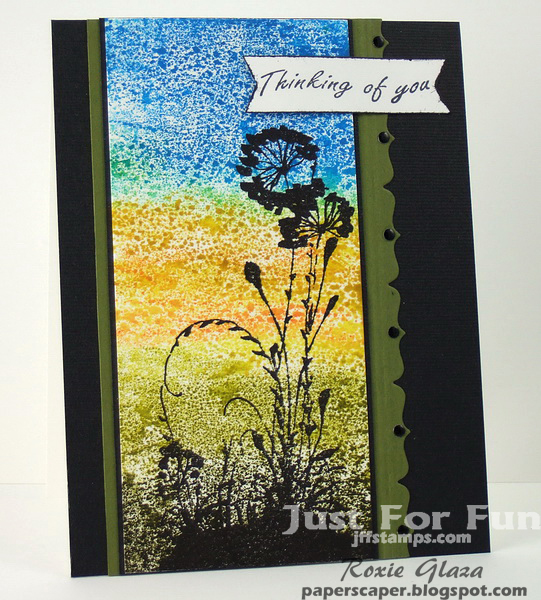
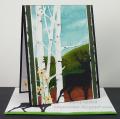
I used the acrylic block watercolor technique for this background: rub the ink pad on the acrylic block, mist with water and place on the watercolor paper. I repeated the step twice using all colors. Once you're happy with the look, let dry then stamp on the silhouettes. And keep in mind every paper will react differently.
Tools:
Stampin Up - banner punch - if you don't know how to punch the banner this way check out my blog post here - a photo is posted.
Spellbinder - border die, Perfect Paper Crafting - Perfect Layers Mini to cut 1/16" and 1/8" borders, Scor-Pal for double line embossing
Ink: Ranger Distress Ink: forest moss, crushed olive, squeezed lemonade, mustard seed, spiced marmalade (streaked through the yellows), tumbled glass, salty ocean, black soot was rubbed on the edges of the banner StazOn - Jet Black for image
Registered: June 18, 2014 Location: PA Posts: 1222
Thu, Sep 04, 2014 @ 9:56 AM
Wonderful card - and thanks for the mini tutorial! I love the long slender card format and you have enhanced it beautifully. Nice job!
------------------------------ SilverSnow Lois Malachi 3:10 "See if I will not throw open the floodgates of heavenand pour out so much blessing that you will not have room enough for it"