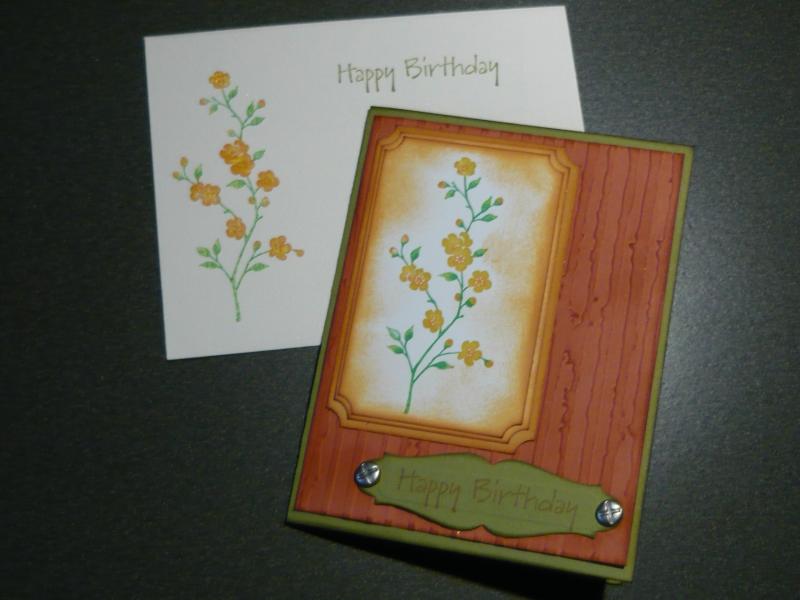
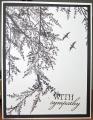
The front of the envelope was colored with the floral stamp from the Garden Silhouettes set using the same direct coloring with Marvy Brush and LePlume II markers like the card front, only this time it was stamped on the envelope front--so the look isn't as vibrant as it is on the glossy cardstock. As well, the Happy Birthday sentiment was also stamped on the envelope front.
Thank you for taking the time to check out my card. Please feel free to browse in my gallery. When you leave a comment, it absolutely makes my day!!! It is my goal to learn from your comments, and to improve as a card-maker.
Date: Thursday, August 7, 2014 GMT Views: 2250
Favorited:5
Splitcoast Dirty Dozen Alumni SCS Gallery Moderator Splitcoast Challenge Hostess Teapot Tuesday TEAm
Registered: July 27, 2007 Location: Dublin, Ireland Posts: 132012
Thu, Aug 07, 2014 @ 5:15 AM
All that layering on the focal panel looks wonderful and works together very well with the embossed background. I like the rich colours - I don't think I've ever tried using my LePlumes on glossy card.
Splitcoast Dirty Dozen Alumni Proud Fan Club Member
Registered: June 19, 2010 Location: SC Posts: 6005
Tue, Aug 12, 2014 @ 6:43 PM
Joanne, I have never been able to stamp an image to this quality the way you have (direct coloring onto the stamp). You've done an excellent job creating a masculine card (love those brads), and finished it with a matching envelope - perfect! I shall take some time to browse your gallery and see what you've been up to (she smiles).
Registered: May 14, 2012 Location: Virginia Posts: 149
Sat, Sep 06, 2014 @ 11:20 PM
What a beautiful card Joanne!! I absolutely love your distressing of the edges of your card. I too love to do that. I think I could play with inks all day long. I hope you have a wonderful day, and thank you for sharing your art work with me.
hugggs Penny