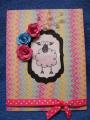
This is one of three cards I discovered I had not uploaded onto my SCS gallery--I thought there was just one. This was created in May, 2011 for dear friend, Sally. I THINK this was my 2nd birthday card for her, my 3rd one was uploaded within the last few weeks.
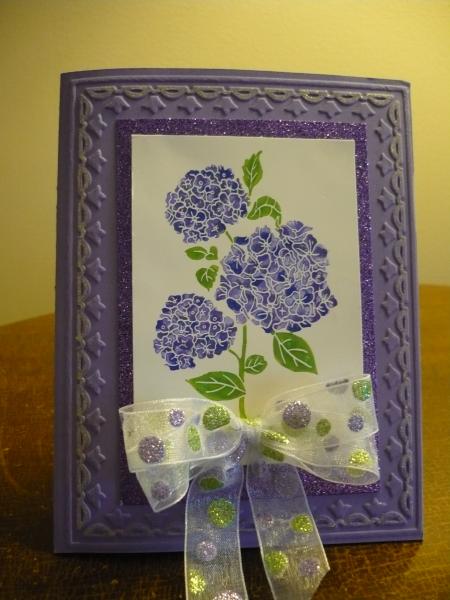
I discovered the Canadian stamp company, Local King Rubber Stamp Co (based in Vancouver, BC) at a local stamping show called Scrap Fest, and ever since I have absolutely LOVED their stamps and their other products. Now many of their stamp sets have coordinating dies that are created by Spellbinders. This company goes to MANY stamping/scrapbooking shows in the US and Canada, and if you see their booth, you HAVE to stop in and see what they are creating. They are known for their direct to stamp coloring with Marvy markers, and they use this brand I believe because these markers dry slower, so you have the luxury of more time to color with your markers onto your stamps without feeling you have to rush the process. I always love to go and watch especially co-owner Lisa in action as she shows various coloring techniques, I'm always learning something new in coloring at this booth!!!
I will be uploading a second card using this same technique, I'm not positive which was done first, I'll check and list that with the other card, the two were created within a week or so of each other. I really enjoyed this technique, it's easy and fun, and the results were what you see here on this card.
The glossy cardstock used here is what I purchased at the Local King Rubber Stamp booth, you can certainly use this technique on regular cardstock, but I love how vibrant the stamped image is when stamped on their glossy cardstock. They told me that their cardstock is not like others, I believe that clay is somehow used, and the cardstock is imported somewhere intthe middle east. It is sold in approximately this size, I believe approximately the size of an ATC, I will measure it for the next card--sorry.
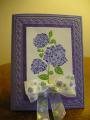
The hydrangea image (one of my favorite flowers, as you can tell from my gallery, as I have used that flower on several cards) was colored directly onto the rubber stamp using various Marvy markers from the purple and green families, then it was inked onto the cardstock. The photo does not clearly show the green colors used on the leaves and stems.
The Almost Amethyst card base was dry embossed with the Tulips Frame embossing folder, then I highlighted part of that frame by going over it with a Sakura clear glitter pen, how I love those Sakura glitter markers!
On top of the card base, I cut a slightly larger piece of glittery purple cardstock and adhered with Sookwang tape (LOVE that tape, isn't it wonderful!!! I don't think there's a better tape, at least I haven't tried it if there is... ). Just a note, I do remember that it took more Sookwang than normal to attach this layer because of the very glittery nature of the purple glitter cardstock--so it will take extra-strong adhesive to secure a piece of this extremely glittery cardstock to another layer. Then I took my focal image on the glossy cardstock and adhered it on top of the glittered cardstock.
I created a double-bow using my Bow-Easy and attached it with a glue dot. My own bows are not the best, and I am a HUGE fan of the Bow-Easy!!! It's inexpensive, takes up almost no room, and it works like a charm! Trust me, if it works for me, it works for anyone, as I am not terribly coordinated at the best of times with tying bows!!! I deliberately left the tails of the bow longer, so they would trail down past the card base, I just like how that looks.
I didn't take a photo of the inside of this card nor the envelope, not sure why... Also I apologize for not uploading these cards for such a long time, normally I'd prefer to have them uploaded in a chronological order, but I wanted them to be a part of my gallery even though I have uploaded more current cards.
Thank you so much for checking out my card, it means a great deal to me when you stop in and take a look at it! And when you leave a comment, it absolutely makes my day--thank you!!! I am encouraged by your comments, and it is my goal to learn from them and to grow and improve as a card-maker.
Have a wonderful day!!!
Date: Tuesday, August 5, 2014 GMT Views: 3524
Favorited:5


 ). Just a note, I do remember that it took more Sookwang than normal to attach this layer because of the very glittery nature of the purple glitter cardstock--so it will take extra-strong adhesive to secure a piece of this extremely glittery cardstock to another layer. Then I took my focal image on the glossy cardstock and adhered it on top of the glittered cardstock.