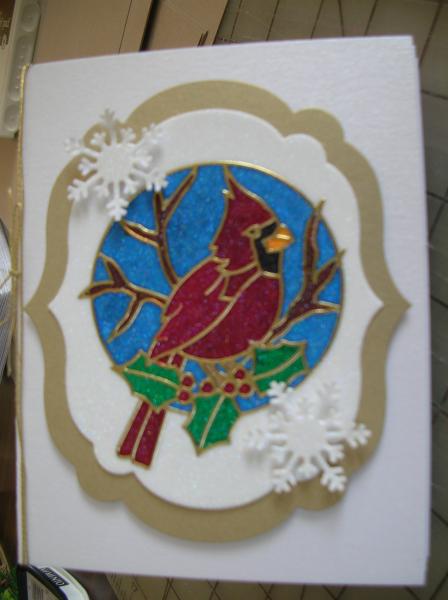
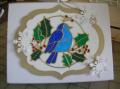
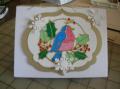
As I waited for the teacher to arrive for the copic intro class the owner of the craft store was doing this technique... The result is a card that just has people ooh-in' and aww-in' as it just pops, which is why we all love Copics, am I right?!?!?!
This technique is not to be done on the fly, you will need to be prepared as to keep the mess and frustrations to a minimum.
Items needed:
Craft Sticky Sheet (update with name when I get home)
Elizabeth Craft Stickers
Elizabeth Craft Glitter - Cool Diamonds (very very fine)
White Cardstock
Copic Markers - Colors you have and enjoy.
Tweezers, stylist or your favorite tool to assist with stickers.
Embossing Tray that the whole sheet of cardstock can lay in....will help contain glitter and keep mess to a minimum.
Peel Brown backing off sticky sheet and set a side as you will need this.
Stick cardstock to sticky sheet - set a side.
Using brown backing as a work surface, non-stick side up.
Start laying out stickers (sticky side UP) on the non-stick....move around with tweezers. The brown sheet will be larger than your card stock so keep that in mind as you are laying out the stickers.
Once you have the placement the way you are happy with....grab your cardstock/sticky sheet. Peel off the label side exposing the sticky making your entire sheet of cardstock a huge sticker.
Lay the sticky side down on top of the stickers / non-stick work surface. Press and rub all areas.
Lay the cardstock (sticky side up) in the embossing tray. Cover with glitter, making sure every bit of the card stock has been covered with the glitter.
Once you are happy that you are completely covered, use the brown sheet (non-stick side) to cover the glittered project, rub entire area to burnish in the glitter into the sticky-adhesive.
Color with copics. Have no fear, by doing the stickers first, there are no air pockets for the ink to go under the sticker to bleed into the other areas.
Once everything is colored, cut out using scissors or your favorite cutting system. I used SU Sizzix Framelits.
Warning: Very Addicting Technique as it is Easy and Lots of Fun!!!!