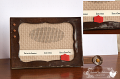
I used an 8 ½” 11” piece of heavy white cardstock for the base. I cut the base to measure 6” x 11”
Place the 6” edge at 1 ¼” and cut from 1” to 7”. Turn over and cut the other 6” edge the same way. Cut across the CENTER ONLY at the 7” mark (start at the 1 ¼” mark and cut across ending at the 1 ¼” mark on the other side).
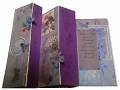
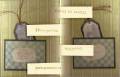
Score the 11” SIDES ONLY at 5 ½” (DO NOT SCORE the center). Cut a piece of White Cardstock 6” x 1” this piece will adhere to the open top edge after you decorate the rest of the card front.
Score the CENTER ONLY at 1” and 2”. Fold the CENTER ONLY: the 1” is a mountain fold; the 2” mark is a valley fold. the top edge of the center will slip through the opening at the back
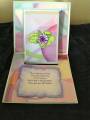
Cut light blue cardstock to layer over the edges. Cut DSP and adhere over the blue; then adhere the entire piece to the cards base. This is when you will add the layer at the top edge.
The flowers are from the Daisy Patch Swirls PreCut set and the Daisy Patch Flowers PreCut. The tag is from Shapeabilities Fancy Tags.
I added Stickles glitter glue, jewels and liquid pearls to finish the card.
Date: Friday, November 9, 2012 GMT Views: 574
Favorited:3