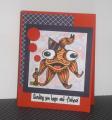
The band going across the card is a fun way to use up small designer paper pieces and itÂ’s really very easy and quick to put together and hereÂ’s what I did in order of steps taken:
-punch the ½” circles from designer paper
-line up the 1” circle punch over the ½” hole and punch
-cut a strip of paper about 1/16” smaller than the width of the small circle
-string the donut circles through the long strip and glue to each other with a dot of glue or tape
NOTE: stringing from under or over the right of the circle as you're looking at it will make two different looks and itÂ’s nice to mix it up a bit
-glue this to the large strip of cardstock (black on my card)
-glue the ½” circles in place and attach the brads
-attach the black strip to the card base
-punch the hearts decorate (I used clear glittered gel pen) and attach with foam or heavy tape (I used thee layers of heavy carpet tape)
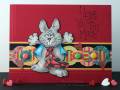
I’ve also used this layout with a dog image and used bone images in place of the hearts. Click here to see the dog card.-The yellow borders are 1/8” strips cut and glued to the card base.
-The border scoring on the base was done with the Scor-Pal.
-Prismacolor pencils were used to color the image, I use baby oil in place of Gamsol. The tie tack was colored with gold pencil then clear glittered gel pen.
-The bunny image is dry embossed from the back with a large metal ball stylus. I held the image up to a light source and marked where the eyes, cheeks and tie edges were located which made it easier to emboss without guessing. I like the dimension of this procedure and itÂ’s well worth the couple minutes it takes.
-The cut out bunny is mounted on layers of thick carpet tape.