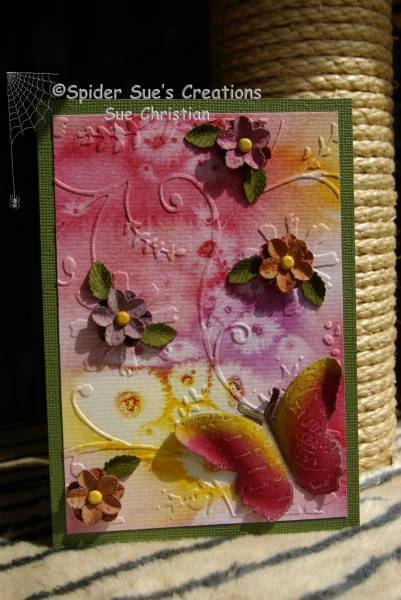
I started with a piece of watercolour paper that i wet with water using the water colour brush, until it sat flat again (it will curl up as you start to add water to it, in long strokes and will flatten as the water goes through it). Once it is flat and nicely wet, I added the Dy-na Flow inks, starting with the lightest colour, by pouncing them on with the wet watercolour brush (I had put a small amount of each colour into a paint palette). When I was happy with the effect, I scattered a small amount of Rock Salt over the watercolour paper and set it aside to dry. DO NOT use a heat tool to speed up the drying it makes a real mess of this background (sorry to yell at you, but it does funny things to the way the ink dries, yes, I did try it myself and I threw it away it was that bad).
While I waited for my BG to dry, I punched out eight flowers and seven leaves from the Grunge Paper. Then I ran the flowers through the Cuttlebug in the Textile Texture EF. I also cut and embossed the Butterfly from the Butterflies Combo using the Postage butterfly to emboss with. I used the Q-tips and the inks to ink up the flowers, leaves and the butterfly. Next I used the Q-tips and the Pastels to add highlights and depth to them. I then layered two flowers together, shaped them and held them together with an orange brad. I shaped the butterfly's wings with a bamboo skewer until they were as I wanted them.
When the watercolour paper was dry, I brushed off the salt and ran it through the Cuttlebug in the Stylised Flowers EF. I then cut it 1/2" smaller than my base card.
To make up the card, I stuck the embossed watercolour piece to my Green base card. I then glued the butterfly down it's middle and put it on the bottom right. I then scattered the flowers and leaves where there were flowers in the embossing or where they looked about right.
TFL
Date: Thursday, September 23, 2010 GMT Views: 719
Favorited:4