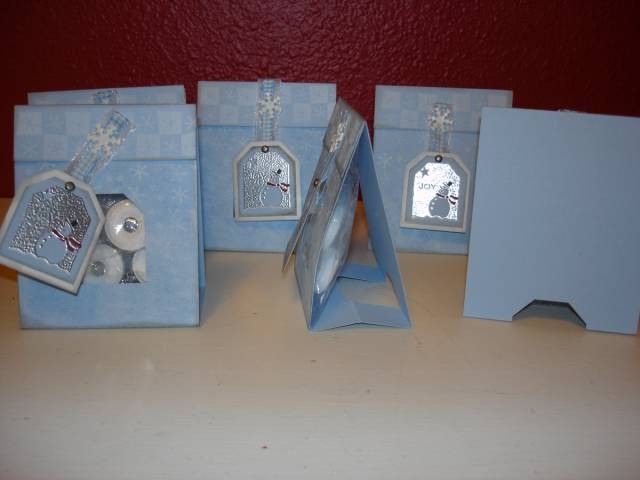
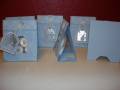
Okay, my final swap project for the "HUGE" anything goes swap. I think these turned out really cute and they are filled with Lifesavor Pep-O-Mints. I must say that I am very mad with Lifesavors as they do NOT package their products correctly! I can't stand it when the lifesavor is backwards in the wrapper and you can see the seam over the words...I tried to twist them arround, but gave up...Irritation!
Okay, I made a tutorial on how I made these. If you have any questions, don't hesitate to ask...Here's a link to the thread in the Resources Forum...
Registered: April 15, 2005 Location: Oregon Posts: 2537
Tue, Nov 08, 2005 @ 11:46 AM
Dimensions: Cut 8-1/2 x 11 C/S in 3-1/4 inch strips (11 inches long) (you will only get two, but the leftover strip is perfect for the tags). Score at 10, 6, and 4, then turn over and score at 5. (This will give you the little mountain fold in the bottom). Then fold the score marks. To get the tag punched through, you will have to punch through two layers of C/S. With the scored piece facing you, Fold up just the first flap (which will be the front where the window is), then punch through the two layers of C/S, make sure you center it. The second piece that was punched will make be on the bottom and a little bit on the back, and it will actually make it a little more stable when standing.
I used the 3- inch Cello bags (thus the 3-1/4 inch strips to cover it). I filled it with 4 lifesavors that you buy in one large package, but individually wrapped in their own little clear packets. I folded it down about two times and stapled it, then I used glue dots on the corners to adhere to the backside of the window flap.
Hanging the tag just right is sort of tricky. You have to have a tag slightly bigger than the punch, so mat your tag. Then, make sure that the ribbon you add on the top is long enough to reach the top flap of the C/S and cover the window completely. I used 2 inches of ribbon and stuck them on with the brad. I punched the top little 1-inch flap in the correct position so the tag would hang correctly, then I used a pencil to mark through the punched hole to mark the window piece. Finally, punch the window piece all the way through the little cello bag, line up all of the holes and use the snowflake brad to hold it all together. You have to put your fingers through the sides of the little guy and sort of do the brad blindly...
I hope this helps and is not too confusing. Once you do it, its really easy! Once you score and fold it, you will be able to figure out how to do it!
Registered: June 12, 2005 Location: Sonoran Desert Posts: 1318
Tue, Nov 08, 2005 @ 4:24 PM
These are just so cute! I made some of these tonight and used the little zip bags I use for for gel cards b/c I don't have any cello bags - they worked great. Not as 'crispy' as cello bags, but the don't break, either!