Here are the deets...I warned you-there are a lot!
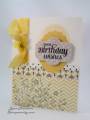
I had a lot of fun making this card! Not only was the challenge to use WMS, but to make a Mother's Day card, as well. Although my mom prefers simple cards, I've noticed she chooses bright colourful ones, too. I know she'll love this one!
The details may be many, but it only appears to take time. It really was easy to put together as I already had the roses coloured/cut out. The cutout for the centre circle was a strong determination of mine. I couldn't 'not' place it and they fit together so well, design-wise!
I first printed out Claire's Celtic Sqs & sponged the edges with Bundled Sage. I then ran my AC white CS through the C-Bug with a Sizzix embossing folder. That too was sponged with Antique Linen all over. I added photo corners (MS?) and sponged them as well as they were too stark. The two circles were stamped with Bundled Sage Distress ink. I then cut out (very slowly-lol) the centre circle and mounted it with pop dots over other after I stamped the sentiment. The roses and the butterfly were coloured with my Copics while the leaves were just stamped onto green CS, edges distressed then sponged with Bundled Sage. Glue dots adhere the pieces closest to the circles while pop dots adds dimension to the outer edges. Two slits were cut on top for the ribbon. It's actually a sheer sage green. I have 2 pieces laying flat (one shorter than the other),cut into 'swallow tails' with the double bow (Bow Easy) glued onto the centre.
The roses have Rock Candy Distress stickles in dots (as dew - it shows up well in RL) with Fruit Punch Stickles as the flower centres. A touch of (orange) Sakura pen around the circle makes it cohesive as well as (orange & sky star) on the butterfly. Added the gems after adhering the front part to the card base, making the inside flap clean and ribbon free.
For the inside: I was determined to use my new Anna Griffin paper punch, but it wouldn't go through my cardstock so I used thin computer paper. Lining up the corners took some figuring, but it worked out ok. I stamped the vellum with Stazon white and coloured on the wrong side so as not to contaminate the (pastel colours) Copics. There are a couple roses & leaves. I stamped the sentiments (from Roses in Bloom & Spring Baskets) before adhering the vellum to the paper using the ribbon to hide the glue strip. The edges of the paper were also sponged lightly with Antique Linen Distress Ink.
Whew! I used '5' Waltzingmouse Stamp sets!!
Thanks for looking - and thanks for the very kind words!
Date: Saturday, April 17, 2010 GMT Views: 944
Favorited:8
Stamps: All stamps by WMS :Roses in Bloom, Sweethearts (For My), Vintage Circles Small, Faux Fun Circles, Spring Baskets except butterfly (Prima)
Paper: 110# wt white cardstock (5"x7"), WMS Celtic Sqs in Fresh Mint, American Crafts White Textured heavy CS, Bazzill Olive CS, Vellum by Strathmore
Ink: Ranger Distress: Bundled Sage, Antique Linen, Memento Black, Versafine Onyx (front sentiment), Archival Jet Black (inside), Stazon White
Accessories: Spellbinders (Circles sm), Sizzix (embossing folder), Kaiser Craft (gems), Sage 1.5" sheer ribbon from stash, MS (photo corners), Multi Craft (inside green ribbon), Anna Griffin (lace paper punch), Bow Easy
Difficulty (1-Easy 5-Advanced): I found it quite easy, but there are a lot of elements.
Registered: July 5, 2008 Location: Ireland Posts: 542
Sat, Apr 17, 2010 @ 11:56 AM
Socks, knocked right off!!!!!!! Heather this is special, sooo gorgeous!!! your colouring is to die for my friend! What a beautiful card! Thank you so much for waltzing with us Heather. hugs