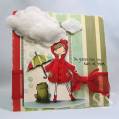
Measurements: star panel - 2 5/8 x 4 9/16” plus 1/16” borders, image panel – 1 7/8 x 3 ½” plus 1/8 and 1/16” borders, cross panel – 1 ¼ x 3 7/8” plus 1/16” border
-The out of the box image using Nestabilites is done using a technique similar (I omitted a step or two) to JulieÂ’s which you can find here if you need photos and IÂ’ll explain how I achieved the technique for those that donÂ’t wish to leave SCS for directions:
I lie the Nestabilities die cut side up over the image and mark with a pencil on each side of the image that will be out of the box (youÂ’re marking on the inside of the die cut) and also make a couple small marks on the top or bottom for easy die cut line up. I cut the image slightly further than the mark to allow for the thickness of the metal. Flip the die over and slide it under the portion which was just cut and secure with repositional tape if needed (I use the blue painters tape). Run through the machine to cut then emboss and remove the die cut, erase the pencil marks and itÂ’s ready to color. I color after cutting just in case I make a mistake.
-The image is colored with H2os and artist brush.
-To keep that cross panel even on the card I stack the same amount of paper it lies on underneath and use in place of dimensionals.
-The beveled image panel and scalloped panels are cut with the long style Nestabilites and to get the length I needed I cut once and embossed, moved the paper up so one end was over the die cut edge and cut it shorter and only embossed that end after the second cut. This just makes the tool more versatile.
THE PUNCHED ENVELOPE:
This is a handmade envelope which has narrow sides that fold in and the square style back folds up over the side flaps for gluing.
-Punch the snowflakes and depending on the punch it may require the side flap to be closed and a portion of it will be punched but wonÂ’t be seen once assembled.
-Stick clear packing tape to the inside of the envelope over the punched area so if you touch the snowflake from the envelope frontÂ…itÂ’s sticky!
-Pour the glitter over the sticky and itÂ’s gone.
-Assemble the envelope, when ready to mail I use tacky glue to close it – for those cards I give away or donate I attach a strip of paper backed tape to the flap’s edge for the sender to peel and stick closed.
Date: Tuesday, November 17, 2009 GMT Views: 3247
Favorited:35
Stamps: Penny Black – snow girl, Stampin Up – Stipple Plaid
Paper: Leather textured white, 80% glossy white, Die Cuts With a View – white glitter paper, unknown blue glitter paper, K&Company – solid blue, unknown designer paper (found at Walmart a few years ago)
Registered: June 29, 2004 Location: Sugar Land. Texas Posts: 79922
Tue, Nov 17, 2009 @ 9:22 PM
Totally charming!!!
------------------------------ LizThe joy of the LORD is my strength.Right Brain Madness --My blogProud member of the redDivasKSS certified multi-step stamperFan Club member since 2004