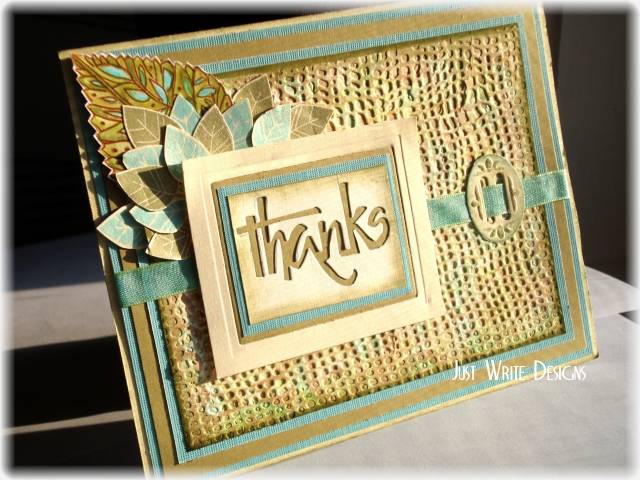
Loved the inspiration pieces, Stef! I took my inspiration from a combination of all of them.
The greeting is actually the negative piece left after running the die thru the CB. I sponged the edges w/ the green ink. I cut a frame of the cool carib. and attached underneath, then attached this to the olive layer. Since the c.carib. was open in the back, the olive shows thru the letters. I used the nestie rectangle on a vanilla piece and used the frame instead of the actual rectangle and set my greeting layers inside it.
The bg was done w/ magic foam. It's basically the kid's dense foam they make blocks and shapes. You hold it against a light bulb for about 30 seconds then press it against something; a stamp, an object, a piece of mesh. It retains the reverse image until you reheat it. Don't use your heat gun, it will melt the foam. I pressed mine against some of those molding mats. Then I inked it w/ the lt brown and stamped onto the vanilla. I used markers & a blender to add some color and also sponged a little of green ink around the edges. Then I used the CB mesh folder on it.
The buckle is also a nestie die. I added the ribbon and layered a few times. I stamped the big leaf (Magenta), colored it, outlined it w/ a brown gel pen then cut it out. I stamped the smaller leaves (SG) w/ the green and Neptune inks and cut them out. They're all layered then the greeting was attached w/ foam tape. TFL
My blog:The Write Stuff. Sorry! I had to delete a bunch of really old posts from my blog & this is one of them.
Date: Saturday, September 20, 2008 GMT Views: 2862
Favorited:53
Registered: November 29, 2007 Location: Posts: 6583
Sun, Sep 21, 2008 @ 6:09 AM
This is incredible! - fascinating! - unique! - creative!...I just keep looking and reading the details and looking and reading the details.... totally cool!!!