In the Forums

Register

Today's Posts

Search

Get the Weekly
Inkling
newsletter


Previous Issues

Splitcoaststampers's privacy policy

Get Social

Splitcoaststampers on InstagramLike Splitcoaststampers on FacebookFollow Splitcoaststampers on TwitterPit Splitcoaststampers on Pinterest

Sponsored Ads


Splitcoaststampers.com - the world's #1 papercrafting community
You're currently viewing Splitcoaststampers as a GUEST. We pride ourselves on being great hosts, but guests have limited access to some of our incredible artwork, our lively forums and other super cool features of the site! You can join our incredible papercrafting community at NO COST. So what are you waiting for?

Join the party at Splitcoaststampers today!

Thread Tools Search this Thread
Old 02-17-2012, 06:34 PM   #1  
Splitcoast Dirty Dozen Alumni
 
giogio's Avatar
 
Join Date: Jun 2007
Location: My heart is in Peru!!
Posts: 2,462
Received 9 Likes on 6 Posts
Default Tutorial Tuesday #7 {02-21-12}: Flowers

Hello! Giovana here sharing with you a Flower Tutorial using a couple of the Heart Dies from Sweet 'n Sassy Stamps!!

TIPS:
1.- Depending on how big or small you want your flower or rosette, it's the die size you are going to use.
2.- When you are getting close to finish your flower, you could cut the hearts in half to position your petals as you wish.

Here is a step by step picture tutorial. Please bear with me, I don't do tutorials, but I think you may like this one

Picture #1: Materials you need.


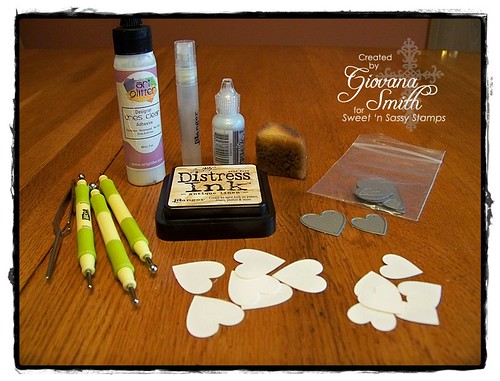
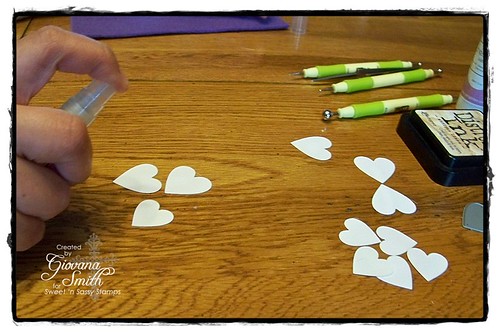
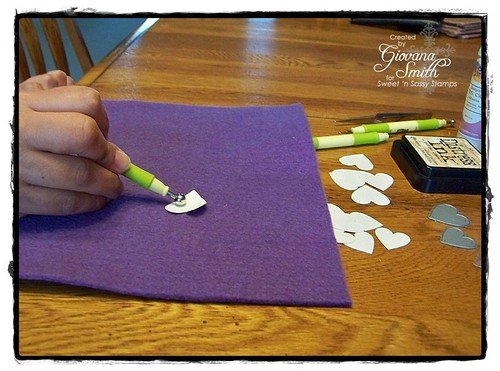
Picture #2 and #3: Die-cut your hearts and shape them using the Paper Blossoms Tool Kit. If you spritz the hearts with a tiny bit of water before you shape, it helps make the paper more pliable.


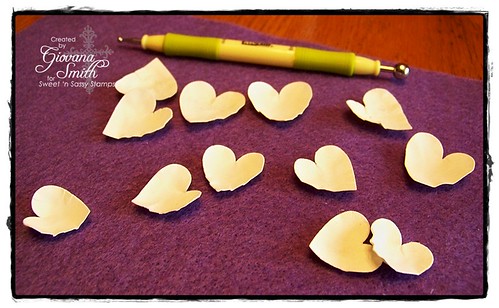
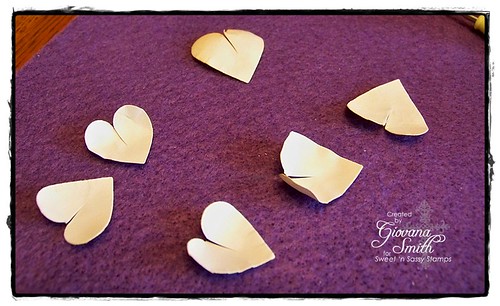
Picture #4: Your hearts will look like these ones:


Picture #5: Ink all edges. (Optional)


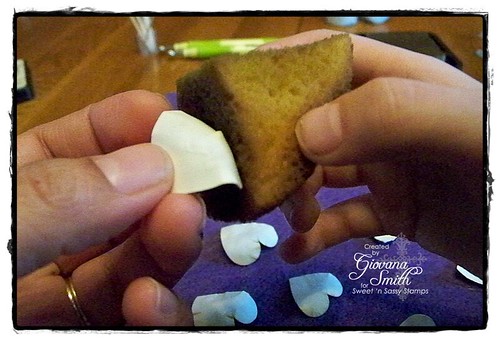
Picture #6: Snip hearts a bit to create open petals.


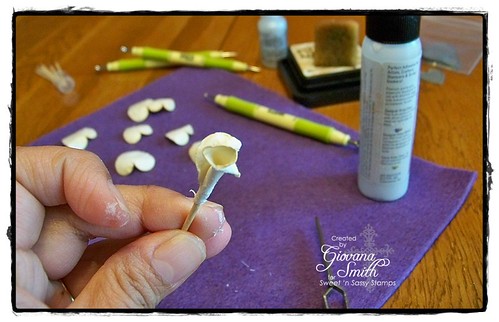
Picture #7: With the help of a toothpick, roll your hearts, then add glue to start creating the rossette.


Picture #8: Add as many hearts you want until your rossette is completed. I added a little bit of StarDust Stickles to give it a little shine
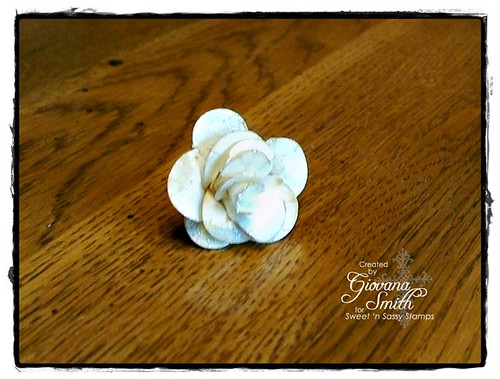


My final card:


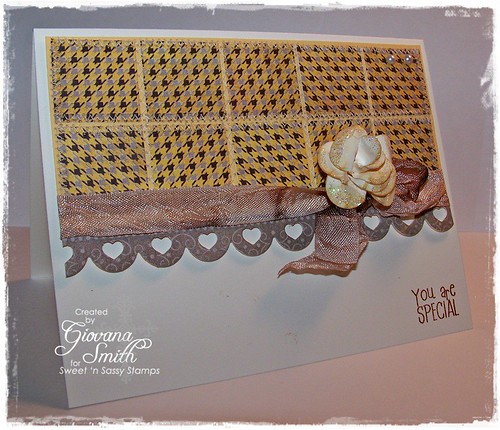
Hope you like it and give it a try.
Thanks so much!
Giovana
__________________
Giovana SmithMy BlogDesigning for Impression Obsession DT

Last edited by SweetnSassyStamps; 02-21-2012 at 08:12 AM..
giogio is offline  
Tweet this Post! Share on Facebook Reddit!! Pin on Pinterest! Share on Google+!
Likes
Old 02-21-2012, 08:13 AM   #2  
Splitcoast Challenge Hostess
Just Me
 
stagccva's Avatar
 
Join Date: Sep 2006
Location: over here :)
Posts: 32,898
Likes: 0
Received 0 Likes on 0 Posts
Default

What a fun tutorial, Giovana!!
__________________
Taylor
(blog) ~ (gallery) ~ (facebook)
Social Media Manager, Crafter's Companion
UK ~ US ~ Spectrum Noir
stagccva is offline  
Tweet this Post! Share on Facebook Reddit!! Pin on Pinterest! Share on Google+!
Likes
Old 02-21-2012, 08:28 AM   #3  
Gabfest Goddess
 
SweetnSassyStamps's Avatar
 
Join Date: Jan 2008
Location: my happy place
Posts: 7,171
Likes: 0
Received 0 Likes on 0 Posts
Default

This is a FABULOUS tutorial . I never thought to use our heart dies to make flowers . YAY!!! You rock !
__________________

Korin Sutherland
This is the day which the Lord hath made; we will rejoice and be glad in it. Psalm 118:24
My Website
SweetnSassyStamps is offline  
Tweet this Post! Share on Facebook Reddit!! Pin on Pinterest! Share on Google+!
Likes
Old 02-27-2012, 09:40 AM   #4  
Gabfest Goddess
 
merrymstamper's Avatar
 
Join Date: Feb 2005
Location: pennsylvania
Posts: 7,318
Likes: 0
Received 0 Likes on 0 Posts
Default

Wow! Gio, you rock this tutorial. Now, I need those dies.
__________________
merrymstamper is offline  
Tweet this Post! Share on Facebook Reddit!! Pin on Pinterest! Share on Google+!
Likes


Posting Rules
You may not post new threads
You may not post replies
You may not post attachments
You may edit your posts

BB code is On
Smilies are On
[IMG] code is On
HTML code is On
Trackbacks are Off
Pingbacks are Off
Refbacks are Off