Splitcoaststampers.com - the world's #1 papercrafting community
You're currently viewing Splitcoaststampers as a GUEST. We pride ourselves on being great hosts, but guests have limited access to some of our incredible artwork, our lively forums and other super cool features of the site! You can join our incredible papercrafting community at NO COST. So what are you waiting for?
Happy Monday, everybody. It's Sabrina here as your hostess this week - and I hope you'll have fun with this.
I don't actually watch many craft videos at all, I mostly use YouTube for playing music in the background, so most suggested videos are also music. But for some strange reason, while I was away on holidays, this video popped up in the list of "you might like this".
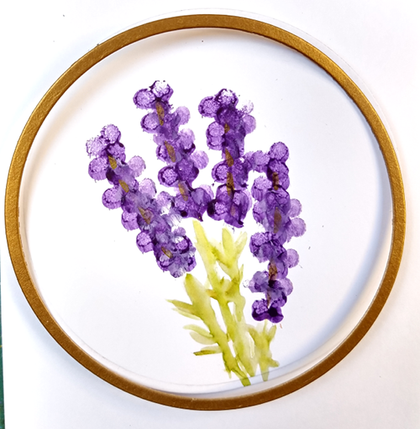
So after I got home, I gave it a go. Because I was working on small card fronts I had to scale down from some of the amazing examples I found, but I have three samples attached below. I mostly used acrylic paint, but for the grass in the dandelion one, I used Twinkling H2Os, so I think any pan watercolour slightly moistened should work.
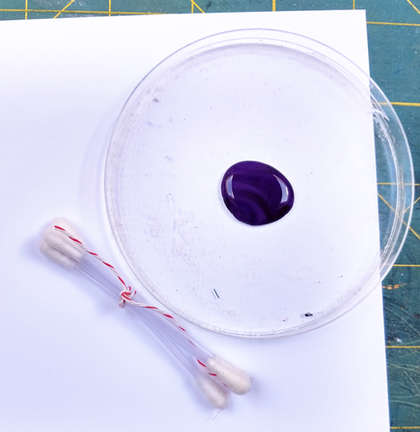
Top tips: I found that with time the tips flattened out a bit, so if you're doing a lot, you might need to ditch the ones you're using and start again. I bought a box in LIDL for 13c - my goodness, I don't remember the last time I bought anything that cost less than 50c!!
It's suggested that you tie your Q-tips together in bundles of maybe 2, 3 and 5. On my cherry blossom tree, I used three for the lighter pink, two for the deeper and just one to add a little greenery.
So - all you need to do is tie a few Q-tips together, squeeze a little paint onto whatever you use as a palette and you're all set to go. If you use chopsticks for eating, you'll find maintaining a little separation between the tips is easy :mrgreen:.
The video I linked shows a beautiful tree, but think also of things like lilac, wisteria, delphiniums, dandelions - wherever your imagination takes you.
Here are my cards - I went in and added a bit more to the lavender while finishing the card. In the attachments below I included an unfinished cherry tree - I die-cut the tree from brown card, and then added the blossom in two shades of pink and some white, then added the grass.
Remember to use the keyword TLC696 when you are uploading. It's helpful (to the hostesses for sure!) if you come back and leave a link on this thread .
If you're not sure how to link your card on the thread here, here's how:
1. Open 2 windows or tabs: one window for your card and one for this thread. 2. In this thread, click on reply and type anything you want to show before the link. 3. Go to your card window. Highlight the address for your card. (It says www. splitcoaststampers.com/gallery/showphoto..... and so on) 4. Click EDIT. Click COPY 5. Go back to this thread. Click PASTE.
This was fun. I had more luck using a single q-tip rather than the 3 tied together....guess I'm not very good with chop sticks (I figured out what you meant) :rolleyes: Mine turned out a bit more like a pointillist technique...:p
__________________ Jan 'Being confident of this very thing, that he which hath begun a good work in you will perform it until the day of Jesus Christ'. Philippians 1:6