|
I don't know if it's my computer or what but I don't get what was written..LOL..g
|
it is not you...it is me :) I bumped a key on my keyboard...and bam! it was posted...doh!! I will try to fix it :)
|
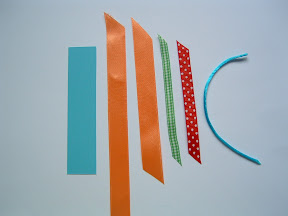
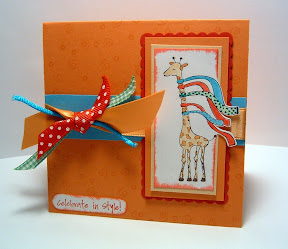
Ribbon "Flower" Technique - revised
Sorry for the my first confusing post...I am still new at this :)
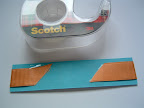
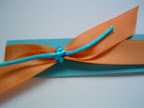
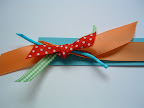
How to make Ribbon "Flowers": Supplies: * A strip of coordinating cardstock * A piece of ribbon approximately 7" long. * Two to four strips of coordinating ribbon measuring 2 to 3 inches each. * tape * glue dots * scissors 1. The first step is to take the strip of cardstock (for this card I used a 1"x4.25" piece of SU! Tempting Turquoise) and wrap the 7" stirp of ribbon around it, securing in the back with tape. 2. The second step is to take a piece of coordinating ribbon and slip it between the cardstock and base ribbon. 3. Next you take a coordinating piece of ribbon and lay it on top of the base ribbon to form a "x". 4. You then tie the first piece of coordinating ribbon in a knot, around the base ribbon and the second piece of ribbon. 5. For the next step you take a third piece of coordinating ribbon and tie it in a knot around the base ribbon and previous knot. Keep in mind, you can continue to add ribbon as desired. If the knot seems to be too big you can lay one piece of ribbon between the cardstock and ribbon and then lay several additional pieces on top of the base ribbon you then finish the "flower" by tying the first piece in a knot around all the additional pieces (see step 2). |
If you want pictures to go with the tutorial, check out my website!
|
Originally Posted by raebirdrhi
(Post 6783927)
If you want pictures to go with the tutorial, check out my website!
|
| All times are GMT -8. The time now is 06:05 PM. |