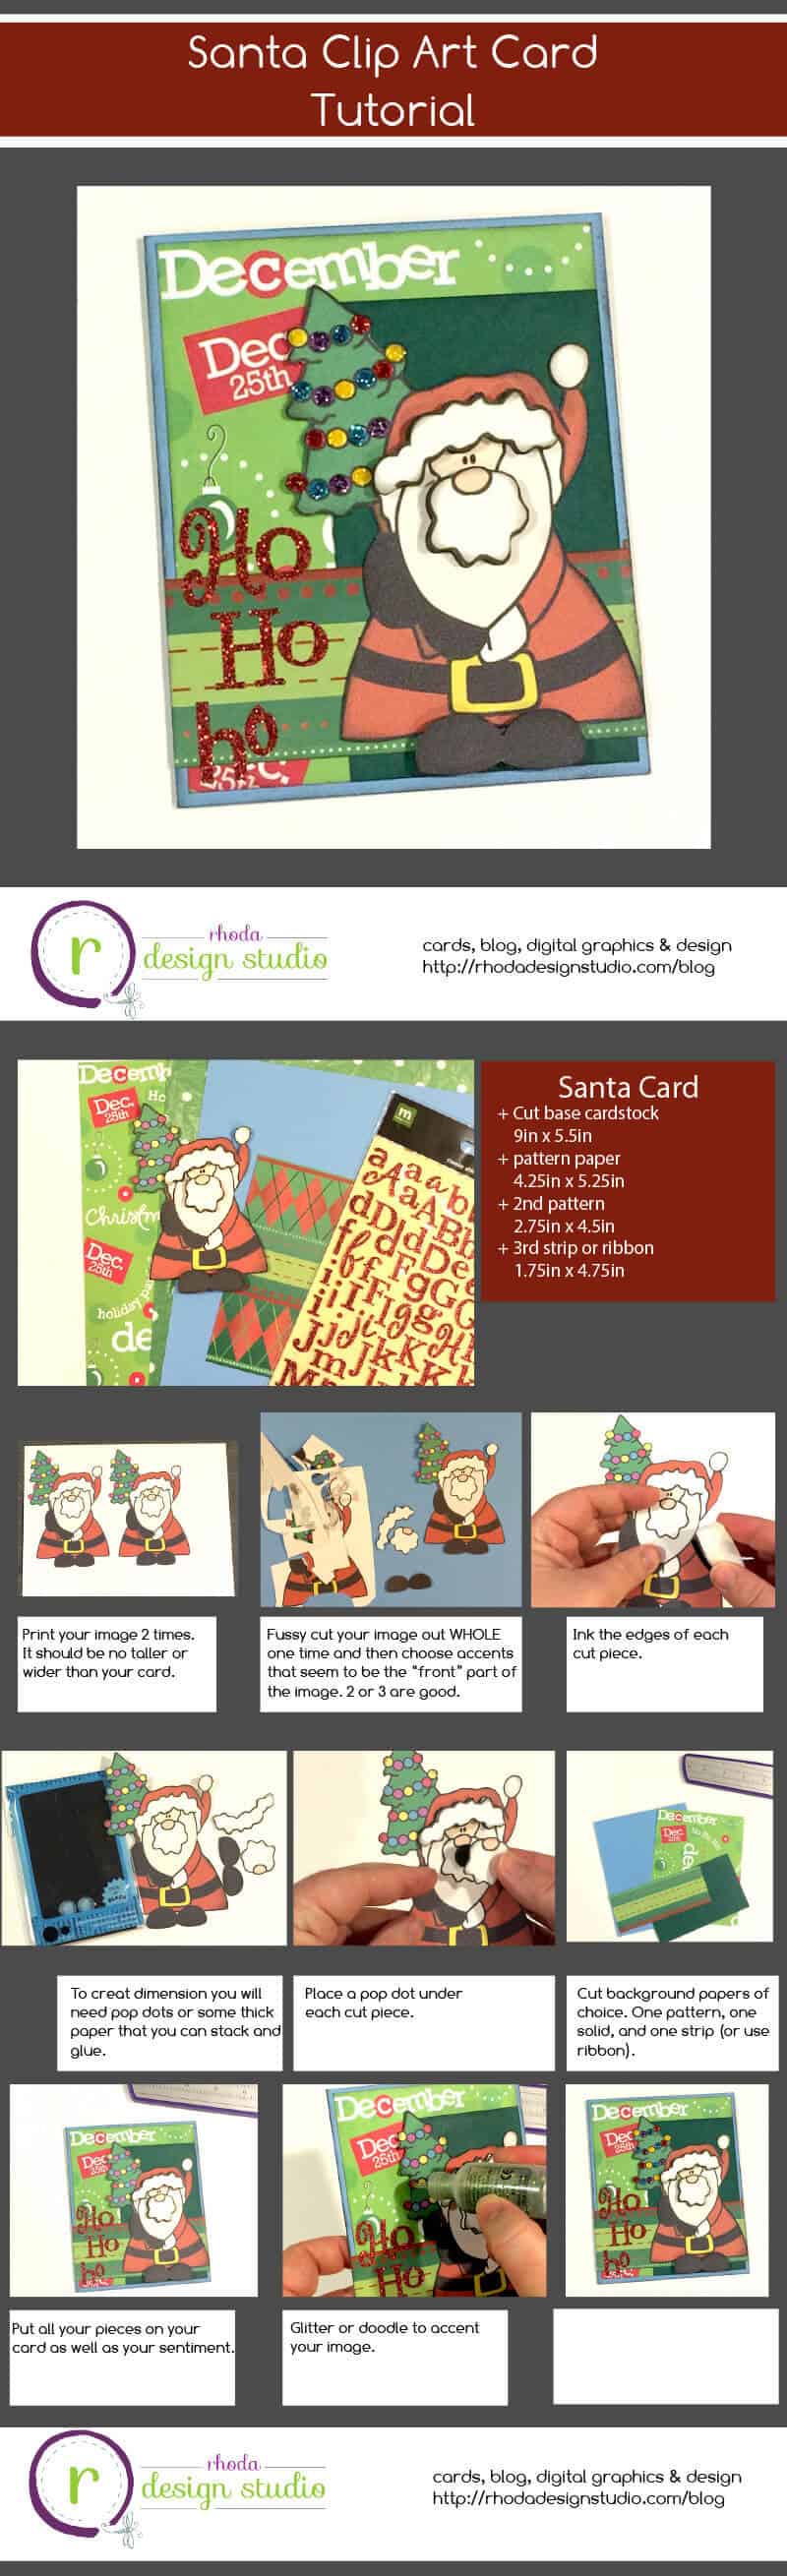
 Santa Clipart Card Instructions:
Card Base:
Santa Clipart Card Instructions:
Card Base:
Choose your clipart, papers, and base card color. You will need a card base. Pre-made ones work great or you can cut a piece of cardstock 9 inches by 5 1/2 inches.
Clipart Image:
Print your clipart of choice on a piece of sturdy cardstock. I love to use any Bazzill white paper, but you can use just average thick, smooth paper as well.
Cut out one image WHOLE. Just the outline. Remove as much white edge as you prefer. I enjoy fussy cutting so I usually don’t add a “sticker” halo, but you can if you want.
Cut the second image to create dimension. You will choose 2-3 key features of the image that seem to be in the “front” of the image.
Ink the edges of all the pieces you just cut, including the whole piece.
Using pop-dots, attach the small cut pieces over the larger piece to give the appearance of a 3D image.
Web Hosting
Page Design:
Cut your 1st pattern paper choice to be 4 1/4 inches by 5 1/4 inches. This will be your full background.
Cut a more solid pattern piece to be roughly 2 3/4 inches by 4 1/2 inches. If your clipart shape is more round or square instead of rectangular, you can change the dimensions of this piece. Do what looks best with your image.
Cut a strip of pattern paper to go across the card. 1 3/4 inches x 5 1/2 inches. If you don’t want to use pattern paper here, you can use one or two pieces of ribbon.
Add your sentiment to the card. Use something that adds some bling, hand write it, or cut out words from a piece of pattern paper.
Decorate your card with brads, glitter glue, or any other decoration of your choice.
That’s it. You now have a super cute card that you can send to a pen pal, keep for yourself or add to the pile of ones you will be giving away this year.


