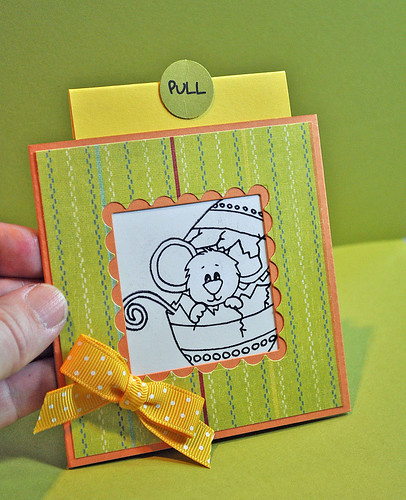
I love the surprise of a "Magic Card". Kids' eyes and even adults' eyes light up when they see the surprise in this card. What is a magic card?
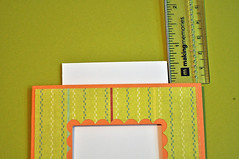
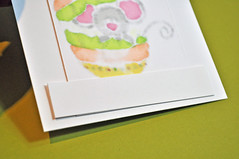
Cute, but not too exciting:
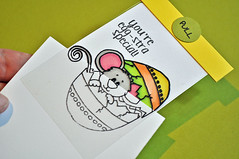
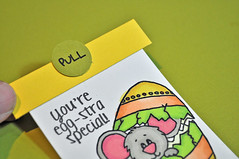
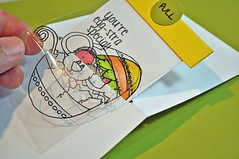
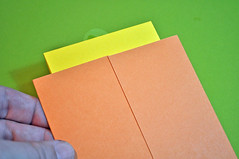
Surprise!! Where did the color come from?
FYI: The Resources section of Splitcoast already has a Magic Card tutorial but it is quite a bit different. They have managed to make the card work with one piece of cardstock - it is an amazing piece of papercrafting. When I was putting together my first Magic Card I was doing it for a church group (not all cardmakers) that were making them in bulk to donate to Family Services. As amazing as the Splitcoast tutorial was - it was just too difficult for me to explain, so I put together this method using ideas from about a dozen different places!
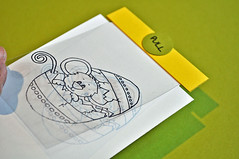
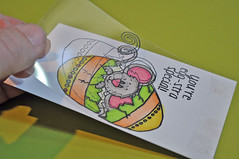
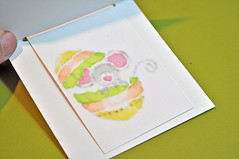
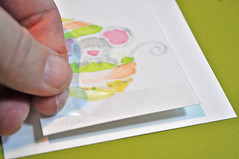
The basic concept is simple. Stamp images on a piece of acetate and a piece of white cardstock. Color the image on the cardstock. If there is a piece of cardstock under the acetate piece, you only see the black stamped image.
But if the cardstock is removed, you start seeing the colored image underneath!
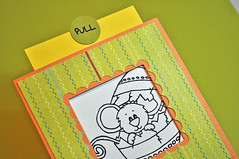
A Magic Card is constructed so that the plain white cardstock is the middle of the card and as the recipient pulls up on the tag, the colored image comes into view!! It's so much fun!!!
Here's what you need:
THE BASIC CARD
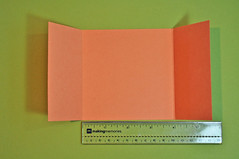
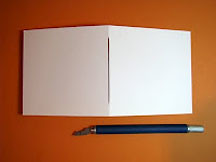
1. A 4x8 piece of cardstock for the main card, scored at 2" from each side (as if to make a trifold card)
 2. A way to cut a window in the center of the card - punches, dies, nestabilities, craft knife, etc
. I used nestabilities and first cut the scalloped square from patterned paper; adhered the paper, then I could easily line up the plain square.
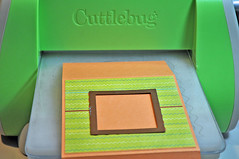 3. A way to decorate the front.
 For this card, I simply selected a patterned paper and a ribbon. Be very careful adding embellishments. If any glue goes over the edge of the "window" and adheres to the acetate, you won't be able to pull it! (Learned through experience!!)
THE IMAGE
1. A 2 1/2" x 4 1/4" inch piece of cardstock with an image stamped on it. The only trick here is that the image needs to be able to peek out the window. So put your cardstock into the card with about 1/2" sticking out of the top (that is going to become our pull tab.) Then stamp through the window.
If your image is too big for the window, place it in the card as in the first picture and then lightly pencil around the window. Take the cardstock out and you can stamp your image. To be honest, I like making my image bigger than my window - it's a bigger surprise when they pull it up!
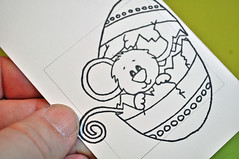 2. COLOR IT!
 It's also fun to add sentiments or other images because they will not appear in the window until the tab is pulled up.
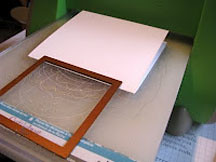
 3. A 2 1/2" x 4 1/4" inch piece of ACETATE with the image stamped in on it in STAZ-ON ink - LINED UP WITH THE IMAGE ON THE CARDSTOCK!
 Here are the steps:
a. First, adhere the blank acetate onto the top of the cardstock with the image.
b. If you are using a clear stamp and can see through it to line it up - just stamp it on the acetate!! Otherwise, find your stamp-a-ma-jig! Remember - you need to use Staz-On ink because you are stamping on plastic
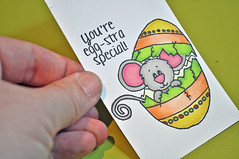
c. I only stamped my main image on the acetate so the remainder will be hidden until the tab is pulled. I did not stamp the sentiment on the acetate - it will remain hidden until the tab is pulled up.
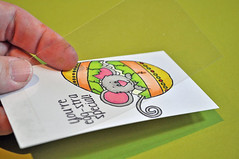
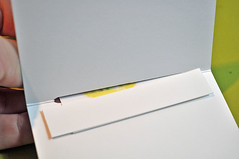
Lifted up, you can see the image.
If the acetate is down, you cannot tell that there are two images.
 4. A 1 1/4"x 3" piece of cardstock folded in half lengthwise.
 This is simply to hide the tape.
 5. A punched circle to make it easier to pull.
 Or you could a ribbon or any kind of pull.
THE INSIDE MECHANICS
1. A 3 3/4" x 7 1/2" piece of card stock, scored in the middle (at 3 3/4")
Then you need a slit in the center of the scored piece leaving 1/2" on each side. You could hold a ruler along the scored edge and use a craft knife.
I used Stampin' Up's Word Window Punch like this...
a. Using the punch upside down, line it up about 1/2" from the edge.
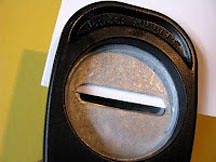
b. After the first punch, simply slide it over to about 1/2" from the other edge to make a full slot.
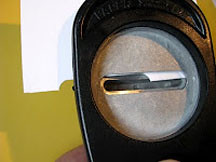
OR another option is to just use one side of a nestie.
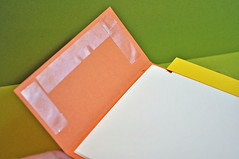
 2. A 3 1/4"x 5/8" piece of white cardstock to act as a "stopper"
PUT IT ALL TOGETHER
1. Slide the paper part of the image panel into the slit of the cardstock from the prior step.
2. This is the backside of the piece. If you were to pull the tab up - the whole thing would come right out of the slit. So we are going to add a "stopper".
a. Apply adhesive along the bottom back portion of the image panel.
b. Add the small piece cut in the prior step with a little bit sticking out of both sides.
c. So when you pull it up, the piece of paper is too large to fit in the slit and it stops it from coming all the way out.
3. Now you want to add the image mechanism into the main card so that it looks like this.
a. To adhere it all together, apply adhesive down both sides of the front of the image mechanism - be sure not to get any adhesive on the acetate or it won't pull up!!

b. Lay the image on the main panel - aligning the top of the image mechanism with the main panel.

4. Now we want to close it all up. Apply adhesive around the outside edges of the main panel.
5. Fold it closed.
 TA DA!!
 You are done!! You have created magic!!