In the Forums

Register

Today's Posts

Search

Get the Weekly
Inkling
newsletter


Previous Issues

Splitcoaststampers's privacy policy

Get Social

Splitcoaststampers on InstagramLike Splitcoaststampers on FacebookFollow Splitcoaststampers on TwitterPit Splitcoaststampers on Pinterest

Sponsored Ads


Splitcoaststampers.com - the world's #1 papercrafting community
You're currently viewing Splitcoaststampers as a GUEST. We pride ourselves on being great hosts, but guests have limited access to some of our incredible artwork, our lively forums and other super cool features of the site! You can join our incredible papercrafting community at NO COST. So what are you waiting for?

Join the party at Splitcoaststampers today!

Reply
Thread Tools Search this Thread
Old 11-14-2019, 10:30 AM   #1  
Die Cut Diva
 
binx's Avatar
 
Join Date: Oct 2007
Location: Charlotte, NC
Posts: 3,985
Likes: 0
Received 1 Like on 1 Post
Default Do you know a trick? - Intricate Die Cuts

I have a confession to make - I suck at adhering intricate die cuts. I have trouble getting them straight, or at least the same shape it's supposed to be.

Do you have a tip or trick to help me? Currently I'm struggling w/a couple of word dies; the letters come out looking like a kindergartner wrote them. :rolleyes:

Oh, and BTW, yes, I die cut them with the adhesive already on the back ready for peel-off. So it should be easy, right?
binx is offline  
Tweet this Post! Share on Facebook Reddit!! Pin on Pinterest! Share on Google+!
Reply With Quote Likes
Old 11-14-2019, 10:41 AM   #2  
Gallery Gazer
 
bjeans's Avatar
 
Join Date: Apr 2016
Posts: 6,425
Received 19 Likes on 14 Posts
Default

The kindergartener thing - do you mean not straight? If so, how about a 99 cent clear (see-through) T-ruler? I learned from Jennifer McGuire. (Video; she did not come to my house.) So easy.

If not that, explain a bit more?

And sometimes applying tiny dots of liquid adhesive works better for me than the adhesive on the back because I want the wiggle time. The if careful Stick-It can be moved a bit.

I just watched a super simple Laura Bassen trick on getting individual letters straight but you don’t mean that, right? But in case you do or anyone wasn’t to see it, here. Wouldn’t need her exact mat. Fast forward to 4:15ish.

ETA: Just realized you could use this technique for full word dies too. Or other types. Liquid adhesive could be used if preferred.

<iframe width="560" height="315" src="https://www.youtube.com/embed/ature=youtu" frameborder="0" allow="autoplay; encrypted-media" allowfullscreen=""></iframe>

Last edited by bjeans; 11-19-2019 at 10:22 AM..
bjeans is offline  
Tweet this Post! Share on Facebook Reddit!! Pin on Pinterest! Share on Google+!
Reply With Quote Likes
Old 11-14-2019, 01:12 PM   #3  
Proud Fan Club Member
 
wavejumper's Avatar
 
Join Date: Nov 2013
Location: NYC
Posts: 17,685
Received 731 Likes on 353 Posts
Default

I wrote a whole thing but took it back. Why read all that if you just need one part

Where are your struggling? Peeling the backing, or after it is peeled, laying it down where you want it? or both?
wavejumper is online now  
Tweet this Post! Share on Facebook Reddit!! Pin on Pinterest! Share on Google+!
Reply With Quote Likes
Old 11-14-2019, 01:15 PM   #4  
Splitcoast Dirty Dozen
Proud Fan Club Member
 
c-mouse's Avatar
 
Join Date: Feb 2007
Location: teetering on the brink of everything
Posts: 8,568
Received 488 Likes on 307 Posts
Default

save the piece that covers the adhesive on your adhesive sheet...when ready to place die cut on card...lay slick side up half way up/on the area your diecut will cover....carefully stick the top of the die--the part not on the adhesive sheet down--lightly, in just a few key places.....when satisfied, slide slick sheet further down and do some more key places, slide again and repeat until done... double check your alignment and if it passes muster, cover with the slick sheet, slick side down and rub your bone folder or ruler or press with one of your cutting plates and finish the job. It takes more time this way but works well for me.
__________________
c-mouse-If you can't say nuttin nice--don't say nuttin at all. Thumper.
Pansy

Card Sketch Challenge 1-227 done only 396+ to go to be caught up!!!!!

-90 and sweating


c-mouse is online now  
Tweet this Post! Share on Facebook Reddit!! Pin on Pinterest! Share on Google+!
Reply With Quote Likes
Old 11-14-2019, 01:33 PM   #5  
Pearl-ExPert
 
cbet's Avatar
 
Join Date: Mar 2004
Location: Central Wisconsin
Posts: 2,607
Received 17 Likes on 8 Posts
Default

After you run the die thru your machine but before you push it out of the die, put some Glad Press n Seal on the back. Then, when it's out, put another piece of Glad Press N Seal on the front and take the piece off the back. Now it should be held together and in shape, and you can see where you're applying it. Once it's stuck down, you should be able to peel the press n seal off the front of it without damaging any of your work.
__________________
~~Cheryl, with a "C"
cbet is offline  
Tweet this Post! Share on Facebook Reddit!! Pin on Pinterest! Share on Google+!
Reply With Quote Likes
Old 11-14-2019, 02:44 PM   #6  
Glitter Guru
 
Scrapjanny's Avatar
 
Join Date: Nov 2006
Location: The City That Never Sleeps
Posts: 5,608
Received 369 Likes on 219 Posts
Default

What about using the negative piece to align the cut-out word? You place the word inside the negative piece, and then you remove the negative.
__________________
My Etsy Shop: https://www.etsy.com/shop/JeanettesCraftyPlace
Scrapjanny is offline  
Tweet this Post! Share on Facebook Reddit!! Pin on Pinterest! Share on Google+!
Reply With Quote Likes
Old 11-14-2019, 03:34 PM   #7  
Rubber Obsessor
 
August29's Avatar
 
Join Date: Sep 2013
Posts: 174
Likes: 0
Received 6 Likes on 4 Posts
Default

I treat the die cut just like I treat vinyl lettering. First I run my cardstock through my Xyron machine to get the adhesive on it...then I die cut it. Once I have the die cut out of the die I place it cardstock up on the table and put a piece of removable tape across the letters. The removable tape will hold the lettering in place and make sure the letters don’t stretch out of shape when removing the backing. Make sure the piece of tape is longer then the lettering as you will use it to hold on to. Next flip the die cut over and remove the backing sheet of the Xyron. Flip the lettering back over and place the lettering where you want it. Rub the letters down and peel the removable tape away.
August29 is offline  
Tweet this Post! Share on Facebook Reddit!! Pin on Pinterest! Share on Google+!
Reply With Quote Likes
Old 11-14-2019, 04:53 PM   #8  
Die Cut Diva
 
binx's Avatar
 
Join Date: Oct 2007
Location: Charlotte, NC
Posts: 3,985
Likes: 0
Received 1 Like on 1 Post
Default

My struggle lies primarily with spacing - getting the letters not to spread out too far or compress (the unevenness is what I meant by "kindergarten"); my letters look random, some are wider than they're supposed to be, some more narrow.

Getting it straight, too. As far as the .99 T ruler - please - where? They're $7+ (consistently) on amazon and no one at my $ stores has ever heard of them.
binx is offline  
Tweet this Post! Share on Facebook Reddit!! Pin on Pinterest! Share on Google+!
Reply With Quote Likes
Old 11-14-2019, 05:10 PM   #9  
Gallery Gazer
 
bjeans's Avatar
 
Join Date: Apr 2016
Posts: 6,425
Received 19 Likes on 14 Posts
Default

A local artists supply store sells them for 99 cents - unless they’ve gone up in the last couple months. I need a new one; mine got run over by my chair with me in it. But let’s see what we can find for you.

Joann at $3.99, order on line to pick up at a store to avoid shipping: C-Thru Ruler Junior T-Square 12" | JOANN -

DickBlick for $2.30 and you can get some percentage off if you sign up for emails:
Westcott Junior T-Square | BLICK Art Materials

$2.13 at Walmart: Westcott 12"/30cm Junior T-Square, JR-12 - Walmart.com

They’re all the “junior” ones.

I think Laura Bassen’s method (video) might work for you too. If you don’t have a grid mat, you could laminate a piece of graph paper to get the lines. Or try one of the others mentioned. Yell if you want to see how JM uses the t-ruler. You’ll get it, hang in there.
bjeans is offline  
Tweet this Post! Share on Facebook Reddit!! Pin on Pinterest! Share on Google+!
Reply With Quote Likes
Old 11-14-2019, 10:33 PM   #10  
Die Cut Diva
 
lylacfey's Avatar
 
Join Date: Feb 2007
Posts: 3,986
Received 261 Likes on 130 Posts
Default

Would this work for you- http://cleversomeday.com/magic-mesh-...for-cardstock/

You don't need magic mesh. You can substitute drywall tape. A lot of us still have that in our stash from our drywall technique days.
__________________

lylacfey is offline  
Tweet this Post! Share on Facebook Reddit!! Pin on Pinterest! Share on Google+!
Reply With Quote Likes
Old 11-15-2019, 04:45 AM   #11  
Die Cut Diva
 
binx's Avatar
 
Join Date: Oct 2007
Location: Charlotte, NC
Posts: 3,985
Likes: 0
Received 1 Like on 1 Post
Default

Just wanna say - y'all are awesome. Thx for the help; not sure which one is going to be the perfect fit, but I'm sure it's in this advice somewhere. Off to try them out, but didn't want to wait to say "THANKS!"
binx is offline  
Tweet this Post! Share on Facebook Reddit!! Pin on Pinterest! Share on Google+!
Reply With Quote Likes
Old 11-18-2019, 11:12 AM   #12  
Pearl-ExPert
 
biblesistersmom's Avatar
 
Join Date: Jul 2007
Location: North Dakota
Posts: 2,412
Received 0 Likes on 0 Posts
Default

These are all great suggestions!
P.S. Kindergartners can make some cool stuff!
__________________
Jennifer


Live each day with kindness, happiness, and a smile.
biblesistersmom is offline  
Tweet this Post! Share on Facebook Reddit!! Pin on Pinterest! Share on Google+!
Reply With Quote Likes
Old 11-19-2019, 08:39 AM   #13  
Rubber Obsessor
 
mphb's Avatar
 
Join Date: Nov 2007
Location: San Francisco Bay Area
Posts: 129
Received 52 Likes on 25 Posts
Default

T-squares can be found at ANY office suppiy store too! I saw one creative gal just put some Lego blocks together to form an L shape and used as a T-square! Whatever works.... LOL! I also used the negative space to line up my die cuts & place them. Press n seal works well too.
mphb is offline  
Tweet this Post! Share on Facebook Reddit!! Pin on Pinterest! Share on Google+!
Reply With Quote Likes
Old 11-19-2019, 08:41 AM   #14  
Kookie Creator
 
Rosestamping's Avatar
 
Join Date: Nov 2004
Location: Hampton VA
Posts: 436
Received 3 Likes on 2 Posts
Default

I spray the die cut with Elmer's Craft Bond spray adhesive, use tweezers to pick it up and place it on the card. Easy Peasy!
Rosestamping is offline  
Tweet this Post! Share on Facebook Reddit!! Pin on Pinterest! Share on Google+!
Reply With Quote Likes
Old 11-19-2019, 01:06 PM   #15  
Cardstock Collector
 
KatGrey's Avatar
 
Join Date: Sep 2019
Location: Western Pa.
Posts: 1
Likes: 0
Received 0 Likes on 0 Posts
Default T-ruler

Quote:

Originally Posted by binxView Post
I have a confession to make - I suck at adhering intricate die cuts. I have trouble getting them straight, or at least the same shape it's supposed to be.

Do you have a tip or trick to help me? Currently I'm struggling w/a couple of word dies; the letters come out looking like a kindergartner wrote them. :rolleyes:

Oh, and BTW, yes, I die cut them with the adhesive already on the back ready for peel-off. So it should be easy, right?
Have you tried using a t-ruler?
KatGrey is offline  
Tweet this Post! Share on Facebook Reddit!! Pin on Pinterest! Share on Google+!
Reply With Quote Likes
Old 11-19-2019, 01:14 PM   #16  
Compulsive Stamper
 
stormhockeymom's Avatar
 
Join Date: Sep 2005
Posts: 29
Likes: 0
Received 0 Likes on 0 Posts
Default Use 2 sided adhesive sheets

adhere to card stock or DSP before cutting card stock. intricate cuttout already has adhesive on it after cutting. take paper off and adhere.... Stampin Up and Sissix had some. now that Su discontinued theres, I think I bought my last order from Joannes or Hobby Lobby
__________________
Stormhockeymom
www.lizmichealson.stampinup.net
stormhockeymom is offline  
Tweet this Post! Share on Facebook Reddit!! Pin on Pinterest! Share on Google+!
Reply With Quote Likes
Old 11-19-2019, 01:18 PM   #17  
Mad Swapper
 
Alice in Md's Avatar
 
Join Date: Feb 2006
Location: Towson, Maryland
Posts: 1,956
Received 264 Likes on 109 Posts
Default

I also cut dies with the adhesive (usually various widths of ScorTape) on the back, and I have handy a roll of wax paper and a poke tool (many use it for poking tiny pieces out of dies). Cut out the die and look at the back to be sure everything has cut through all the way. Remove the die cut piece from the cardstock and rest of the adhesive, peel off the backing, and then using only the poke tool, I hold the die cut over where it is to go and gradually lay it down. If I need to stop before adhering it, the wax paper is a great parking place. With long words, I sometimes put the Scor-Tape only on parts of what I'm cutting so it's less apt to land where I don't want it. As for lining things up, I work on gridded paper, or draw a line across a piece of copy paper, that is wider than the project, and then eyeball to make it straight. You could use the wax paper here again -- park the die cut, peek through the wax paper to see where all the parts go, and then lay it down permanently. It all takes practice, and you'll find your own way.
Alice in Md is online now  
Tweet this Post! Share on Facebook Reddit!! Pin on Pinterest! Share on Google+!
Reply With Quote Likes
Old 11-19-2019, 06:03 PM   #18  
Die Cut Diva
 
binx's Avatar
 
Join Date: Oct 2007
Location: Charlotte, NC
Posts: 3,985
Likes: 0
Received 1 Like on 1 Post
Default

Quote:

Originally Posted by KatGreyView Post
Have you tried using a t-ruler?

Absolutely, that helps get it straight, but that doesn't fix the spacing problem. However, I've tried some of these suggestions and am definitely seeing improvement. Thx again.
binx is offline  
Tweet this Post! Share on Facebook Reddit!! Pin on Pinterest! Share on Google+!
Reply With Quote Likes
Old 11-20-2019, 11:58 AM   #19  
Crimping Master
 
annie*'s Avatar
 
Join Date: Jan 2008
Posts: 1,208
Received 39 Likes on 12 Posts
Default

The link to the video is not working on my computer. Could you give some more information on the the video so perhaps I could do a search for it on Youtube? Thanks in advance!
annie* is offline  
Tweet this Post! Share on Facebook Reddit!! Pin on Pinterest! Share on Google+!
Reply With Quote Likes
Old 11-20-2019, 12:24 PM   #20  
Gallery Gazer
 
bjeans's Avatar
 
Join Date: Apr 2016
Posts: 6,425
Received 19 Likes on 14 Posts
Default

Okay, here’s the link directly to Laura Bassen’s blog to that card. It’s called “Joy From Me To You” from 11/12/19. At the top of the page she provides a link to the video on the My Favorite Things youtube channel.

Fast forward to about 4:20 for a lead-in to how she uses a grid and Post-It tape to get letters lined up and spaced before adhering to a card. Laminated graph paper may work well too, or a positioning tool lid with grid marks, though I prefer lines with contrast.

She’s using foam tape, but I’ve done the same with liquid adhesive - not a lot!

http://www.laurafadora.com/2019/11/12/joy-from-me-to-you/

Here’s the YouTube video link again, just in case it works again. Hope this helps.
https://m.youtube.com/watch?feature=...&v=vs5pfHZ9JgM


Last edited by bjeans; 11-20-2019 at 12:28 PM.. Reason: Fast forward to 4:20, not 1:25!
bjeans is offline  
Tweet this Post! Share on Facebook Reddit!! Pin on Pinterest! Share on Google+!
Reply With Quote Likes
Old 11-20-2019, 12:25 PM   #21  
Crimping Master
 
annie*'s Avatar
 
Join Date: Jan 2008
Posts: 1,208
Received 39 Likes on 12 Posts
Default

Thank you very much!
annie* is offline  
Tweet this Post! Share on Facebook Reddit!! Pin on Pinterest! Share on Google+!
Reply With Quote Likes
Old 11-21-2019, 04:27 AM   #22  
Cardstock Collector
 
Missouri Stamper's Avatar
 
Join Date: Oct 2016
Posts: 5
Likes: 0
Received 0 Likes on 0 Posts
Default "Crooked" on purpose!

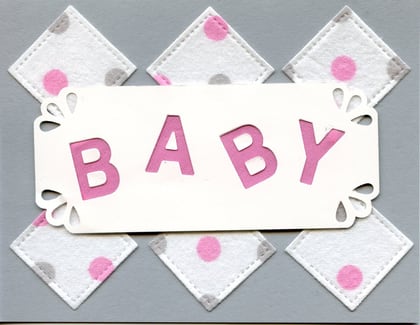
I don't use cut-out letters a lot, but when I do I usually tilt them in various directions on purpose. Then they don't have to line up! Here's one I made with scraps from a quilt that my mother made for the baby.


After reading all of your suggestions I will likely try some straight letters soon. Thanks!
__________________
Mary
Missouri Stamper is offline  
Tweet this Post! Share on Facebook Reddit!! Pin on Pinterest! Share on Google+!
Reply With Quote Likes
Old 11-21-2019, 05:07 AM   #23  
Crimping Master
 
annie*'s Avatar
 
Join Date: Jan 2008
Posts: 1,208
Received 39 Likes on 12 Posts
Default

What a lovely way to use the quilt scraps!! I never would have thought of that.
annie* is offline  
Tweet this Post! Share on Facebook Reddit!! Pin on Pinterest! Share on Google+!
Reply With Quote Likes
Old 11-22-2019, 04:47 AM   #24  
Proud Fan Club Member
 
123scrap's Avatar
 
Join Date: Jun 2006
Location: texas gulf coast
Posts: 1,061
Received 77 Likes on 41 Posts
Default

Years ago I learned a simple trick: Take an acrylic ruler (I use the clear Tim ruler) and align the very tops of your letters that have adhesive on back along the bottom of the ruler. You can pick up the ruler and the letters are hanging off of it. You use the ruler to space them unformly and all the letter tops are on a ruler line. Then just put it down on where you want your letters to be. Burnish the bottoms of the letters well and then peel the ruler off and away (or gently pull the letters off the ruler).

Alternately, if you are using liquid glue to adhere your letters, you could put a piece of double sided removeable tape on the ruler where your letters are going to be and then temporarily adhere the letter tops to ruler. Apply liquid glue to the bottoms/exposed area of letters, adhere to project, then take letters off ruler and add dots of glue to letter tops to adhere to project. A lot simpler to do than to describe, hope I gave you the idea!

And when all else fails, I just purposefully adhere them crooked lol.
__________________
xoxo, Aimeslee
My Paper Paisleys Art Blog
123scrap is offline  
Tweet this Post! Share on Facebook Reddit!! Pin on Pinterest! Share on Google+!
Reply With Quote Likes
Old 11-22-2019, 08:44 PM   #25  
Die Cut Diva
 
binx's Avatar
 
Join Date: Oct 2007
Location: Charlotte, NC
Posts: 3,985
Likes: 0
Received 1 Like on 1 Post
Default

Quote:

Originally Posted by 123scrapView Post

And when all else fails, I just purposefully adhere them crooked lol.
LOL, now that's an idea I can adopt!
binx is offline  
Tweet this Post! Share on Facebook Reddit!! Pin on Pinterest! Share on Google+!
Reply With Quote Likes
Old 11-26-2019, 11:34 PM   #26  
Hardware Hotshot
 
uncbballfan's Avatar
 
Join Date: Jul 2007
Posts: 4,893
Received 77 Likes on 42 Posts
Default

SPRAY ADHESIVE is your friend!
__________________
Linda E
Caution: You are entering an artistic zone. This is not clutter - this is creating. These are not pajamas - it's my work uniform.
uncbballfan is offline  
Tweet this Post! Share on Facebook Reddit!! Pin on Pinterest! Share on Google+!
Reply With Quote Likes
Old 11-28-2019, 05:59 AM   #27  
Proud Fan Club Member
 
123scrap's Avatar
 
Join Date: Jun 2006
Location: texas gulf coast
Posts: 1,061
Received 77 Likes on 41 Posts
Default

Quote:

Originally Posted by uncbballfanView Post
SPRAY ADHESIVE is your friend!
Oh most definitely! On intricately shaped die cuts, I use 3M General Purpose 45 Photo Safe spray and have great results.

I do two things always:
1. After I am through spraying, I always take my can outside and spray upside down until it sprays clear. You can hear it make a different sound. Then I take a q-tip soaked in GooGone or UnDu and holding the spray nozzle up, I rub the q-tip on / into where the spray comes out. Then I make sure to cap the can back. Never have an problems with clogs when I do this.
2. I let the adhered die cut CURE. It's quite tacky for a while but just be patient. Overnight is long enough for all the sticky to dissipate. Any stubborn spots get the EKSuccess powder brush.

I used to be afraid of using the spray adhesive because I have had bad luck before with clogs, maybe 3M is really good about no clogs.
__________________
xoxo, Aimeslee
My Paper Paisleys Art Blog
123scrap is offline  
Tweet this Post! Share on Facebook Reddit!! Pin on Pinterest! Share on Google+!
Reply With Quote Likes
Reply


Posting Rules
You may post new threads
You may post replies
You may post attachments
You may edit your posts

BB code is On
Smilies are On
[IMG] code is On
HTML code is On
Trackbacks are Off
Pingbacks are Off
Refbacks are Off