Splitcoaststampers.com - the world's #1 papercrafting community
You're currently viewing Splitcoaststampers as a GUEST. We pride ourselves on being great hosts, but guests have limited access to some of our incredible artwork, our lively forums and other super cool features of the site! You can join our incredible papercrafting community at NO COST. So what are you waiting for?
Organizing embellishments sparked my interest off of another thread. I have organized some of my stuff in colour order for ink pads, card stock and ribbon, and I quite like it that way.
Plus I do use Evernote and tag colours.
My brads and other embellishments are still in the same stamp n store containers that they came, candy dots are on sheets, 95% of my stuff is Stampin Up!
It may be time to make my embellishments storage a little more compact.
I don't have a lot to offer, sorry, so will be interested in other's responses. I currently have a lot of embellishments, but forget to use them mostly because I don't think they are organized at all effectively. I do have all my sequins in a bead organizer, which works for me, but my sticky dots of various shapes and sizes by a variety of manufacturers are currently shoved in different boxes and stamp and photo cases (yes, my name is Chris and I'm addicted to dots). I made a stab at organizing them by type (epoxy vs metal-ish vs ?) but it's a sorry mess. And don't even get me started on my ribbon collection. At one point I had all this stuff organized, but then kept buying and buying and let it get away from me. I think your idea of making your storage more compact is the ticket, but that will require me to purge...oh my.
Oh, and I also use Evernote, but mostly for my non-consumables like stamps, dies and stencils.
I have 16 7-quart Sterilite storage containers that I got for around $2 a piece several years ago that I use for ribbons/trims/twines etc. and any and all assorted embellishments/doodads. They are primarily assorted by color plus four other categories as follows:
1. White
2. Pink/Red
3. Orange
4. Yellow
5. Green
6. Blue
7. Purple
8. Multi-color
9. Off-White (ivory/cream)
10. Brown
11. Gray/Metallic
12. Black
13. Themes
14. Occasions (birthday, baby, etc.)
15. Holidays (non-Christmas)
16. Christmas
The following 4 users liked this post by Fortuosity:
My embellishments like brads, ribbon, twine, bling etc, are organized in bins and drawers by color and type. I have eyelets and small brads in embroidery floss containers. My big problem is with pre-made embellishments, rub-ons, stickers, chipboard etc. I never think to use them because they're all stored away in drawers where I don't see them. Also, I never buy whole collections so have to rummage through drawers and drawers of embellishments to find something that works with my current project. Organizing by color and theme doesn't work well because many packets are a mix of both. I do keep my holiday embellishments organized and stored by holiday and season but it's the everyday stuff that never gets used.
Karen
Karen, are the mixed embellishments attached to their packaging/cardstock in a way that would allow you to cut them into logical groupings?
For example, if an enamel dot card has neutrals and colors, I cut the card to separate them and put with similar colors in rainbow order (ROYGBIV/neutral/black & white). Occasionally I write the manufacturer name/card name or SKU on the card that’s been cut away.
Vertical rather than horizontal (stacked) storage works better for me for flipping through, from embellishments to CS. Stacked = fageddaboutit. Sometimes something tiny is put into a larger clear pocket so it won’t get lost amongst the big guys.
In case you’re interested, the Totally Tiffany Get Organized Challenge class on embellishments may be on September 24th, but you can email customer service to double check. You don’t have to watch every session or even watch live since the classes are posted on the website afterwards. You may need to sign up but it’s free. Questions can be asked if watching live. While Tiffany shows and sells her products, of course, she also discusses other storage ideas and classes have sparked ideas for me.
I watch on Lifestream; it’s also on FB and maybe YouTube though FB sometimes has issues.
Bjeans,
Yes, I store and organize all of my embellishments vertically, so I can flip through them easily. Items like my rhinestones and pearls, or brads and ribbon are stored by color so are easy to find when I need them. I even have all my buttons sorted by color and separated. However, it's thing like pre-made stickers, chipboard shapes, printed tags etc that come in assorted designs and colors (and styles) that I'm having trouble with.
I thought about splitting up some of those packages of pre-made embellishments and sorting all of them by color but then I end up with a zillion small baggies that are harder to keep track of then the original packaging.
Thanks for the link to the Get Organized class, I'll check it out. I've seen the Totally Tiffany presentations on HSN but her products wouldn't help me with my basic problem of how to organize my stash so I can find things and use them. My husband says I just have too much stuff...and he's probably right! However, if I never use what I have because I can't find it, then that adds to the problem.
My basic embellishments get used all the time (even my eyelets!) but the pre-made things have been languishing for years.
Karen
I hear you! I did a massive purge a while back for items that weren’t being used or weren’t my style. (I’m not saying that is right for you or others.) Tiffany’s classes are quite different than the HSN selling fests. There are assignments, points made about the brain, chatting on the side bar and questions answered, etc. While her products are presented, they aren’t needed.
I just spent 20 minutes reading through the different organizing tips on the Totally Tiffany blog and realize that I have a LOT to learn! I'm actually considering separating out some of those pre-made embellishment packs now and storing them either by color, or theme.
I'm trying to avoid spending more money on my organizers than I do on stash, but I may try making card stock dividers to use in my plastic bins to sort our different embellishment themes etc. I have that done in a casual way already for themed stickers and papers but maybe I need to do it with even more of my embellishments. I have filing cabinets with categories like Spring, Summer, Fall, School, Halloween and Thanksgiving, Baby and children etc. I place themed papers, stickers, flat embellishment sets in these folders. I even have two large totes that just have Christmas stash! However, I still have whole packages of printed die cuts and chipboard etc, that are not sorted by theme.
Beth,
I purge every so often but really should dig even deeper. I donate unwanted supplies to my granddaughter's school, and work with a group of ladies at the local senior center, teaching them how to make cards. I use all my own materials for the card classes, so that's a way to gradually purge too. However, until I get more organized and know what I want to keep and what I can let go, most of it still stays crammed into my craft storage spaces. Let's face it, my entire house is my craft storage space, eek! It's all tucked away and neatly stored, but doesn't get used.
Karen
Good going! Do you want to wait until the embellishment class to see if any ideas resonate? Or continue and if need be switch gears? If on a roll I can see not wanting to stop. Cardstock or chipboard (cereal box) dividers sound perfect.
I think this Tuesday’s class is paper: purging/sorting/storing. Paper pads get a bit of a bad rap, haha. Tiffany won’t be there since she’s traveling; Karen is subbing. After the class you can post your progress on FB (I’m not a member) or email it about that week’s topic and a few are read the next session. I got a $25 gift certificate once. I don’t think many people attended that class so my odds were good!
I didn’t see your post about teaching and how that’s a way of purging too. How wonderful that you’re doing that.
Tiffany recently answered someone’s question about not finding items that are organized by pointing out there’s a difference between organizing and containerizing. lol You’re not talking about losing items, but the whole out of sight out of mind thing is discussed too for exactly the reason you mentioned.
Hi Beth,
I think I'll start with my organizing, and then tune in for more tips when that class comes around. I read through some of the info on her blog and am kind of following her general tips to get started.
Paper pads are my least problematic storage issue because I store all my 8x8 pads in a huge shallow basket tucked one of my living room side tables. the 6x6 pads are stored in two drawers in my living room side tables, and the 12x12's are stored on a shelf in my craft closet with all spines marked with the name of the manufacturer and collection. I also have 12x12 stored in a tall cupboard in my garage...but shhhh..don't tell my family! My holiday pads are stored in an old entertainment center cabinet in my bedroom. Come to think of it, there may be tips in the class that will help me organize them even better. Of course, there's the purge part of it that will probably stop me in my tracks, haha! I started using a lot of the papers that are outdated to make envelopes so that's helped a lot. I turn the pattern to the inside of the envelope so I can still write the address on the outside.
Karen
I didn’t see your post about teaching and how that’s a way of purging too. How wonderful that you’re doing that.
Tiffany recently answered someone’s question about not finding items that are organized by pointing out there’s a difference between organizing and containerizing. lol You’re not talking about losing items, but the whole out of sight out of mind thing is discussed too for exactly the reason you mentioned.
Yup, I'm a containerizer all the way. And they ARE totally different..as evidenced by my inability to find anything. Sigh....
Karen
I won’t tell about the paper storage. If I recall (and may not), Tiffany’s thing about 12x12 pads was they often didn’t get used. She’s big on “library” filing including paper, IOW, vertical. Stacked gets buried. And the nature of paper pads means unless the paper is pulled out, it’s not seen. Of course for everyone, YMMV.
I have several of one 12x12 pad that has paper I love, not patterned, and I used to use it a lot for cards and little tabletop lantern things, but even that one gets forgotten. I don’t think I have any other 12x12s?
My take is it’s not as big a deal for 6x6. Mine are in an Interdesign frig bin and it’s easy to see what’s in a pad by flipping through. Except I have a couple too many pads crammed in to do so easily. I should put a couple in the donate box or pull out papers in some pads that don’t have many papers I love. I don’t tend to use them for backgrounds.
Beth,
I store all of my paper vertically too. When I first started I stored them in stacks and could never pull out a sheet without having to move everything else. I store my loose card stock in stacked cubes, and the large paper pads vertically on shelving. Most of my 12x12 paper pads are DCWV so all the papers coordinate with each other. I have a couple of HUGE paper pads that have assorted colors and patterns in them that are not DCWV and I have those where I can see them all the time. I shuffle through the papers when I need a color and it's fairly easy to deal with.
I started out as a scrapbooker so have a lot of 12x12 patterned and plain card stock. Now I'm mostly making cards so the 12x12 pads aren't used as often. I've been forcing myself to cut some of those papers up to fit card fronts more recently, and it's much easier to see what I have. I have also separated some paper pads that are either solid or subtly patterned papers...and incorporated them in with my loose papers by color.
I just spent over an hour going through my 6x6 paper pads and sorting them by theme and season...and found a lot of things tucked away that I didn't even know I had! So far I feel good about my baby steps today but I didn't even get to the embellishments, ha!
Karen
Easy fix! The name of this thread is hereby changed to Not Organizing Embelishments. ;)
Right now I have mine by type. It started out as one big box of by theme and one of misc. Then over time it split out into shoeboxes of string, brads, ribbon, and sequins are their own universe.
I dont want to change the sequins, but now I am sort of thinking about taking what isnt a hard theme (ie halloween) and changing to by color and putting everything of that color in. There is a lot to be said for that. The less boxes I have to pull the more likely I am to use it.
Karen-
I find the best way to purge is to bite the proverbial bullet...clear the dining table and pull out EVERYTHING of that item (ie ribbon). When you see it all...you find duplicates that you dont really need...realize you will NEVER use this color....do I really need that much of that color...etc. Just how it works for me. DO NOT get into self shaming about how did I get this much/how much did it cost, etc.
You can do good things with it-with the holidays coming up this is a good time to make small bundles that can be sold at Church/school/senior center/youth center/whatever holiday sales. Or use it to make things like packs of tags for the sales...in your case Karen to make projects for the ladies.
If someone crops regularly...you can set up a trading table at the crop...whether or not you actively trade or just leave it there and people pick up what they want...Or assign a low value to the pack like a buck that goes in a jar to go to a charity or something. Right now might be a good time for soup kitchens with Thanksgiving coming.
Once you purge it helps to envision how to store it. Whether or not you want to store in a way that allows you to grow over time...well that's your call ;) Some people find it helps to say I can only have what fits now.
My embellishments like brads, ribbon, twine, bling etc, are organized in bins and drawers by color and type. I have eyelets and small brads in embroidery floss containers. My big problem is with pre-made embellishments, rub-ons, stickers, chipboard etc. I never think to use them because they're all stored away in drawers where I don't see them. Also, I never buy whole collections so have to rummage through drawers and drawers of embellishments to find something that works with my current project. Organizing by color and theme doesn't work well because many packets are a mix of both. I do keep my holiday embellishments organized and stored by holiday and season but it's the everyday stuff that never gets used.
Karen
I recently watched a video where the cardmaker/blogger stored all embellishments in a Raskog cart. I’m not a big embellishment user, so that would be overkill for me, but it seemed logical and really neat if someone had the space. Many were in clear jars, plus other containers - sorry I’m blanking on exactly what. Regardless, the Raskog could be wheeled over to her table when she needed any type of embellishment.
I keep things I use most often in containers meant for them, like: Tins the sequins come in, & the containers you can buy for those that don't come in tins & keep those near where I craft. Sequins & Nuvo Drops are my go to for embellishments these days. But, the others, Ribbon- I store in Sterilite type containers & inside them are ribbons sorted by color. Other loose embellishments that can be used, are stored in the same type of containers, & things are separated out & bagged accordingly inside. I don't throw out or sell off, because everything comes back around at some point. I also don't have as much as many in crafting supplies, although my storage of all this is telling me I NEED a craft room all my own! LOL It's a matter of space! ;) I even have things I THOUGHT would work well as embellishments & have never used them. Hmmm, I DO have a SPECIAL CARD coming up & I just MIGHT USE those after all these years! LOL
I have a set of sterilite drawers that are about the size of a shoe box. Since they are extremely narrow. I have them squeezed in between a book shelf and a closet door. They are stacked approx. 6 feet high. Each drawer is designated a color. All embellishments are tossed in there. I have "Glad-ware" containers in the drawers and have buttons in one and tiny embellishments in another. I also have baggies with "like items" tossed in there too. I did this about 8 years ago and it is SO much easier and faster to just pull a drawer and hold my project in one hand and "rummage" through with my other and find what matches and works.
For ribbon storage, a great tip I picked up in an old craft magazine is gutters. Yes, like you get at the home improvement store. I got one (I think it was maybe 8' long?), cut it into 3 sections, added end caps (in the same area as the gutters) to the ends of each section, & screwed them to the wall. The gutter is made of plastic of some sort, so it's easy to cut with a hand saw. (I would not recommend getting metal gutters.) The hardest part was attaching the sections to the wall! I think I ended up using machine or sheet metal screws, with the hexagonal heads that you can use with a wrench. If you have a socket wrench--especially one with an extension piece--that makes it much easier to screw that kind of fasteners. I think I actually ended up using a flexible screwdriver shaft that I connected to my cordless driver. But the socket wrench would have been a lot easier, frankly! LOL I can fit up to 3" diameter spools standing on their edge quite nicely, & it was a LOT cheaper than some of the ribbon-specific storage I've seen from scrapbooking storage companies! If you have a smaller amount of ribbon (especially spools), another option is the 3-tiered wire hanging baskets like they sell to store fruit in in a kitchen. You can just toss your ribbon spools in there, and they're readily visible/available when you need them. I have one of those, too, that I used until I grew out of it and added the gutter storage. (I actually still use the baskets--why waste?) But if your stash is large & you have the wall space, just go for the gutters. You'll appreciate them!
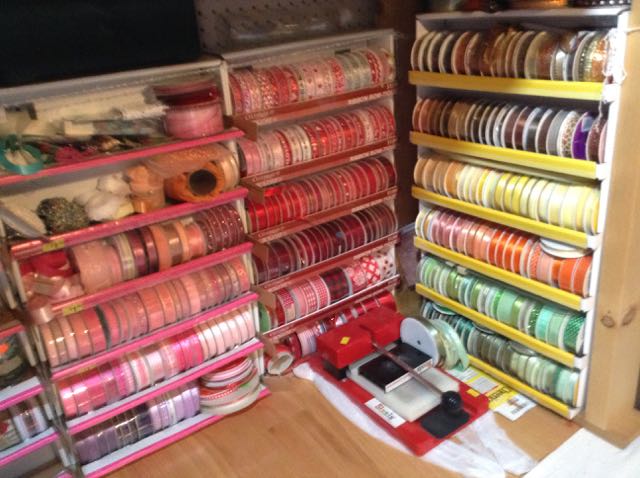
I'm frugal (OK CHEAP). I would love a really pretty all matchy organizing system, but I'd rather spend my money on other things. So:
I got some empty ribbon display boxes from Michael's that work great.
Attachment 362888
My hubby and I made a rolling two sided display rack with curtain I-beam rod attached to a pegboard backing. Opened paper clips hang through the rolling rings to hang packages of embellishments. It's so full now the rings don't have room to roll anymore. Love it! Attachment 362889
My punches are in Aunt Jemima tray boxes from Costco. I attached ribbon to create drawer handles to pull them out of the shelves they sit on in metal mesh cubes. Attachment 362890
There are more embellishments and packages of clear stamps hanging from paper clips on this stand. It is two revolving shoe racks joined together. We mounted it to a wheeled plant stand so I can move it for vacuuming. Attachment 362891
I still have my deco edged scissors. I attached a strip of plastic canvas to the bottom rung of a coat hanger and hang the scissors with large opened paper clips. Three hangers full...enough!!! Attachment 362892
I made cardstock boxes to section the plastic drawers in hardware cabinets. These are still the best thing in my experience for storing loose things like beads, brads, rhinestones, charms, buttons, clips, etc. Attachment 362893
Attachment 362894
I still haven't come up with a system to store all the different shapes and sizes of stamp pads. There are small cubes, distress squares, Stampin' Up rectangles, eye shapes...Yikes!
I don't know what happened to my pictures. Here is another try:
I'm frugal (OK CHEAP). I would love a really pretty all matchy organizing system, but I'd rather spend my money on other things. So:
I got some empty ribbon display boxes from Michael's that work great.
My hubby and I made a rolling two sided display rack with curtain I-beam rod attached to a pegboard backing. Opened paper clips hang through the rolling rings to hang packages of embellishments. It's so full now the rings don't have room to roll anymore. Love it!
My punches are in Aunt Jemima tray boxes from Costco. I attached ribbon to create drawer handles to pull them out of the shelves they sit on in metal mesh cubes
There are more embellishments and packages of clear stamps hanging from paper clips on this stand. It is two revolving shoe racks joined together. We mounted it to a wheeled plant stand so I can move it for vacuuming.
I still have my deco edged scissors. I attached a strip of plastic canvas to the bottom rung of a coat hanger and hang the scissors with large opened paper clips. Three hangers full...enough!!!
I made cardstock boxes to section the plastic drawers in hardware cabinets. These are still the best thing in my experience for storing loose things like beads, brads, rhinestones, charms, buttons, clips, etc.
I still haven't come up with a system to store all the different shapes and sizes of stamp pads. There are small cubes, distress squares, Stampin' Up rectangles, eye shapes...Yikes!
This thread inspired me to go through all of my brads last weekend.
I brought the whole big bag of them out to my coffee table and sorted through everything while watching football ;)
I keep each color in small round plastic containers with lids. I sorted out all the different colors I have (shades of blue, green, etc.) and put each shade in its own Ziploc bag.
I put all the multi-colored small brads in one bag and the metallic small brads in a different bag.
Then all of the bags went in a 2-gallon Ziploc bag so I can see what all I have by simply turning the bag around and looking.
Easy Peasy and now I can see what I have so much better
__________________ Lorraine
Wife to an awesome DH, Mommy to an adorable DS who is on the spectrum for autism, and Twin Sister to Linda
The free Totally Tiffany on-line organization challenge class will be about embellishments on Tuesday. Whether or not her products are used (I don’t for embellishments) she provides lots of information, including some theory about how people tend to think about their stash, and tapping into that to better organize and use what we have.
I used to put things all together by color and eventually it didnt work for me. I now keep things by type. I have two of those rolling carts. I use one for small paper pack, ribbon , washi and misc stuff. The other is my working cart, I roll it next to me when I work. The top has tools and small ink cubes and adhesives. The next two levels have two photo boxes each. Labeled with Bling, 3d flowers, paper flowers. My sequins are in a large ziplock bag with individual colors in their own little bags. This helped me so much. No more little boxes to take up space. The ziplock and small zipper bags helped reduce the space it took for my stuff. I just wish I had space for a nice wall shelf to put all my paper together. I still use my 12x12 papers.I learned I just have to make my space comfortable me.
Each photo box holds different categories- metal ephemera, ribbons, paper ephemera, etc.... Most of my boxes are organized by size of sandwich bags so I can flip through easily and put back easily.
My paper ephemera is organized by categories- animals, fantasy, words, etc... I use the same system I set up using my computer for cataloging my digital files. Rubber stamps are also in themes.
I recently took all of my die cuts, stickers, pre-stamped images etc and sorted them by category and now store each category in one and/or two gallon zip bags and placed those bags into a milk crate that was the perfect size. I can now flip thru everything to find my needed theme then go thru that bag to find something that works for whatever I'm working on. It is so much easier to have all the possibilities in one place rather than several places. I used a sharpie to label the top of each zip bag with the appropriate theme.
...btw that same crate also holds all my stencils facing one way while the themed bags face the opposite way. I just have to flip the crate around access which ever I'm interested in at the time.
I don't care about where I bought something or who made it because I usually don't need to replace it because I probably have something else that will work so I don't keep original packages. I store ...
ribbon - wrapped on mat board and stored in drawers by color
sticky backed gems & beads - small binders with cardstock that I attach the backing sheet. Stored in clear plastic sleeves, colors labeled on edge of binders
larger item like stickers, chipboard, etc. stored in baskets by themes such as hearts, birds, celebrations, etc.
small loose embellishment - buttons, loose beads, gems, etc. are in plastic divider boxes by color.
I've using this method for several years and it works really well for me.
I'm sort of a broken record - my apologies - but, since the topic is being discussed again, here is a thread I chimed in on about embellishments (posts #8 and #11), as well as an idea to help with dies/punches without pulling them all out (post #22). May be something helpful...
bjeans, I want to thank you again for pointing me toward the Totally Tiffany organizing videos. Oh my gosh, her method has completely changed the way I go about organzing and it's already helping a lot. The biggest tip she gives is to only organize one box at a time. I have stacks of boxes, filled with a mish mash of supplies...and always tried organizing it all at once. I would only get so far, then have to put it all away because my granddaughter was going to sleep over in the craft room, or it got too messy too craft in my craft room etc. So I was organizing, and re-organizing the same things over and over again, and getting no where.
Now that I only deal with one box at a time, I can organize it while I'm watching TV, and the go upstairs and actually put it away! I'm also finding that organizing more of my supplies by color, rather than type is making more sense to me. Still baby steps but I'm feeling good so far.
Many of you wonderful SCS people suggested that as a newbie, I should start planning how to organize my crafting materials now, rather then later.
Came across this thread and figured maybe it would be worth sharing...
Saw this nifty storage container, and wonder if this would be a good solution for storing small quanties of little things like embellishments, small stamps, etc. Containers are 4 x 6.
I have a decent closet in my crafting room, and besides storing a giant portable AC, the plan is to turn into a crafting storage area + pantry, + coat storage. I only plan to store project supplies and things like glue/adhesive/scissors in my desk. 2 of these containers would last me a long long while.
bjeans, I want to thank you again for pointing me toward the Totally Tiffany organizing videos. Oh my gosh, her method has completely changed the way I go about organzing and it's already helping a lot. The biggest tip she gives is to only organize one box at a time. I have stacks of boxes, filled with a mish mash of supplies...and always tried organizing it all at once. I would only get so far, then have to put it all away because my granddaughter was going to sleep over in the craft room, or it got too messy too craft in my craft room etc. So I was organizing, and re-organizing the same things over and over again, and getting no where.
Now that I only deal with one box at a time, I can organize it while I'm watching TV, and the go upstairs and actually put it away! I'm also finding that organizing more of my supplies by color, rather than type is making more sense to me. Still baby steps but I'm feeling good so far.
Karen
I’m so glad that’s been helpful for you, Karen. I’ve also learned to put on blinders and just work on the one shelf/box/area in front of me, whether it’s my office/craft room or elsewhere in the house.
I keep forgetting about Harbor Freight! thank you Sue for the reminder!
Indigo Blue: I like the idea of what you have-boxes in boxes. If you can police yourself to stay within those confines...yay. Personally I have had to re-org many times as my stash grew. Even if it was three years down the road on something..I am not a person who likes doing the same thing over and over. I rather just get it right but there is no predicting growth patterns sometimes.
here is the link Sue had given us for example-you might find your idea for less $$:
For sequins, prills, shakers goodies...I use the plastic sectioned boxes for beads. I did finally get one of this kind called bead solutions. It is very mix and match based on what you need. You might find it cheaper too. I find the tiny containers hold a standard pack of sequins-what is that-they call it 2 teaspoons? This is good if you want to work outside your room or for travel. They are pretty tight though nervous me would still put them in a sandwich bag in a travel bag. You can see them too and they have labels for the top if it matters.
I will tell you what I am going to organize now is my excel sheet-which is very messed up for gen supplies. I never bothered-I just tossing things into it. How's that for crazy LOL But seriously it does help me quickly remember good sources esp if it has been a few years.
Many of you wonderful SCS people suggested that as a newbie, I should start planning how to organize my crafting materials now, rather then later.
Came across this thread and figured maybe it would be worth sharing...
Saw this nifty storage container, and wonder if this would be a good solution for storing small quanties of little things like embellishments, small stamps, etc. Containers are 4 x 6.
I have a decent closet in my crafting room, and besides storing a giant portable AC, the plan is to turn into a crafting storage area + pantry, + coat storage. I only plan to store project supplies and things like glue/adhesive/scissors in my desk. 2 of these containers would last me a long long while.
Quite a few have those or the larger ones, or the same from other companies. I did and donated them. Not because they aren’t excellent - just that opening a box to open more boxes means I won’t open anything.
I bought storage containers when starting out. Some are still used; many have left the building. Sometimes retrieving items was awkward - like for paper. Or discovering I was a flipper (small open bins) vs. a leafer (ringed binders).
Obviously, one isn’t better or worse, things just evolve over time - even what I make versus what I thought I’d make.
Before paper crafting, boxes and lids that held checks were perfect to organize drawers. That was when I wrote checks.
BTW, in case anyone’s interested, this IKEA chest was marked down because it was going to be discontinued but it wasn’t. It’s handy for flat embellishments on sheets - like enamel dots and peel-off lines. IBM Selectric supplies are in one drawer. It fits Expedit/Kallax but is stand alone. Just cardboard but sturdy. PALLRA Mini chest with 3 drawers - dark gray - IKEA
IKEA has great storage containers and has lowered shipping costs, especially good for larger items.
Organizing embellishments sparked my interest off of another thread. {SNIP} It may be time to make my embellishments storage a little more compact.
How do you store your embellishments?
I've tried all sorts of containers, but finally decided on little zipper bags, that I found at Michael's. They are 4" L x 3" W zipper bags, thinner plastic. I used my Crop-a-dile to punch a hole in the top, just below the zipper, and all the small embellies to the bags. I store like items on the book rings. For instance, my googly eyes collection has about 4 or 5 different sizes/styles. I dumped each style/size in its own zipper bag, zip the bag shut, punch a hole (twisting the baggie and the punch around a bit to make sure it punches ALL the way through both layers) then thread the bag on a book ring.
The containers I use are the older CTMH large organizers that have plastic dividers for sections. I have discovered this is my favorite way of organizing the little embellishments.
As far as ribbon/washi tape go, I found picture frame ledges at Ikea. A long time ago there were some of the basic Ikea ledges that were not so deep from front to back. The depth size has since changed (almost 4.75" now) and the newer style (newer ones called "Mosslander") hold the large spools of ribbon.