Splitcoaststampers.com - the world's #1 papercrafting community
You're currently viewing Splitcoaststampers as a GUEST. We pride ourselves on being great hosts, but guests have limited access to some of our incredible artwork, our lively forums and other super cool features of the site! You can join our incredible papercrafting community at NO COST. So what are you waiting for?
Anyone tried one of these? Descriptions say the etched lines help in placement, but I'm not understanding how this would work? I really want the mint striped stencil, but not if I can't figure out how to use it.
I was watching a Vicky Papaioannou video a couple of days ago, on unboxing an SSS kit, which had two of them in. From what I remember her saying, you put the stencil on card and put the ink on,then you move the stencil, placing the etched design over the inked design you have already laid down. tThen you ink with a second colour. She said you can see through the stencil sufficiently to be able to line up the etched design with your inked one.
Paula, funny you should ask that now. I was trying to play with the stripes stencil yesterday and just don't think I'm doing it right. All the others stencils line up fine but the stripes and the mint, nope, can't get them. Tim's release videos don't demo either of those and I can't find any other videos online. Tim said in his release videos he was going to do so many demos on them (and all his new products) but as far as I can tell he hasn't done any yet. will try again when I have time.
Can be found in the archived Facebook live video that introduces the Halloween products. Tim tapes down the tag he�s inking, then tapes the stencil over it. Inks the stencil with color 1. Then lifts the stencil, cleans it off to avoid cross mixing of colors on applicator. Then lines up the etched images on the stencil over the images he just inked. This essentially acts as a mask to protect the color he�s just put down - tapes down stencil again and applies ink #2 over the openings, which are now over a clear space on tag. Lift it and there are two colors on the tag.
TH did a demo of the stencils near the end of his latest video showing the release of the last 12 Distress Oxides. It’s on his Facebook page and his blog. Sburke’s description of how to use them is exactly how he demoed them.
Oh DUH. I bought the "diamonds" stencil because I liked it, and never realized it was a "shifter" stencil or what that even was!
I'm glad I looked on the forum and saw this thread.
Thank you for posting, Paula. I knew the stencil looked different from my other layering stencils, but never would have figured out why. !!!
__________________ I have come to the conclusion that buying craft supplies and actually using them are two separate hobbies. RachelRose Designs by Robin... GALLERY
TH did a demo of the stencils near the end of his latest video showing the release of the last 12 Distress Oxides. It�s on his Facebook page and his blog. Sburke�s description of how to use them is exactly how he demoed them.
He demo'ed the straight/slanted line shifters? I've seen him demo all of them except those. How do I keep missing them? LOL
i caught the demo of the diamonds one somewhere, I think on a big release video for 2018, maybe Halloween? It was towards the end and he kept saying he was going to do a demo just on the shifters, but really once you see how to do it it's pretty self-evident.
You have to hand it to Tim - he always comes up with something that makes you think "Of course! What a great idea!"
I just think it's a riot that I've been using mine as a regular stencil, looking at those etched lines and wondering what the heck they were there for. Like I said. Duh.
__________________ I have come to the conclusion that buying craft supplies and actually using them are two separate hobbies. RachelRose Designs by Robin... GALLERY
Meanwhile, OT, I’m in love with Birch Press stackable stencil sets. Actually one set, since that’s all they had - Mandala. Lovely with colored pencils outlining shapes too, or a mix of mediums. Of course Oxides make them sing. Oxides and colored pencils.
Birch Press person said they were testing the waters with the first one to see if there was interest. I may get Shine. Birch Press Design
Yeah, saw that one, and another one, like I said I think it was the Halloween reveal. I have to say, I also liked those little brushes he used. In the craftiverse, you can't look away for too long, or when you look back there will be a score of things that have come out that you now have to have.
I can't say I have any desire for that glass craft thing. I didn't when it came out and now that I have a GIANT craft sheet covering my workspace (;)!), I am entirely satisfied. I know some people love the glass mat, but it's just a weird and forced division of space for me. And I don't believe I wouldn't end up with stuff piled up on it. I'm just a very, very messy crafter and no device on the planet is going to change that.
__________________ I have come to the conclusion that buying craft supplies and actually using them are two separate hobbies. RachelRose Designs by Robin... GALLERY
I have the little brushes. Like them a lot, and that they can be used spread out (soft) or only partially out so harder, if that makes sense. Only complaint: following Tim’s path, I keep the brushes in a mini cube tin, with room for a basic rainbow + brown, but not black [soot]. Or black and not browns.
Glad to know the Tim brushes work. I’d been waiting to hear that. I bought the Nuvo brushes and they made funny little pokey spots all over. I like the Clarity brushes but the TH ones seem more handy. I’m interested in the picket fence ink apppliers but I’m not interested in the $50 price. I’ll try a pack of TH first.
Kind of wish the shifter stencils were bigger. I do bigger pieces. Guess I could do more shifting.
__________________ Mary
Last edited by maryalena; 10-14-2018 at 03:08 PM..
Notice he didn't demo the lines, but shows the samples of them while saying 'see how easy that is'. LOL The problem with the lines vs. the images like diamonds and dots is that the line stencils are designed to leave an un-inked stripe and figuring out the placement of the guide on the stencil has been the issue for me. When I've tried, I've wound up with missing inked places, if that makes any sense. I'm going to get myself set to use the stencil and watch this video, freezing as he shows the samples with the stencil on top. That should work in clearing up the mystery. I've been told by a few people that I would be their 'phone-a-friend' so I can't let this beat me!! (Fingers crossed) Thanks, Beth!
I think I figured out the stripes/mint stencils (which I keep calling slated for some reason).
Below is what I did for the MINT:
I cut a piece of cardstock slightly larger than the stencil and taped them down, then sponged in some color:
Then I shifted it, matching the inner etched rectangle grid lines to the sponged sections:
I sponged in the 2nd color and here's the part that bothers me, the stripe on the left-side is exposed to contamination from the new color and the right-side goes off the edge:
This is what you're left with when you remove the stencil, an unfinished left-side:
This forces you to shift the stencil back over to the left-side so I had to add a piece of scrap paper to the right-side to protect the image I already laid down:
And this is the final product. The right-side will need to be trimmed off:
This is the only way I could figure out how to make this stencil work. The having to (literally) shift the stencil more than once is what throws me and my cardstock dimensions off. All the other designs just gets moved the one time.
I did the striped stencil too and will post that shortly (less pictures, yay!)
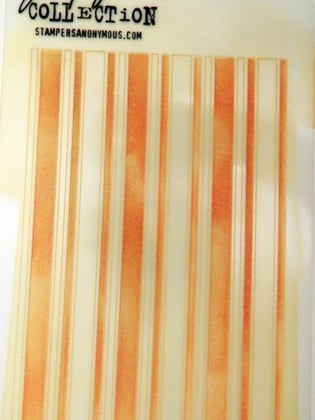
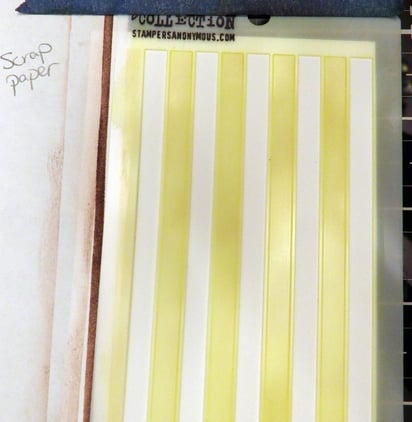
This time I used a piece of cardstock cut to the same width of the stencil. I laid down my first color:
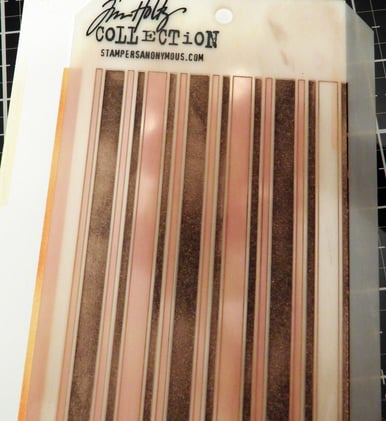
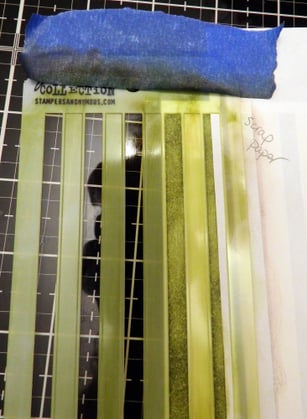
I shifted the stencil lining up the color within the etched rectangles. This, again, exposed the left-side to contamination from the new color so I had to cover it with scrap paper:
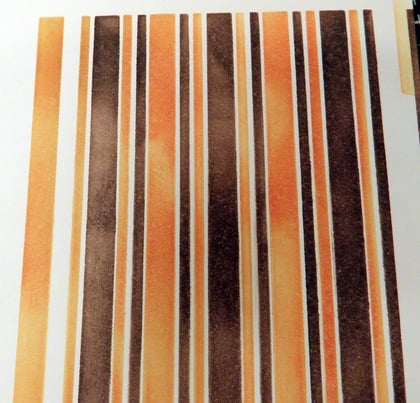
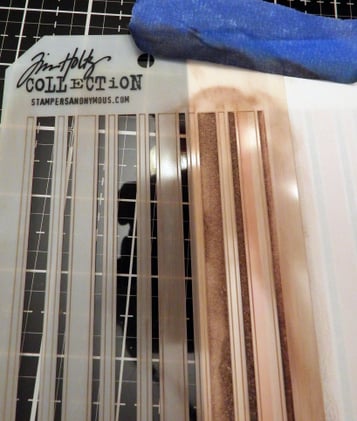
After laying down the 2nd color, I had to shift the stencil back to the left-side to fill-in the missing stripes. I had to use scrap paper again to protect the image:
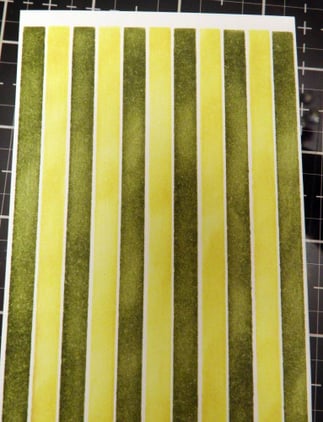
And this is the final product:
This going back and forth annoys me, lol. I feel like there has to be a better way to do this and when someone shows me I'll turn into Homer Simpson - d'oh!
These stencils remind me of the retired Stampinup Plaid Makers. I'll have to get those out again as plaid and gingham are all the rage now. tfs the videos of Tim.