Splitcoaststampers.com - the world's #1 papercrafting community
You're currently viewing Splitcoaststampers as a GUEST. We pride ourselves on being great hosts, but guests have limited access to some of our incredible artwork, our lively forums and other super cool features of the site! You can join our incredible papercrafting community at NO COST. So what are you waiting for?
I know this has been discussed a lot, as I've done searches and read through many posts, but I am still confused.
I haven't paper crafted in a while because my supplies have been hard to get to and find. I want to convert my wood mount stamps to cling mount and have a few questions.
1. Does the stamp have to be taken down to bare rubber? Can you just use the foam attached to it? I've seen where many people don't, but I'm not sure why.
2. If the stamp IS taken down to bare rubber, do you HAVE to apply foam? I've read somewhere that most get a good stamped image even without the foam....but this is mixed and I can't remember where I read it now.
Does anyone have any tips/suggestions. I really don't know what I am doing! LOL!~
One...Remove stamp with foam from the wood block and prepare it to be used on an acrylic block. That means the foam cannot be damaged on removal. And you either need cling film or a glue of some sort on the foam that will be removable.
Two...Remove stamp from the foam and block and clean the rubber (if needed, because it often comes off cleanly), then mount on Cling mounting foam.
Three...Remove stamp from the foam and block as in #2 and leave it as bare rubber. Use an adhesive on the back of the rubber for mounting on the block and in your storage system.
Now, my experience.
For option one, I never had any luck with all the ways to accomplish this. Either the cling film doesn't really cling, or the glues get too sticky and are wanting to stick to the block or the storage permanently. Also, oftentimes the foam tears when removing from the block.
For option two, well, this is the way that most of my stamps are done. On occasion there's stuff that needs to be removed from the back of the rubber and it is a pain in the thumb to get it all off, but that's the exception, not the rule.
For option three, this is gregzgurl's method and I'm certain she will chime in and share her experiences. I have some large stamps that are bare rubber and some thin ones that will soon be bare rubber but I'm not very experienced in this method.
Hi Denise, when I first started stamping, 12-15 years ago now, I tried buying bare rubber mostly, as it was way cheaper than wood stamps- and mounting onto cling foam. Over that time period, I've seen the foam backing start to degrade. Some starts to go concave on the stamp, so it distorts the design, and doesn't store well on sheets.
A couple of years ago, I started trying to remove it- some just peeled straight off, the glue had lost its sticky. Others were more problematic- I'm still working on some of them!
Gregsgurl, as Fionna says, has done a few threads on this subject, and has awesome information. She posted to another inquirer recently that putting stamps in the freezer for a few minutes makes them easier to remove from the wood block. You can also microwave for a few seconds to loosen the glue.
Totally agree with Fionna that it's rarely a workable idea to retain the old foam on the back of a stamp. Even the tiniest bit of damage can cause stamping problems.
I have gradually turned almost all mine back to bare rubber- they take up less room than even the ones with just a foam mount.
I'm trying Gregzgurls preferred Ad Tech Tape for temporary adhesion, and so far I'm loving it. I also have a large number with no adhesive, stored in currency collector sheets, which I mount onto Acrylic blocks that have Tack'n'Peel on. So that's another option.
If you worry about getting good images, stamp onto a surface with a little cushioning beneath it- such as a stack of copy paper, magazines, mouse mat, I've also seen people say they use a telephone directory! It does make a huge difference.
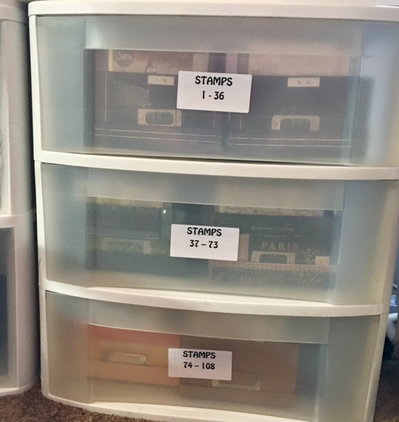
All my stamps are stored on laminated sheets, or in currency storage pockets, in A4 ring binders. Both red rubber & photopolymer. I bought a cheap laminator locally, and buy packs of laminating sheets from Amazon, and just laminate spare cardstock.
I just unmounted 3 large Outlines stamps last night. I left the original foam on them. Two of them still had some adhesive, so I left it. I've found in the past that the remaining adhesive is just enough for an acrylic mount or stamp positioner. The third stamp had no adhesive left on the foam, because it all remained on the wooden block. I used a little Tack It Over & Over. I've found that just a very thin coating works well. This is, of course, my experience. I know that others have had different results. Good luck with your project!
I'm a bare rubber girl all the way (except for the photopolymer, of course)! Diane's method of storing her stamps (on laminated cardstock in pouches) inspired my own. Here's what works for me:
Put stamps in freezer for a few minutes. It hardens the glue so that the rubber comes off cleanly (in most cases). If there is residue, it can be rolled off with a thumb or finger.
Trim excess rubber to eliminate stray ink marks when stamping. Even pre-cut stamps often have excess, so I trim them really close. I use Tim Holtz Tonic scissors for that.
Swipe AdTech permanent tape runner on the back of the stamp and stick it on laminated cardstock for storage. I use half sheets in mini binder page protectors in bins so I can flip through them (the page protectors were left over from when I had all my stamps in binders). I use really cheap cardstock to laminate. I cut the sheets in half, stick a half-sheet in a pouch and run it through the laminator. I cut the clear half off to use as a "cover sheet" for photopolymer stamps so they don't stick to the page protectors.
I index all of my stamps - which are stored in categories rather than in sets - but that's a different thread...
Large stamps (backgrounds and such) I leave alone after I remove them from the block or foam - no adhesive on the back - and use them face up instead of sticking them to anything to stamp. I ink up the stamp and lay the cardstock on top (or tape it to the lid of the MISTI) and use them that way.
Since I have the two MISTIs and a stamping pad (see link below), I don't worry about not having foam - there is enough "cushion" to ensure a good stamped image every time.
AdTech permanent glue runner DO NOT get the dotty one - it will leave glue dots everywhere. Also, these are MUCH cheaper at Hobby Lobby - especially if you get a multi-pack and use a coupon. There is another one that says "extra strong" rather than "permanent" - they appear to be interchangeable for my purpose, since I've used both and not really noticed a difference...
Thank you everyone! Sue, you have been especially helpful! I have been reading some of your other threads and this has helped to clarify things quite a bit. One question, do you stamp or transfer an image to the back of the stamp for positioning help?
Thank you everyone! Sue, you have been especially helpful! I have been reading some of your other threads and this has helped to clarify things quite a bit. One question, do you stamp or transfer an image to the back of the stamp for positioning help?
Thanks so much!
Denise
I don't. Since I have the MISTIs, I can do a "test run" to make sure things are where I want them.
I don't. Since I have the MISTIs, I can do a "test run" to make sure things are where I want them.
Hi there-Love your posts! I've just finished unmounting 95% of my wood stamps too! Big job, but love how little room they now take. (Room for more!) So with the bare rubber stamp, and no foam on the back, can you still use the Misti with the Adtech adhesive? I figured the Misti "door" the stamp is adhered to wouldn't reach the paper if that makes sense. Or does the "door" the bare stamp is adhered to adjust depending on the thickness of the actual stamp? And you mentioned you had separated all your sets. Really? If all your thank-you, or thinking of you (to name a couple) sentiments are together, I suppose then that gives you options all in one place of which to use. Would you do the same with all your trees, clouds, and such? Using DVD cases, I did my individual sentiments with spine labels like "Words-thinking of you". Then went through all my "sets", and stamped all the thinking of you sentiments, then labeled which set they are in. It' then easy to know in the thinking of you DVD case, where else I have that sentiment. I guess I am really on the fence about breaking up my sets. I know you've heard that before. I'd appreciate any feedback.
The only sets that I keep together are "builder"-type sets that only make sense with each other. That includes flowers that have multiple layer/foliage/configuration options, sets like SU! "White Christmas", and so on. Otherwise, I have the trees with the trees, the stars and moon and sun together, the hearts together, blah blah blah. If you don't want to break up the actual sets, you could always stamp each heart, for example, and note which set it's in and have the stamped hearts all in one place in your index for reference but the actual stamps still with their respective sets. To me, it seemed like one extra step to get to the stamp I wanted, so I just put them all together.
As far as the stamps stuck to the lid of the MISTI reaching the paper, the unmounted rubber stamps are generally a similar thickness to photopolymer, so they do fine with the foam insert inside the MISTI. I have some cheap thin foam that I picked up at Dollar Tree for the very few that are thinner and need a little extra "shimming" under the cardstock...
I'm with Sue, and I put (generally) like with like. Especially sentiments. I've split them all from sets,as most often I looked for a sentiment within my sentiments folder, never thinking of all the sets that may have had a suitable one amongst them. Once your stamp collection gets to a certain size, it does become hard to keep track. I have a virtual catalogue in folders on my pc, folders for Manufacturers, and for 'things'- trees/ floral/ etc etc. Helps me to stop double buying, and also means I can check if I have something similar before I buy. I also have them all catalogued in Evernote, so I have it to hand when I'm out!
I've unmounted 95% of my old Stampin' Up wood mount sets (I used to be a demo). I removed all the foam. I did try the Ad-Tech but it either left residue on my Misti or didn't cling to my laminated sheets. For laminate I just laminate an empty 5 mil pouch, cut it to the size I need and round the corners. For adhering i have been putting a blob of Tombow green glue on a silicone mat and spreading a thin layer on the rubber with a quarter of a yellow blending sponge with a binder clip on the top so I don't get my fingers sticky. I have been very happy with this method. Let me know if you have any questions. Unmounting sure is a daunting task when you have many stamps. Also, I have been using Evernote for indexing my stamps and I love it (this from a non-techhie).
I'm curious why the AdTech wasn't working for you - this is the first I've heard of it not working for someone! The only time I've had it leave residue on the MISTI is if I didn't stick it to the laminated cardstock first to sort of "burnish" it, and I've never had it not stick to the laminated sheet. Curiouser and curiouser... Glad you found something that works for you, though!
I found that the stamps that I had done earlier with the AdTech were just falling off the laminate and I had to redo them with the glue. I'm glad the new system works for me and that the AdTech works for so many other people.
90% of my rubber stamps are 'nekkid', and all I do is slap a bit of glue stick on the back and stick it to my acrylic block or Misiti lid, and when I am done, I wipe the glue off. I am a very low maintenance crafter lol!
I found that the stamps that I had done earlier with the AdTech were just falling off the laminate and I had to redo them with the glue. I'm glad the new system works for me and that the AdTech works for so many other people.
That makes more sense to me now. I mentioned on another of these threads that occasionally I have had to add more AdTech to a stamp here or there - almost like it absorbed into the stamp or something - but it's been occasional, as I said, and no big deal for me. If the new system is working better, then you should absolutely stay with it! This whole stamping/organizing thing is definitely NOT "one size fits all"!
90% of my rubber stamps are 'nekkid', and all I do is slap a bit of glue stick on the back and stick it to my acrylic block or Misiti lid, and when I am done, I wipe the glue off. I am a very low maintenance crafter lol!
I use those type of page protectors instead of then Avery Elle pockets too. I found the Avery brand at Wal-Mart is cheaper than even Staples brand. I get them for 2.50 for a 15 pack.
I need to try the ad tech adhesive. I'll be going to Hobby Lobby next week. So I will be getting some to see if it works for me. I unmounted most of my stamps many years ago and use rubber cling mount. But it's a lot of work. Thanks for the tips everyone.
[*]I index all of my stamps - which are stored in categories rather than in sets - but that's a different thread......
How do you index your stamps?:confused:
Also, I NEED to have the image stamped on the stamp, especially sentiment stamps. I am always stamping crooked! So what would I need to do to get the image onto the stamp?:confused:
I use really cheap cardstock to laminate. I cut the sheets in half, stick a half-sheet in a pouch and run it through the laminator. I cut the clear half off to use as a "cover sheet" for photopolymer stamps so they don't stick to the page protectors.
I do similar but I place 2 sheets cut down slightly smaller than half so the pouch will seal all around each piece and then trim once sealed. I also round the corners so they are kinder to my self-seal bags that I store them in.
Also, I NEED to have the image stamped on the stamp, especially sentiment stamps. I am always stamping crooked! So what would I need to do to get the image onto the stamp?:confused:
I think this means she has a folder with each of her stamps stamped out as a reference.
I found the only way to index the cling mount was to ink up whole sheets of rubber before sticking to the cling but you have to stick it in exactly the same place as you stamped it. Almost impossible with individual stamps.
I do similar but I place 2 sheets cut down slightly smaller than half so the pouch will seal all around each piece and then trim once sealed. I also round the corners so they are kinder to my self-seal bags that I store them in.
I cut them down so they are exactly 5 1/2" x 8 1/2" and round the corners, but I've never had a problem with the layers separating or anything else, so I don't worry about not having the seal all the way around - I lop it off so I have the full-size area to stick the stamps. Back to what works for one is not suitable for all, right?
Also, I NEED to have the image stamped on the stamp, especially sentiment stamps. I am always stamping crooked! So what would I need to do to get the image onto the stamp?:confused:
I stamp each image/sentiment on a 2 1/2" x 3 1/2" card (cheap white cardstock cut down - you can get 10 from one sheet) and put them in the pages designed for trading cards. They are organized by category in binders (I have two). If the image or sentiment is small, I stamp several on one card, and if the image or sentiment can be used in multiple categories, it gets stamped multiple times so it doesn't get overlooked when I'm looking in a particular category. Make sense?
I stamp each image/sentiment on a 2 1/2" x 3 1/2" card (cheap white cardstock cut down - you can get 10 from one sheet) and put them in the pages designed for trading cards. They are organized by category in binders (I have two). If the image or sentiment is small, I stamp several on one card, and if the image or sentiment can be used in multiple categories, it gets stamped multiple times so it doesn't get overlooked when I'm looking in a particular category. Make sense?
Okay one more ?? ( I have this small pile of sentiments that I had pulled off the blocks ( last year ) and the foam did not come off in one piece... so I set them aside to try to get the rubber clean ( the majority of these are cheap 1$ bin sentiments that are not worth a great deal and a few were gifts that I have never used :mrgreen: so, its not a big hurry to get them clean...
but, I just tried sticking these in the freezer and I am not seeing the glue get hard ?
how long do you think they need to freeze? ( if I freeze them too long and try to pry the foam off is it going to crack the rubber?)
It doesn't really get hard, just sort of solidifies enough to come off cleanly. I usually only leave them in for 5-10 minutes. It is possible to crack the rubber if the stamp is old and kind of brittle anyway, but I've never had a problem. If you're concerned about it, you could set it out to "thaw" a bit, lol...
Hi Dbavaria, I've unmounted about 1/2 of my rubber stamps. I need to keep storage to an absolute minimum, so I keep the images bare rubber, stored in old floppy disc containers (I pretty much only collect SU, so I store complimentary sets together). I bought clear mounts then applied Tsukineko's Tack-N-Peel to them. As long as I cover them with clear plastic after use (thin, like overhead projector film) they stay nice and sticky, though they're easy to clean if they get dusty. This way I didn't have to re-trim all those new backings to my rubber stamps. Thanks to eBay I have a huge collection (built over many years), so putting the cling on the mounts made more sense to me.
Creative-Juices, that is exactly how you should use Tack N Peel- it should go on the block, not on the stamps. Also, for anyone wanting to use it, to cleanit off, just run under warm water and leave to air dry.
Creative-Juices, that is exactly how you should use Tack N Peel- it should go on the block, not on the stamps.
Exactly, for this product, but a lot of people choose to use a cling foam on the back of each individual stamp, which is a lot of time invested. I've already invested a lot of time either trimming new images, or cleaning off the backs of stamps I've unmounted. ;)
Creative Juices, sorry I misunderstood! Yes, I invested a lot of time with the E-Z Mount foam when I first started buying unmounted. Then I found after some years that it was starting to shrink on the back of the stamps, making them 'cupped', awkward to stamp with, and they kept falling off the sheets. Plus they still take up extra room as compared to totally bare rubber. I'm now storing a large number of the unmounteds in the storage pockets you can buy for currency/trading card/postcard storage, and thats working well for me.
I'm now storing a large number of the unmounteds in the storage pockets you can buy for currency/trading card/postcard storage, and thats working well for me.
No kidding! I'd be concerned they'd fall out (I don't yet have a dedicated space for crafting), but perhaps that's something I can convert to when I DO have a dedicated space. Thanks for commenting!
Not having any problems with them dropping out yet, I have the pages stored in A4 binders. It actually works really well for very small stamps, I have those in coin holder sleeves. I have a lot of Stampscapes stamps, and quite a few are very small. I've had one or two go missing from when they were on storage sheets. One of these days I'm going to have to search down the back of the IKEA storage unit I have them all in!
I really need to do this. I'm not even using my wood mount stamps anymore because I'm so used to the MISTI and being able to perfectly re-stamp if something doesn't come out right.
That means I'll have a huge empty cabinet with shallow drawers that I bought specifically to store wood mount stamps. I'm sure I can store lots of my supplies in it.
__________________ aka Sue. Or Sue-odd.
No blog for me. My gallery chronicles my card-making successes and mishaps.
The MISTI is $100!! That's more than the Big Kick, which does a LOT! Isn't it just a couple of pieces of acrylic hinged together? Sorry, but I'm really blown away.
The MISTI is $100!! That's more than the Big Kick, which does a LOT! Isn't it just a couple of pieces of acrylic hinged together? Sorry, but I'm really blown away.
The Memory MISTI is $100, but that's for 12" x 12" papers. The original size is $60, and the mini is $45. Still a chunk of change, but more reasonable than $100... I have the original size and the mini and love 'em!
I just got the Tim Holtz Stamp Platform and I love it!! It's about 8.5" x 8.5", but 2 sides are open so your paper can be 12" x 12" (or even larger). And the lid flips for foam mounted rubber on one side and clear/photopolymer stamps on the other side. And it's price point I think is around $39, but lots of places have it for less ~$32.
I just got the Tim Holtz Stamp Platform and I love it!! And it's price point I think is around $39, but lots of places have it for less ~$32.
Oh, well that's much more reasonable. I just watched a YouTube video of a demonstration. I can see how useful such a tool would be, but it will definitely be on my wish list for a while (unless I can use a 50% off coupon at one of the craft stores - lol). Thanks for pointing it out!
I'm trying to get my hands on the Tim Holtz platform even though I have a MISTI. I feel hemmed in by the MISTI sometimes, and I like that the Tim Holtz one is open on two sides. I'll use them both. Game changer.
__________________ aka Sue. Or Sue-odd.
No blog for me. My gallery chronicles my card-making successes and mishaps.
I really need to do this. I'm not even using my wood mount stamps anymore because I'm so used to the MISTI and being able to perfectly re-stamp if something doesn't come out right.
Unmounting while listening to a good book or music is wonderful. When my son was younger I used to sort out his Lego collection. It would take about 14-16 hours of work, (eBay and I had gotten well-acquainted) but I loved it. I'd just get deep inside my own thoughts, figuring out the world around me. It was therapeutic, and I miss it.;)
My preference is #2. After unmounting my collection of wood stamps, they have been incorporated into the same storage system as my acrylic/plastic stamps. Using the Evernote app, I keep a running inventory of all my stamps. This system works great for me.
When I purchase new stamps (wood mounted or otherwise) they immediately get cataloged and put into the system. Fair warning, it was pretty costly and time consuming to set up, but it saves me SO MUCH time and space this way.