In the Forums

Register

Today's Posts

Search

Get the Weekly
Inkling
newsletter


Previous Issues

Splitcoaststampers's privacy policy

Get Social

Splitcoaststampers on InstagramLike Splitcoaststampers on FacebookFollow Splitcoaststampers on TwitterPit Splitcoaststampers on Pinterest

Sponsored Ads


Splitcoaststampers.com - the world's #1 papercrafting community
You're currently viewing Splitcoaststampers as a GUEST. We pride ourselves on being great hosts, but guests have limited access to some of our incredible artwork, our lively forums and other super cool features of the site! You can join our incredible papercrafting community at NO COST. So what are you waiting for?

Join the party at Splitcoaststampers today!

Reply
Thread Tools Search this Thread
Old 04-04-2009, 06:42 AM   #1  
Pearl-ExPert
 
stampztoomuch's Avatar
 
Join Date: Jun 2006
Location: Coquitlam, BC
Posts: 2,288
Likes: 0
Received 2 Likes on 2 Posts
Default Digital Easter Bunnies set

Name:  SMALLparachutin-boy-bunny-mel-stamp.jpg
Views: 48
Size:  10.2 KBName:  SMALLgirl-bunny-with-flowers_mel-st.jpg
Views: 42
Size:  12.4 KB Name:  SMALLparachutin-bunny-with-goggles-.jpg
Views: 46
Size:  13.1 KB

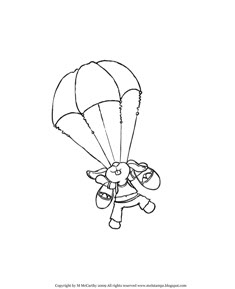
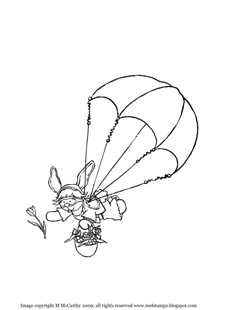
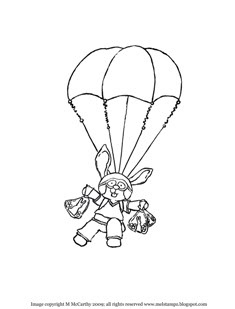
I wanted to give you guys a little Easter Present. I drew these bunnies to use as digital images. You can resize them & you can adjust the darkness of the lines, like any JPG.

THEY ARE BIG (about 6 inches)

attached here (JPGS in thumbnails):

1) boy bunny with baskets
2) girl bunny with flowers
3) bunny with goggles & chocolate Easter rabbits

They can be scaled down any way that you like to do that (print at a percentage is the easiest way I know of--using scaled printing in your printer settings or in photoshop.) Word to the wise on resizing: of course, when/if you resize, just make sure to write down the percentage you've used, so you can resize the paper pieces to scale (been there, forgot that.) ;O)


Accessories to come too:


I'm working on paper piecing pages too (the parachutes & the clothes etc.) I also made accessories (stuff for the bunnies to throw, clouds, etc...)
I would love some feedback, if anyone has any trouble with them, so I can fix them up if need be.


Copyright jazz:
These are intended for use just like any other angel policy image. You can use them for personal use & feel free to use them to make any handmade items that you'd like to sell. The images themselves, however, are copyright... (not that they're all that, but they're made with the intention that they be shared for free.)

Link them, pretty pretty please, if you try them. I'd love to see your creation. :O)

Digital hugs & may your Easter be blessed with love & creativity,
:O)
Mel

All the blog posts with paper pieces etc are HERE


P.S. Blog post here.
Attached Thumbnails
Digital Easter Bunnies set-parachutin-boy-bunny-mel-stampz.jpg   Digital Easter Bunnies set-girl-bunny-flowers_mel-stampz.jpg   Digital Easter Bunnies set-parachutin-bunny-goggles-mel-stampz.jpg  
__________________
Mel :0) (Gallery & Blog (Mel Stampz))
Happy to be a Fan Club member!

Last edited by stampztoomuch; 04-12-2009 at 02:33 AM.. Reason: adding blog link
stampztoomuch is offline  
Tweet this Post! Share on Facebook Reddit!! Pin on Pinterest! Share on Google+!
Reply With Quote Likes
Old 04-04-2009, 08:05 AM   #2  
Compulsive Stamper
 
marcea's Avatar
 
Join Date: Jun 2008
Location: North Yorkshire
Posts: 31
Likes: 0
Received 0 Likes on 0 Posts
Default

wow, thanks hun - these are gorgeous :o)
x
marcea is offline  
Tweet this Post! Share on Facebook Reddit!! Pin on Pinterest! Share on Google+!
Reply With Quote Likes
Old 04-04-2009, 10:05 AM   #3  
Mad Swapper
 
scrubbybubbles's Avatar
 
Join Date: Apr 2008
Location: Sunny Florida
Posts: 1,756
Likes: 0
Received 0 Likes on 0 Posts
Default

Well these are just downright adorable!! I love them! thankyou so much! would you like us to link the card here when we're done? I'd be happy to do that and thanks again!
scrubbybubbles is offline  
Tweet this Post! Share on Facebook Reddit!! Pin on Pinterest! Share on Google+!
Reply With Quote Likes
Old 04-04-2009, 10:09 AM   #4  
Polyshrink Goddess
 
saramoreno's Avatar
 
Join Date: May 2007
Location: Redding, CA
Posts: 731
Likes: 0
Received 0 Likes on 0 Posts
Default

thanks so much, too cute
__________________
Sara
My Blog
DT Member for: Sassy Studio Designs, Card Makin' Mamas, and Christmas Crafting
saramoreno is offline  
Tweet this Post! Share on Facebook Reddit!! Pin on Pinterest! Share on Google+!
Reply With Quote Likes
Old 04-04-2009, 10:42 AM   #5  
Hardware Hotshot
 
stampinscrapnewbie's Avatar
 
Join Date: Jun 2007
Location: Plano, TX
Posts: 4,355
Likes: 0
Received 0 Likes on 0 Posts
Default

Saw these on your blog - thank you again so much for sharing - they are awesome!
__________________
KIM
stampinscrapnewbie is offline  
Tweet this Post! Share on Facebook Reddit!! Pin on Pinterest! Share on Google+!
Reply With Quote Likes
Old 04-04-2009, 10:53 AM   #6  
Polyshrink Goddess
 
marie_honey's Avatar
 
Join Date: Jan 2008
Location: Pennsylvania
Posts: 643
Likes: 0
Received 0 Likes on 0 Posts
Default

Thanks for making these available to us Mel! They are so durn cute!!
marie_honey is offline  
Tweet this Post! Share on Facebook Reddit!! Pin on Pinterest! Share on Google+!
Reply With Quote Likes
Old 04-04-2009, 11:11 AM   #7  
Stazon Splitcoast
 
jonjinko's Avatar
 
Join Date: May 2005
Location: Alexandria, VA
Posts: 15,063
Likes: 0
Received 0 Likes on 0 Posts
Default

Omword, these are adorable! Thank you for your generosity! I can't wait to play around with these.
__________________
My blog: A Sticky Situation
DT for ♥ ♥ Raise the Bar!.:The Pink Elephant:.
jonjinko is offline  
Tweet this Post! Share on Facebook Reddit!! Pin on Pinterest! Share on Google+!
Reply With Quote Likes
Old 04-04-2009, 11:27 AM   #8  
Glitter Queen
 
Cropping Nanny's Avatar
 
Join Date: Oct 2007
Posts: 23
Likes: 0
Received 0 Likes on 0 Posts
Default

Thanks Mel! Can't wait to convert in Inkscape so I use them with SCAL.
Cropping Nanny is offline  
Tweet this Post! Share on Facebook Reddit!! Pin on Pinterest! Share on Google+!
Reply With Quote Likes
Old 04-04-2009, 12:05 PM   #9  
Hardware Hotshot
 
Ellibelle's Avatar
 
Join Date: Aug 2005
Location: US--midwest
Posts: 4,497
Received 4 Likes on 4 Posts
Default

These are adorable!
__________________
Ellibelle's Corner - My Blog
Year in Review 2021- My Own Favorites of 2021
Ellibelle is offline  
Tweet this Post! Share on Facebook Reddit!! Pin on Pinterest! Share on Google+!
Reply With Quote Likes
Old 04-04-2009, 12:29 PM   #10  
Mad Swapper
 
a1r601's Avatar
 
Join Date: Jul 2006
Posts: 1,964
Likes: 0
Received 0 Likes on 0 Posts
Default

For those of you who are wondering how to re-size your images...Some images may look big on your computer, but I just printed out some of Mel's images and they are the perfect size for a card.

1) Open Microsoft Word
2) Go to INSERT > PICTURE > FROM FILE
3) To resize: Right click on the picture
4) Go to FORMAT PICTURE > Go to SIZE tab > Make sure LOCK ASPECT RATIO is checked to make sure that the image doesn't get distorted and stays true to the way it was drawn
5) You can resize using the SIZE AND ROTATE menu under the SIZE TAB entering in the desired measurements in inches
6) Hit OK

OR

You can go back to the Word doc and use the image handles to make the image the size you want - click on picture for the image handles to appear and you will see a rectangle surrounding the image with smaller squares to make the image bigger or wider. Only use the corner squares to resize so that the image doesn't get distorted. I've attached a doc for those visual learners.

Hope this helps...
Attached Files
File Type: doc Re-sizing digi stamps.doc (116.0 KB, 150 views)
__________________
Alma
Blog: Me, Myself and I-N-K
a1r601 is offline  
Tweet this Post! Share on Facebook Reddit!! Pin on Pinterest! Share on Google+!
Reply With Quote Likes
Old 04-04-2009, 01:24 PM   #11  
Die Cut Diva
 
troopersma's Avatar
 
Join Date: Dec 2004
Posts: 3,695
Received 4 Likes on 1 Post
Default

I was able to resize just using my printer options. I clicked on the image (so it's full screen) then chose 'Print'. Then I clicked on 'Preferences', then clicked on the 'Effects' tab and down on the left there is a box that says 100% of normal size. You can choose any percentage you want. I printed mine at 50% and they are about 2 1/2 inches tall (and cute as the dickens!)

Also, a tip...if you want to paper piece but want to use scraps (instead of feeding full sheets of cardstock/paper through)...on the top sheet of paper in your printer mark one of the corners (like BL for bottom left). Then print your image. Now place your scrap on top of the printed image and adhere with a temporary adhesive. Place the sheet back in your printer tray with the BL in the bottom left corner (so you know it's going to print the same place again). Now print it again. You can send that same base sheet through as many times as you want and you can use up some of your smaller scraps of patterned paper.

Jane
troopersma is offline  
Tweet this Post! Share on Facebook Reddit!! Pin on Pinterest! Share on Google+!
Reply With Quote Likes
Old 04-04-2009, 01:29 PM   #12  
Die Cut Diva
 
deeth1's Avatar
 
Join Date: May 2004
Location: Florida
Posts: 3,676
Likes: 0
Received 3 Likes on 1 Post
Default

Those are sooo cute! Thank you for posting them!
deeth1 is offline  
Tweet this Post! Share on Facebook Reddit!! Pin on Pinterest! Share on Google+!
Reply With Quote Likes
Old 04-04-2009, 01:39 PM   #13  
Stazon Splitcoast
 
smileyj's Avatar
 
Join Date: Feb 2008
Location: Twin Cities,MN winter wonderland
Posts: 29,735
Received 973 Likes on 662 Posts
Default

I'll try them later. Thanks
__________________
Sending smiles and hugs across the miles.
smileyj is offline  
Tweet this Post! Share on Facebook Reddit!! Pin on Pinterest! Share on Google+!
Reply With Quote Likes
Old 04-04-2009, 04:17 PM   #14  
Die Cut Diva
 
troopersma's Avatar
 
Join Date: Dec 2004
Posts: 3,695
Received 4 Likes on 1 Post
Default

I had too much fun playing! Here's the one card I got finished today: http://janescreativeprocess.blogspot...ter-bunny.html

Thanks for sharing with us Mel.
troopersma is offline  
Tweet this Post! Share on Facebook Reddit!! Pin on Pinterest! Share on Google+!
Reply With Quote Likes
Old 04-04-2009, 07:15 PM   #15  
Cardstock Collector
 
campbelljudy1228's Avatar
 
Join Date: Jan 2009
Posts: 6
Likes: 0
Received 0 Likes on 0 Posts
Default Digital Easter Bunnies Set

Mel,
I'm having trouble trying too download these free bunnies. What do I need to do? Thank you for the bunnies!
campbelljudy1228 is offline  
Tweet this Post! Share on Facebook Reddit!! Pin on Pinterest! Share on Google+!
Reply With Quote Likes
Old 04-04-2009, 07:38 PM   #16  
Pearl-ExPert
 
stampztoomuch's Avatar
 
Join Date: Jun 2006
Location: Coquitlam, BC
Posts: 2,288
Likes: 0
Received 2 Likes on 2 Posts
Default

Quote:

Originally Posted by Cropping NannyView Post
Thanks Mel! Can't wait to convert in Inkscape so I use them with SCAL.
What a brilliant idea! I just bought an Expression and I would love to try it out. (I am using the trial version of SCAL and can't wait to buy it. I would love it if you would share your .cut file with everyone (if that's okay with you that is.) Thank you so much for the wonderful idea. Pure genius!!! :O) mel
__________________
Mel :0) (Gallery & Blog (Mel Stampz))
Happy to be a Fan Club member!
stampztoomuch is offline  
Tweet this Post! Share on Facebook Reddit!! Pin on Pinterest! Share on Google+!
Reply With Quote Likes
Old 04-04-2009, 07:40 PM   #17  
Pearl-ExPert
 
stampztoomuch's Avatar
 
Join Date: Jun 2006
Location: Coquitlam, BC
Posts: 2,288
Likes: 0
Received 2 Likes on 2 Posts
Default

Quote:

Originally Posted by a1r601View Post
For those of you who are wondering how to re-size your images...Some images may look big on your computer, but I just printed out some of Mel's images and they are the perfect size for a card.

1) Open Microsoft Word
2) Go to INSERT > PICTURE > FROM FILE
3) To resize: Right click on the picture
4) Go to FORMAT PICTURE > Go to SIZE tab > Make sure LOCK ASPECT RATIO is checked to make sure that the image doesn't get distorted and stays true to the way it was drawn
5) You can resize using the SIZE AND ROTATE menu under the SIZE TAB entering in the desired measurements in inches
6) Hit OK

OR

You can go back to the Word doc and use the image handles to make the image the size you want - click on picture for the image handles to appear and you will see a rectangle surrounding the image with smaller squares to make the image bigger or wider. Only use the corner squares to resize so that the image doesn't get distorted. I've attached a doc for those visual learners.

Hope this helps...
You are such an angel to write out these directions thank you ever so much!! I have a bad migraine, family visiting and a LOT of wedding invites to make & didn't have time to write out the instructions. I think you did a much better job than I would have, beyond a doubt! (I have a hard time with technical things...) Thank You Thank You Thank YOU!!! :O) mel
__________________
Mel :0) (Gallery & Blog (Mel Stampz))
Happy to be a Fan Club member!
stampztoomuch is offline  
Tweet this Post! Share on Facebook Reddit!! Pin on Pinterest! Share on Google+!
Reply With Quote Likes
Old 04-04-2009, 07:42 PM   #18  
Pearl-ExPert
 
stampztoomuch's Avatar
 
Join Date: Jun 2006
Location: Coquitlam, BC
Posts: 2,288
Likes: 0
Received 2 Likes on 2 Posts
Default

Quote:

Originally Posted by campbelljudy1228View Post
Mel,
I'm having trouble trying too download these free bunnies. What do I need to do? Thank you for the bunnies!
Sorry you're having trouble with them. If you right click on the little thumbnails, and click save image as (at least in mozilla firefox) then it should let you save it. If you have any trouble, please don't hesitate to PM me with your email & I'll send them to you. :O)
__________________
Mel :0) (Gallery & Blog (Mel Stampz))
Happy to be a Fan Club member!
stampztoomuch is offline  
Tweet this Post! Share on Facebook Reddit!! Pin on Pinterest! Share on Google+!
Reply With Quote Likes
Old 04-04-2009, 07:44 PM   #19  
Pearl-ExPert
 
stampztoomuch's Avatar
 
Join Date: Jun 2006
Location: Coquitlam, BC
Posts: 2,288
Likes: 0
Received 2 Likes on 2 Posts
Default

Quote:

Originally Posted by troopersmaView Post
I was able to resize just using my printer options. I clicked on the image (so it's full screen) then chose 'Print'. Then I clicked on 'Preferences', then clicked on the 'Effects' tab and down on the left there is a box that says 100% of normal size. You can choose any percentage you want. I printed mine at 50% and they are about 2 1/2 inches tall (and cute as the dickens!)

Also, a tip...if you want to paper piece but want to use scraps (instead of feeding full sheets of cardstock/paper through)...on the top sheet of paper in your printer mark one of the corners (like BL for bottom left). Then print your image. Now place your scrap on top of the printed image and adhere with a temporary adhesive. Place the sheet back in your printer tray with the BL in the bottom left corner (so you know it's going to print the same place again). Now print it again. You can send that same base sheet through as many times as you want and you can use up some of your smaller scraps of patterned paper.

Jane
You are wonderful Jane!!! Your tips are perfection. It's so great that everyone is posting their particular printer directions, since there are so many varieties of settings. Your paper piecing tip is pure gold & your card is so sweet. A gazillion thank yous for the directions & the tips. :O) mel
__________________
Mel :0) (Gallery & Blog (Mel Stampz))
Happy to be a Fan Club member!
stampztoomuch is offline  
Tweet this Post! Share on Facebook Reddit!! Pin on Pinterest! Share on Google+!
Reply With Quote Likes
Old 04-04-2009, 07:46 PM   #20  
Pearl-ExPert
 
stampztoomuch's Avatar
 
Join Date: Jun 2006
Location: Coquitlam, BC
Posts: 2,288
Likes: 0
Received 2 Likes on 2 Posts
Default

Thank you all from the bottom of my heart for your sweet words. It's SOOOOooooh much fun to know these will be used by all you creative peoples! I'm jumpin for joy! ;o) You made my day BIG time!!!! Happy Easter Hugs :O) mel
__________________
Mel :0) (Gallery & Blog (Mel Stampz))
Happy to be a Fan Club member!
stampztoomuch is offline  
Tweet this Post! Share on Facebook Reddit!! Pin on Pinterest! Share on Google+!
Reply With Quote Likes
Old 04-05-2009, 02:45 AM   #21  
Insane Embellisher
 
pa stamper's Avatar
 
Join Date: Feb 2005
Location: pa.
Posts: 902
Received 0 Likes on 0 Posts
Default

Thanks, Mel...you are so sweet to share with all of us. Hoppie Easter Mel....
Patsy
pa stamper is offline  
Tweet this Post! Share on Facebook Reddit!! Pin on Pinterest! Share on Google+!
Reply With Quote Likes
Old 04-05-2009, 06:52 AM   #22  
Stampin' Fool
 
Debra Hogg's Avatar
 
Join Date: Mar 2006
Location: Delhi Ont Canada
Posts: 1,379
Likes: 0
Received 0 Likes on 0 Posts
Default

Jane nice card, I love it!

You have a big heart Mel, I'm not to computer adaptable to print off the bunnies, but I love to look at them and dream

Debra
Debra Hogg is offline  
Tweet this Post! Share on Facebook Reddit!! Pin on Pinterest! Share on Google+!
Reply With Quote Likes
Old 04-05-2009, 09:27 AM   #23  
Mad Swapper
 
a1r601's Avatar
 
Join Date: Jul 2006
Posts: 1,964
Likes: 0
Received 0 Likes on 0 Posts
Smile

You are quite welcome, Mel...will have some fun playing with these cuties this week! You are too kind to offer the other parts for paper piecing. I am just starting to work with digital images so I had to experiment on what works for me. The printer option is a good way to resize too.

If you are having trouble downloading the files, right click on the files and hit SAVE AS TARGET and you should be able to save in the desired folder.
__________________
Alma
Blog: Me, Myself and I-N-K
a1r601 is offline  
Tweet this Post! Share on Facebook Reddit!! Pin on Pinterest! Share on Google+!
Reply With Quote Likes
Old 04-05-2009, 10:40 AM   #24  
Splitcoast Dirty Dozen Alumni
 
glowbug's Avatar
 
Join Date: Jul 2006
Location: Appomattox, VA
Posts: 12,589
Likes: 0
Received 0 Likes on 0 Posts
Default

Wow Mel!!! Thanks!! I am going to play with these this week. You are quite the artist! Happy Easter!
glowbug is offline  
Tweet this Post! Share on Facebook Reddit!! Pin on Pinterest! Share on Google+!
Reply With Quote Likes
Old 04-06-2009, 06:38 PM   #25  
Mad Swapper
 
scrubbybubbles's Avatar
 
Join Date: Apr 2008
Location: Sunny Florida
Posts: 1,756
Likes: 0
Received 0 Likes on 0 Posts
Default

Hi mel! I wanted to post my finished card. I just LOVE these images! they are so cute!! and I had a fun time coloring him in. I printed the image onto white CS and then I used my Prismacolor pencils along with my OMS and blender stump to color it in with. As well as inking the sides with my TH distress ink for added detail. The yellow CS is from DCWV and the ribbon is from the Dollar Tree. I decided to use some sky blue CS and DP from MM here as I thought it was appropriate for an air balloon. Lastly, the sentiment is from Studio G and stamped in colorbox pigment ink. Thanks so much!

Last edited by scrubbybubbles; 02-25-2017 at 01:51 PM..
scrubbybubbles is offline  
Tweet this Post! Share on Facebook Reddit!! Pin on Pinterest! Share on Google+!
Reply With Quote Likes
Old 04-06-2009, 06:43 PM   #26  
Pearl-ExPert
 
stampztoomuch's Avatar
 
Join Date: Jun 2006
Location: Coquitlam, BC
Posts: 2,288
Likes: 0
Received 2 Likes on 2 Posts
Default

Quote:

Originally Posted by scrubbybubblesView Post
Hi mel! I wanted to post my finished card. I just LOVE these images! they are so cute!! and I had a fun time coloring him in. I printed the image onto white CS and then I used my Prismacolor pencils along with my OMS and blender stump to color it in with. As well as inking the sides with my TH distress ink for added detail. The yellow CS is from DCWV and the ribbon is from the Dollar Tree. I decided to use some sky blue CS and DP from MM here as I thought it was appropriate for an air balloon. Lastly, the sentiment is from Studio G and stamped in colorbox pigment ink. Thanks so much!
Ouuuuuuu! Sue it is so AWEsome! I love your colouring & layout SOoooooooh much! It's too neato to see the little guys come to life. I have been dying to try the prismacolour technique out. It looks so stunning. Thank you so much for uploading your card for me to drool over!!! TOO fun!

Happy Easter Hugs!
=:o-)
__________________
Mel :0) (Gallery & Blog (Mel Stampz))
Happy to be a Fan Club member!
stampztoomuch is offline  
Tweet this Post! Share on Facebook Reddit!! Pin on Pinterest! Share on Google+!
Reply With Quote Likes
Old 04-07-2009, 02:10 PM   #27  
Mad Swapper
 
scrubbybubbles's Avatar
 
Join Date: Apr 2008
Location: Sunny Florida
Posts: 1,756
Likes: 0
Received 0 Likes on 0 Posts
Default

Quote:

Originally Posted by stampztoomuchView Post
Ouuuuuuu! Sue it is so AWEsome! I love your colouring & layout SOoooooooh much! It's too neato to see the little guys come to life. I have been dying to try the prismacolour technique out. It looks so stunning. Thank you so much for uploading your card for me to drool over!!! TOO fun!

Happy Easter Hugs!
=:o-)
your so welcome! but, no, no, nooooooooooooooooo...thank YOUUUUU...heeheehee.:mrgreen:
scrubbybubbles is offline  
Tweet this Post! Share on Facebook Reddit!! Pin on Pinterest! Share on Google+!
Reply With Quote Likes
Old 04-07-2009, 02:21 PM   #28  
Stazon Splitcoast
 
creatingisfun's Avatar
 
Join Date: Jun 2008
Location: Los Angeles
Posts: 13,001
Likes: 0
Received 0 Likes on 0 Posts
Default

how fun!
thanks for sharing ;)
__________________
Martha
BLOG
ZIBBET
creatingisfun is offline  
Tweet this Post! Share on Facebook Reddit!! Pin on Pinterest! Share on Google+!
Reply With Quote Likes
Old 04-08-2009, 10:41 AM   #29  
Kookie Creator
 
java_jenny's Avatar
 
Join Date: Nov 2008
Location: The Land of Happy Cows...
Posts: 409
Likes: 0
Received 0 Likes on 0 Posts
Default

Wow these are so cute!!! Thank you so much for posting these. I'll be using them tonight to make easter cards for my children. Thanks!!!
__________________
Stamp to Spend Alloted: $427 Spent: $810 = (-$383.00)
76 Cards/ 3 Layouts/54 altered items/walked 58 hours
java_jenny is offline  
Tweet this Post! Share on Facebook Reddit!! Pin on Pinterest! Share on Google+!
Reply With Quote Likes
Old 04-13-2009, 06:31 AM   #30  
Mad Swapper
 
a1r601's Avatar
 
Join Date: Jul 2006
Posts: 1,964
Likes: 0
Received 0 Likes on 0 Posts
Smile

Here are some cards I made for my kiddos for Easter:

- Boy Parahopper
- Girl Parahopper

Thanks Mel for offering these cute bunnies. You can also use the girl bunny for birthdays and a Spring card. Oooohhhhh, I might have to do some more playing!
__________________
Alma
Blog: Me, Myself and I-N-K
a1r601 is offline  
Tweet this Post! Share on Facebook Reddit!! Pin on Pinterest! Share on Google+!
Reply With Quote Likes
Reply


Posting Rules
You may post new threads
You may post replies
You may post attachments
You may edit your posts

BB code is On
Smilies are On
[IMG] code is On
HTML code is On
Trackbacks are Off
Pingbacks are Off
Refbacks are Off