Shadow Box Card
by Dawn Griffith
Showcase stamped images or a special sentiment in this mailable card.
Supplies
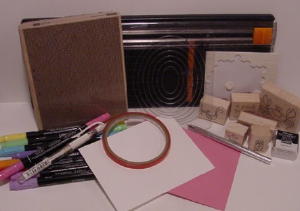
- Bone folder (for scoring)
- Sticky Strip™
- Coluzzle® oval template or other circle/oval cutting system
- Two pieces of cardstock (cut at 4 1/4" X 5 1/2")
- Background stamp
- Stamps
- Ink pads and/or markers for decorating
Step-by-Step
-
Step 1
Cut 2 pieces of cardstock at 4 1/4" X 5 1/2" (quarter sheet of cardstock). Score short ends of both pieces at 1/2" and 1".

-
Step 2
Place oval template in the center of one of the scored quarter sheets. This will be the front of the shadow box.
Make sure to center the template so that the oval has equal margins on all sides. It is helpful to use the 1" score line as a guide.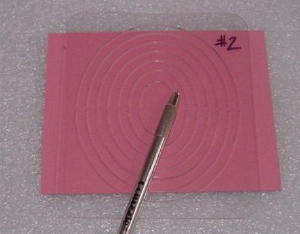
-
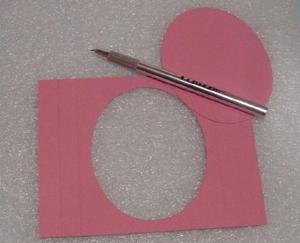
Step 3
Choose an oval size, and use the swivel knife or cutting tool included in the cutting system to cut an oval. Use scissors to remove cut out if needed.
-
Step 4
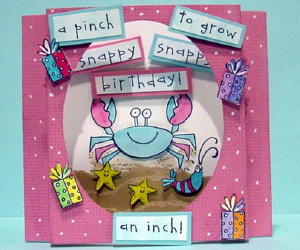
If desired, stamp a background on shadow box front as shown.
-
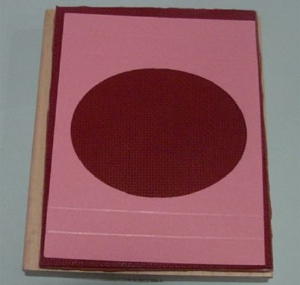
Step 5
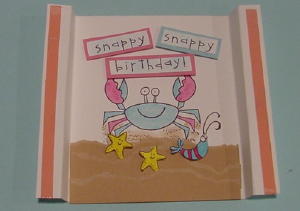
Line up the shadow box front with the shadow box back, being careful to match both pieces perfectly.
Stamp an image through the cut out onto the shadow box inside.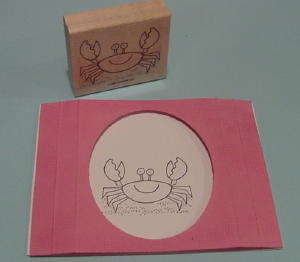
-

-
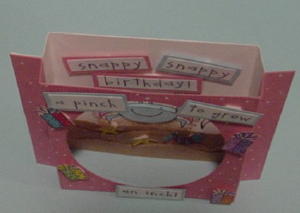
Step 6
This image will be the focal point. Finish decorating the inside of the shadow box as shown here.
-
Step 7
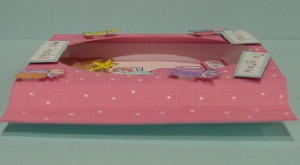
Once satisfied with the shadow box inside, apply Sticky Strip™ between 1/2" score line and the outside edge.
At this point, the shadow box should look like this.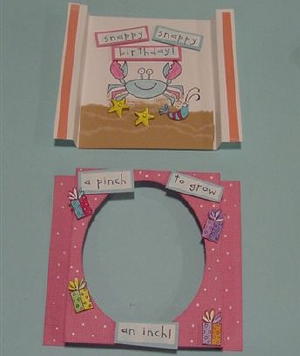
-
Step 8
Fold all score lines as shown. Remove Sticky Strip™ liner, and attach the two end pieces together, being careful to line ends up perfectly.
Tip: It is easier to remove the Sticky Strip™ covering one end at a time.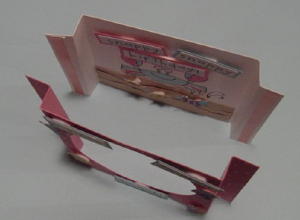
-
-
Step 9
The completed shadow box will lay flat for mailing in a standard sized envelope.
-
Finished card.
Video!
Your Turn
You've seen the tutorial, now you try it! We've got a section of the gallery set aside for Shadow Box Card. Try this technique, then upload your artwork to the gallery. Show us your creations!
***Please note - Internet Explorer/Edge is not a supported browser, and will not allow you to see the videos. Please use Chrome, Firefox or Safari to view our tutorial videos.

Questions and Comments
We'd love to get your feedback or questions. Leave your comment below.
Hugs ~ Lady Anne xx
http://mycraftyheaven.blogspot.com/2010/08/digi-doodle-shops-best-challenge-use.html
I altered it slightly to make an easel card. Thanks so much I will be using this again I loved making it and it really is quite easy x
Hugs Pascale
again thanks this is a really cool card design
Page 1 of 1 pages