Gamsol Magic
by Cecilia Ross
Use colored pencils, odorless mineral spirits, and blending stumps to color a masterpiece.
Supplies
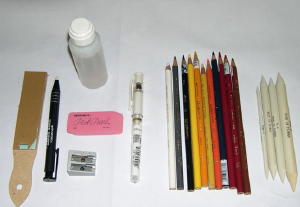
- Prismacolor™ Pencils or other wax-based colored pencils
- Blending stumps in various sizes
- Gamsol or other artist-grade odorless mineral spirits
- Emery board or sanding block to sharpen stumps
- Soft eraser
- Metal pencil sharpener
- Neutral colored cardstock
- Outline stamp
- Dye based ink Check the bottom of the tutorial for lots of great technique and supply tips added since the tutorial was initially published.
Step-by-Step
-
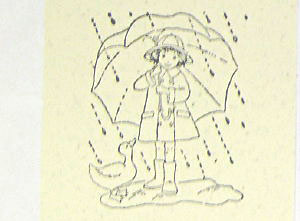
Step 1
Ink stamp with dye based ink and stamp image on neutral cardstock.
-
Step 2
Start coloring the image background (usually sky and ground) with a pencil, applying a light amount of color close to the edge of your image. I used Copenhagen Blue.
-
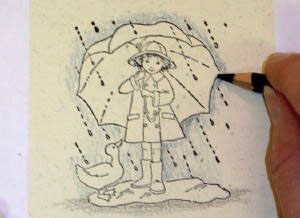
Step 3
Dampen the tip of your stump with Gamsol.
Blend the color with the side of your stump, pulling the color towards the outer edges in a small circular motion.
HINT: This works best if you have a small plastic bottle with a dauber lid (like a bingo marker) or a small piece of felt soaked in Gamsol. Press the stump against the felt or the dauber top to dampen.
-
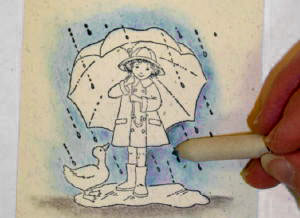
Step 4
Continue coloring and blending the inside images as in Steps 3 and 4.
Always start with the lighter colors first like the skin, goose and puddle.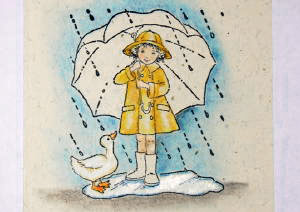
-
Step 5
Once all of the base colors are in, go back and add some shading or highlights.
To shade, add darker color around edges, in creases and anywhere a shadow would be.
Highlights should be added with a lighter color or simply by removing color with an eraser.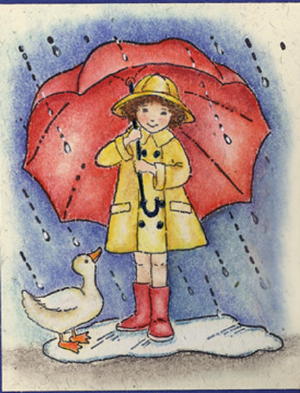
-
Step 6
Now put the card together. There is no need to seal the image. Gamsol sets the colors so there's no worry about smudging.

Variations
Pencils
Your colored pencils must be waterproof. Water soluble pencils will not blend with mineral spirits. Usually the box will just say colored pencils and not have anything that refers to aqua or water (like Aquarelle).
Stampin' Up! Pure Color, Derwent Studio Line, and Faber-Castell (better quality, but pricier) pencils also work for this technique, but Prismacolor Pencils have more colors to choose from. You can always blend two or more colors together to get the shade that you want, it's just extra work.
Blending Stumps
Try to find stumps made in Taiwan instead of those made in China. This may sound frivolous, but the ones from Taiwan are made of a softer paper making it easier to move the color around on smooth paper like SU! Whisper White.
A.C. Moore has blending stumps by Pro Art (made in Taiwan) in their art department by the charcoal pencils.
Michaels and other art supply stores also carry blending stumps (made in China), but just make sure you use them on a paper with a grain like Confetti or Naturals.
Clean your stump often with an emery board or sanding block so that the tip of the stump is not holding too much color. Sharpen the tip for finer work. The emery board also serves to rough up the tip (if the tip gets shiny you'll notice it just squeaks on the paper and doesn't move the color around).
Your Turn
You've seen the tutorial, now you try it! We've got a section of the gallery set aside for Gamsol Magic. Try this technique, then upload your artwork to the gallery. Show us your creations!
***Please note - Internet Explorer/Edge is not a supported browser, and will not allow you to see the videos. Please use Chrome, Firefox or Safari to view our tutorial videos.

Questions and Comments
We'd love to get your feedback or questions. Leave your comment below.
Thank you!
also is it ordinary kiddy pencils this is?
Thanks
Debby
Please, someone, anyone, help me on this one! Thanks
Pam
they are shown in the supply picture to the far right and in Step 3.
They are stumps out of rolled paper. They soak up your Mineral spirit and help you blend your colors. You can find them at Michaels and other hobby stores.
thanks
HTH!
Coletta
thanks for the emery board tip, i did not think of that!!! and was going through stumps like you would not believe
Thanks for the tutorial!
Thanks Judy
Page 1 of 2 pages 1 2 >