Coaster Mini Book
by Beate Johns
Turn coasters from a restaurant into a book perfect for gift-giving.
Supplies
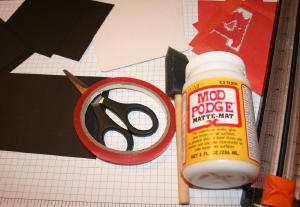
- Two 4” x 4” chipboard coasters
- Four 4"x4" pieces of patterned paper
- Two 3 5/8" x 3 5/8" pieces of cardstock for inside covers
- One 3 5/8" x 5 1/4" piece of cardstock for binding (this length will hold five pages, for each additional page, add 3/4")
- Five 3 1/2" squares of cardstock for pages
- One piece of ribbon about 20" long
- Mod Podge™ or other strong adhesive
- Foam brush
- Sticky Strip™
- Scissors
- Sanding block (optional)
- Corner rounder (optional)
- Paper cutter with scoring blade
Step-by-Step
-
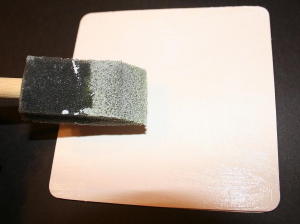
Step 1
Apply Mod Podge™to one side of a coaster.
-
Step 2
Adhere one piece of patterned paper to the coaster. Cut paper around the corners.
Repeat this step on other side of this coaster. Repeat to cover both sides of the second coaster.
-
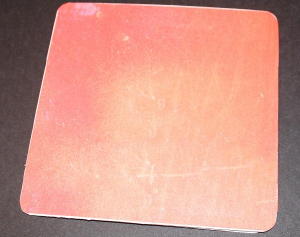
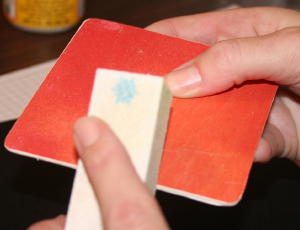
Step 3 (Optional)
Sand the edges of the patterned paper on the coaster with a sanding block for a weathered look.
-
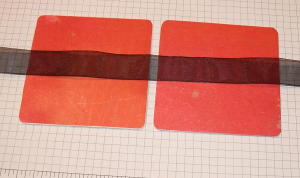
Step 4
Place the coasters with inside pages facing up next to each other. Leave about a 1/4" gap between the two coasters. Place your ribbon over both coasters as pictured.
-
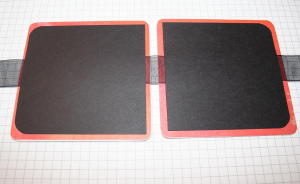
Step 5
Add adhesive to the inside 3 5/8" inside covers. Use Sticky Strip™ to ensure the ribbon will stay in place.
-
Step 6
Center the inside pages over the coasters and press down to adhere.
-
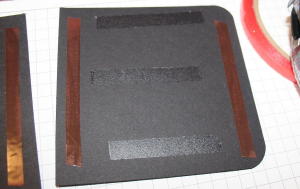
Step 7
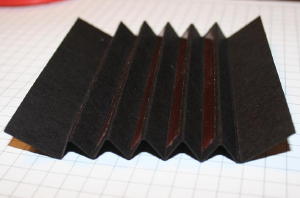
Take the 3 5/8" x 5 1/4" piece of cardstock and score at 3/4". Add 3/8" and score. Repeat ten times.
Hint: If you want to add more then five pages, add two scores for each additional page.
-
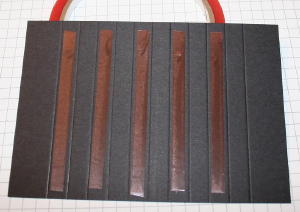
Step 8
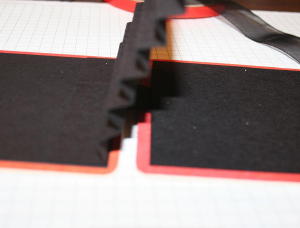
Add Sticky Strip™ to the first, third, fifth, seventh, and ninth small scored strips. These will hold your pages.
-
Step 9
Turn the scored cardstock around and add Sticky Strip™ to each end piece of the cardstock. This will adhere the binding to the coasters.

-
Step 10
Fold the scores in mountain/valley fashion as pictured.
-
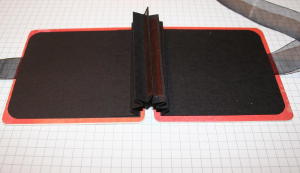
Step 11
Remove the liner of the Sticky Strip™, and adhere one side of the binding to one book cover. Line the end of the first fold line up with the end of the inside cover of the book.
-
Step 12
Repeat step 11 to adhere the other end of the binding to the other book cover.
-
Step 13
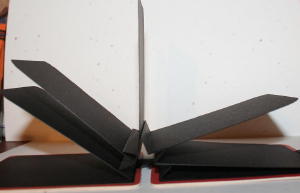
Add book pages.
-
Step 14
Finish your project.
This one was left very simple. It will be Rebecca's gift to her grandma for Christmas. She will add drawings to the pages. I gave her 3 1/4" squares of white cardstock for her drawings that we will then tape onto the pages.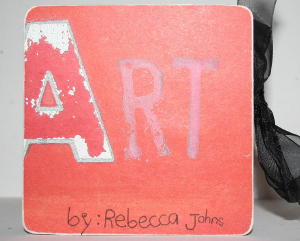
Variations
Make the book into a little scrapbook.
Collect favorite sayings or facts.
Make it into a classmate book for your kids.
Your Turn
You've seen the tutorial, now you try it! We've got a section of the gallery set aside for Coaster Mini Book. Try this technique, then upload your artwork to the gallery. Show us your creations!
***Please note - Internet Explorer/Edge is not a supported browser, and will not allow you to see the videos. Please use Chrome, Firefox or Safari to view our tutorial videos.
Questions and Comments
We'd love to get your feedback or questions. Leave your comment below.
Thanks for your wonderful projects. I look forward to signing on and seeing the new ideas you have.
Linda Duensing
Use your corner rounder on a cardstock square. Now use that rounded corner as a guide. Mark the corner lines on your chipboard with a pencil and cut it with scissors. Last use a sanding block to smooth your corner out.
What do you need help with in step 6? You take your piece of cardstock and score at 3/4", then (3/4" + 3/8" =) at 1 1/8", ( 1 1/8" + 3/8) 1 1/2"and so on. Just add 3/8" to your last score measurement until you have 11 score lines.
(3/4", 1 1/8", 1 1/2", 1 7/8", 2 1/4", 2 5/8", 3", 3 3/8", 3 3/4", 4 1/8", 4 1/2")
We Are Memory Keepers has a Corner Chomper. It will cut through about anything and round the corner - bonus is that you have 2 different corner rounder sizes 1/4" and 1/2' in one tool.
Page 1 of 1 pages