Zentangling

by Lydia Fiedler

Learn this relaxing form of advanced doodling to jazz up stamps, stencils and die cuts. The Zentangle® Method was created by Rick Roberts and Maria Thomas.

Supplies
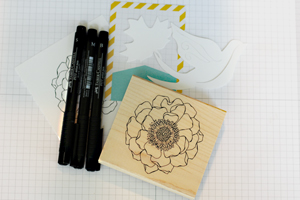
  • Cardstock

  • Pens (Faber-Castell Pitt Artist Pens used here)

  • Stamped image (Stampin' Up!® Blended Bloom used here)

  • Ruler, masking tape, stencil, die cut (optional)

Step-by-Step

  1. Step 1

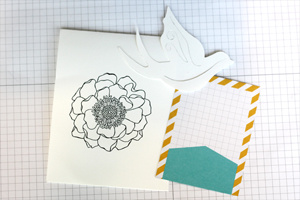
    Choose an area to work in. This can be a blank page, a stamped image, a shape that has been stenciled, a die cut, a masked area on a card, a Project Life card or graph paper.
  2. Step 2

    Subdivide the area into sections the size you would like to fill with patterns. In this case, the stamp image already has subdivisions perfect for tangles - look for outline images in your collection. Start with small subdivisions until you are comfortable with the technique.
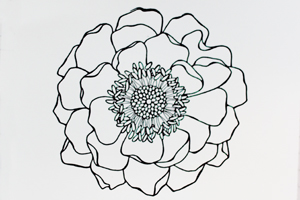
  3. Use rulers, stencils or other marking tools to help create interesting shapes. Here's a sample using a Dreamweaver stencil - the stencil is already divided into sections, which makes tangles easy.
  4. Step 3

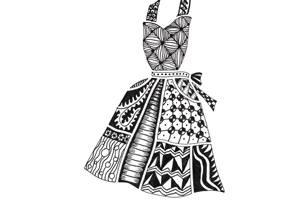
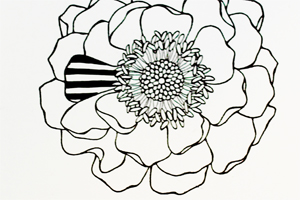
    Begin filling the subdivisions with patterns. Start with something simple, like stripes. There are many online resources for tangle patterns, including http://www.tanglepatterns.net to inspire you. The Zentangle Method can be found at http://www.zentangle.com.
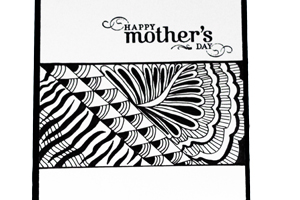
  5. In larger areas, such as this masked off area of the card front, experiment with larger patterns.
  6. Step 4

    Move to an adjacent section, and fill that with a pattern.
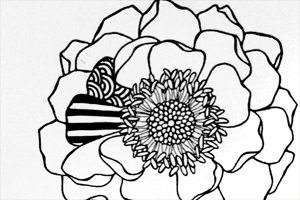
  7. Try to alternate elements of your patterns in adjacent areas. For example, if pattern 1 was mostly white space, make pattern 2 mostly black. If pattern 1 was an organic pattern, make pattern 2 geometric. This will make the finished project more visually interesting.
  8. Step 5

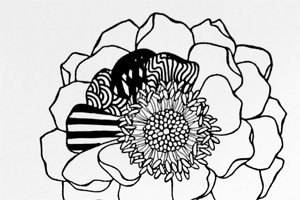
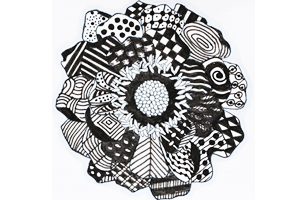
    Continue working in this manner until the image is completely filled.
  9. Step 6

    Add a small shadow around your design to make it pop off the page.


    Color your tangles, or draw them on colored paper for additional interest.

Video!

Your Turn

You've seen the tutorial, now you try it! We've got a section of the gallery set aside for Zentangling. Try this technique, then upload your artwork to the gallery. Show us your creations!

***Please note - Internet Explorer/Edge is not a supported browser, and will not allow you to see the videos. Please use Chrome, Firefox or Safari to view our tutorial videos.

Questions and Comments

We'd love to get your feedback or questions. Leave your comment below.

Lydia-Thanks for the feedback. I think I'm going to "borrow" my son's drafting pens that have a very fine point as a starter.

I'm glad to see my memory isn't fading too much. LOL I remembered a friend of mine had that stamp set a long time back.
Jeanne  |  Thu Jun 5, 2014 at 5:49 PM
Lydia, thanks SO much for doing this tutorial! Recently I bought 2 Zentangle books (after checking them out from the library, renewing them, and checking them out again!) and I bought the Sakura Pigma Micron pens (I got some colored ones too! <g>). NEVER thought of doing it in a stamped image, and I think this would be very helpful, as the "traditional" 3.5x3.5 inch square seems to be too big a space, even when I draw my "string" and sub-divide it. I really appreciate your video and hope you'll do more. I'm also eagerly awaiting your class at your Unwind Retreat in SLC! grin
Susan Vater  |  Thu Jun 5, 2014 at 8:34 PM
Wonderful tutorial, Lydia. Can't help but think of Santa Fe when I see you doing this. smile Such good advice about using open stamps and templates to sub-divide. I think some are a little overwhelmed at first with where to start. I have a few Dreamweaver templates that would be fun to use. AND... we are leaving for the southwest the end of the month (with a stop over in Santa Fe). I'll be sure to take your advice and take my Zentangling supplies with me.
Susie Lessard  |  Fri Jun 6, 2014 at 8:13 AM
What a fabulous zentagled flower Lydia!!! It looks so perfect to me. I love the dress one you've done and remember commenting on that in the past. Great tutorial!! :>)
Kim Hahn  |  Sat Jun 7, 2014 at 5:52 PM
This is beautiful. I bought some books, but have not tried to do this yet, I think I will now.
debbie horve  |  Sat Jun 7, 2014 at 10:50 PM
Oy Look what Lydia started --LOL
I order the SU Blended Bloom stamp ! MY SU Demo was very surprised to hear from me . I have not ordered anything from SU in ages
Barbara
Barbara Jay  |  Sat Jun 7, 2014 at 11:18 PM
@susie - Santa Fe is exactly where I started doing it - being relaxed in the most relaxing place on earth! smile

@barbara - hee hee...
Lydia Fiedler  |  Sun Jun 8, 2014 at 5:18 AM
Wow, Lydia! This is fabulous! I've taken a Zentangles class at a local store and have "dabbled" some with it...to my enjoyment! But I LOVE how you've used this beautiful new SU image and made a lovely card! It really is relaxing! Fabulous tutorial...thanks for sharing it! Hugs!
CherylQuilts  |  Sun Jun 8, 2014 at 12:04 PM
I have only just started learning Zentangle but I used it on some stamped notecards which I made for an upcoming challenge with Marks Finest Papers. Have loads to learn and mine isn't a patch on this but still look OK
Janine B  |  Tue Jun 10, 2014 at 2:22 AM
Lydia,
Thanks for your tutorial to introduce more folks to Zentangle�. You are absolutely correct about tangling as a relaxation method. I am a Certified Zentangle Teacher (CZT) - that means I studied with the founders of Zentangle, Rick Roberts and Maria Thomas. What you have demonstrated here is really ZIA (Zentangle Inspired Art) because a Zentangle is always non-representational. FYI Because Zentangle is a registered trademark is should not be used as a verb. Rather than "Zentangling" it is correct to say I am "Tangling".
Bette Abdu  |  Wed Jun 11, 2014 at 5:43 AM
This is so interesting and I loved watching you work, Lydia.
Benzi  |  Wed Jun 11, 2014 at 7:41 AM
I just love looking at these images. Now to find a stamp image in stock that I can use. Thanks for sharing!
Gail Russell  |  Thu Jun 12, 2014 at 8:04 PM
This is great! Thanks so much for sharing!
Gayle  |  Sat Jun 14, 2014 at 8:26 AM
Totally love this tutorial, Lydia, and it's gorgeous! Of course, I need this new SU flower too!! Hugs!
CherylQuilts  |  Mon Jun 16, 2014 at 8:09 PM
I am soooo hooked!
muscrat  |  Sat Jun 28, 2014 at 8:36 PM
I discovered zentangling a couple years ago. I really need to get back to working on it, because it relaxes me and frees my mind!! I love the idea of using a basic stamped image to zentangle into as an image for a card. GREAT idea of combining 2 passions!
Jann Schott  |  Sat Jul 5, 2014 at 6:36 PM
LOVE Zentangle art...great job Lydia! smile
Susanne Gleason  |  Wed Jul 9, 2014 at 8:32 AM
that is so cool i love what you done with the flower.thanks for showing us how to do it
mickey behnke  |  Wed Jul 23, 2014 at 10:03 AM
Thank you so much! I've just barely tried this And this tutorial has been the most helpful. I can't wait to try your method!
Kathy Harrison  |  Wed Jul 30, 2014 at 1:06 AM
Hi Lydia. I am also a CZT and I agree with the previous posters regarding using the term Zentangling. A Zentangle is what you produce (a noun) and tangling is what you do (a verb). A lot of people seem to be interested in learning this relaxing art method.
Barbara  |  Sat Aug 9, 2014 at 8:10 PM

Page 3 of 4 pages  <  1 2 3 4 >

You need to be logged in to comment

GET OUR NEWSLETTER


Splitcoaststampers's privacy policy