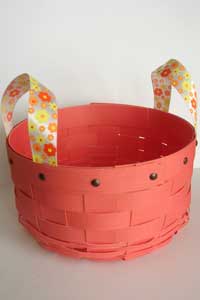
Woven Basket
by Laura Canale
Create a beautiful basket with paper strips and glue.
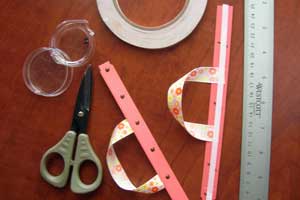
Supplies
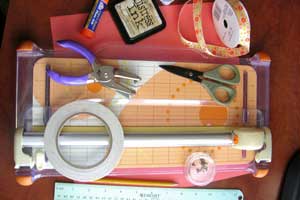
- 12 x 12 sheet of cardstock
- Paper Trimmer
- Ruler
- Hole Punch
- Scissors
- Pencil
- Glue Stick
- Double Sided Sticky Strip
- Distressing Ink and dauber (optional)
- Ribbon
- Brads
Step-by-Step
-
Step 1
From cardstock cut (all 12" long)
8 strips 3/4" wide,
9 strips 1/8" wide,
7 strips 1/2" wide,
2 strips 5/8" wide.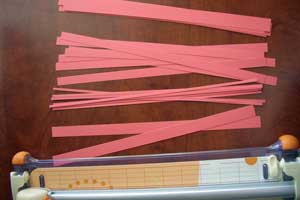
-
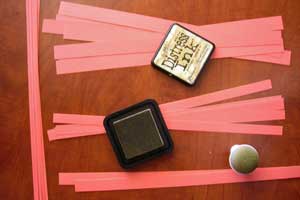
Step 2 (Optional)
Ink edges of wider strips on the side that will be the outside of your basket.
-
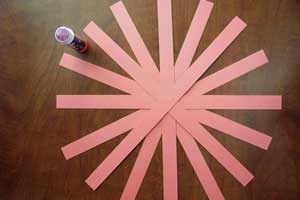
Step 3
Create the base of the basket by crossing the 3/4" strips as shown. Use a glue stick to secure each overlapping section in the center.
-
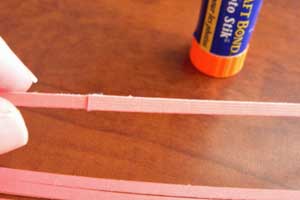
Step 4
From the 1/8" strips create three 36" long strips with a glue stick. This will allow you to use a more continuous weave when you start your basket.
-
Step 5
With distressed side facing down, start weaving with the 1/8 " strips. Start about 2" from the center.
It will be loose when you start and you shouldn't have to tug too hard on the weaving strip. If you are having a hard time getting started you could use a little glue to hold the 1/8" paper in place.
After the first row of weaving is done it is helpful to fold up the 3/4" strip where it meets the 1/8" strip. This becomes the bottom of your basket. Continue weaving in the other strips of 1/8' x 36" strips. With a continuous weave you have to skip a weave when you get back to your starting point. It shouldn't be too noticeable once the weaving is finished.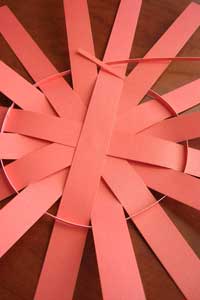
-
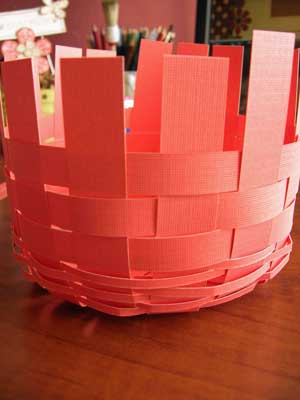
Step 6
Glue the ends of 2 of the 1/2" strips together to create a 24" long strip. Weave that above the smaller row. This will not be a continuous weave. Trim the remainder of the strip and glue that to the end of another 1/2" strip. This will be long enough to do the next row of weaving. Repeat for the third row. You will use what's left of the 1/2" strips for some finishing work on the basket.
-
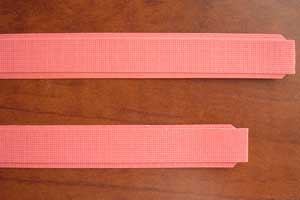
Step 7
Trim corners of one end of the 5/8" strip. Adhere 1/2" strip to the top with 1/2" folded behind to create the finishing detail as seen in the picture below on the right. Trim each strip to 8".
-
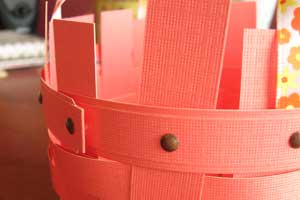
Step 8
Starting 1/4" in from decorative edge, make 6 marks 1 1/4" apart. Punch holes, adhere brads to front side, flip over and attach 5 1/2" length of ribbon with double sided tape behind the 3rd and 5th brads. Add strip of double sided tape to entire length of both trim pieces.
-
Step 9
Attach trim pieces just above the last row of weaving. Leave enough unattached to tuck the tail end of the second piece under the first.
-
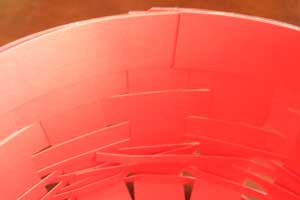
Step 10
Trim excess strips to slightly under the top of the trim. Adhere Sticky Strip™ to 2 longest lengths of leftover 1/2 strips. Adhere to inside top of basket to cover trimmed edges.
-
Your basket is finished.
Your Turn
You've seen the tutorial, now you try it! We've got a section of the gallery set aside for Woven Basket. Try this technique, then upload your artwork to the gallery. Show us your creations!
***Please note - Internet Explorer/Edge is not a supported browser, and will not allow you to see the videos. Please use Chrome, Firefox or Safari to view our tutorial videos.

Questions and Comments
We'd love to get your feedback or questions. Leave your comment below.
Eveline.
Page 1 of 1 pages