Wiper Card
by Beate Johns
Create a card with a surprise image with just a few scores and a bit of adhesive.
Supplies
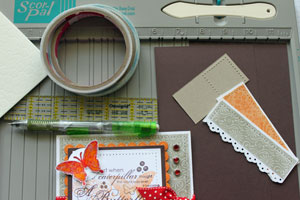
- Scor-Pal™, or other scoring tool
- Two 4 1/4" x 8 1/2" pieces of cardstock, for your card base
- One 1 1/2" x 3" piece of cardstock, for your "wiper"
- Scor-Tape™ or other strong adhesive
- Ruler and Pencil
- Stamps, Unity's Quote Bundle Pack and Ending & Beginnings used here
- Ink
- Embellishments and additional cardstock to decorate the card
Step-by-Step
-
Step 1
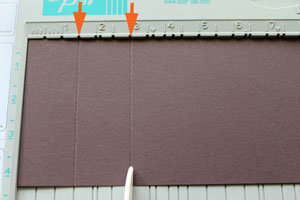
Score your 4 1/4" x 8 1/2" piece of cardstock at 1 1/2" and 3".
-
Repeat the scoring on your second piece.
-
Step 2
Prefold all scored lines.
The score line next to your large panel should fold down, the one next to the edge up.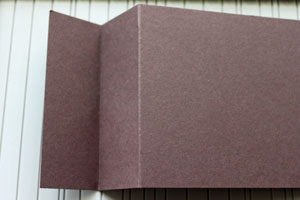
-
Repeat with your second cardstock piece.

-
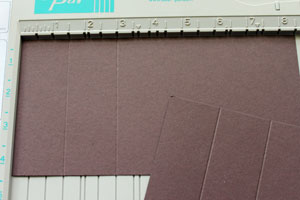
Step 3
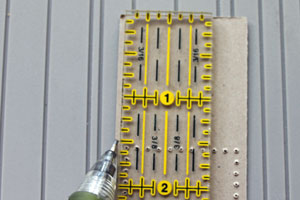
Mark the 1 1/2" x 3" piece of cardstock at 1 1/2" on the long side.
-
Step 4
Score from the top right corner to the 1 1/2" mark.
Hint:
When using a Scor-Pal™ you don't need to mark your strip. Place the right hand corner in the 1" groove and line the left hand corner up with the 1" mark on the left hand side of the Scor-Pal™.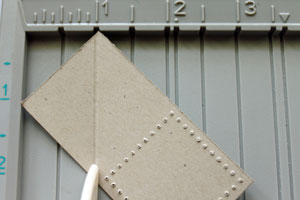
-
Step 5
Prefold your score line, turn your strip around and decorate.
Variation:
Instead of adhering patterned paper and stamped images as shown here, you could also stamp directly on the top of the strip.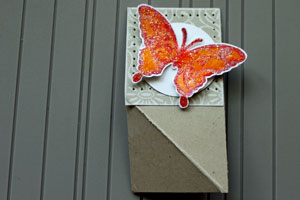
-
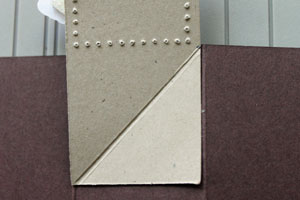
Step 6
Add Scor-Tape™ on your scored triangle on the bottom of the strip.
Only add adhesive to your triangle. If you place it over the entire bottom strip, the wiper won't work.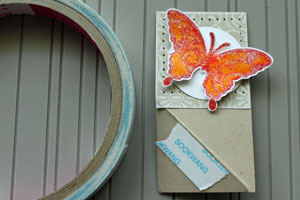
-
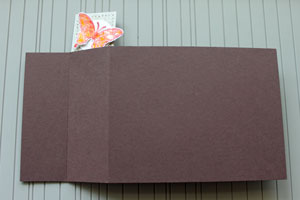
Step 7
Take one of your card base pieces and lay it down with the score lines to the right. This will be your card front.
Adhere your strip, image facing down, between the two score lines.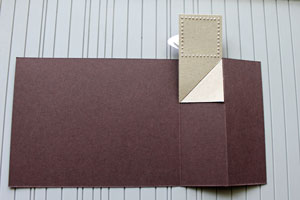
-
Line up the end of your diagonal score with the edge of your card front.
-
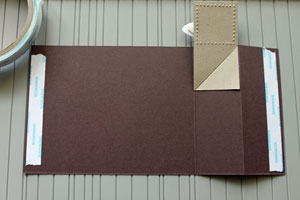
Step 8
Add adhesive to the edgesof both 4 1/4" sides of the cardstock piece.
-
Step 9
Place your second 4 1/4" x 8 1/2" piece of cardstock over your card front. Make sure the score lines are on the left.
-
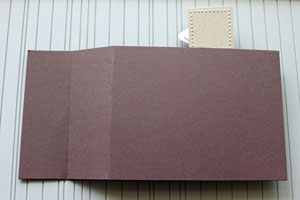
Step 10
Turn your card around.
-
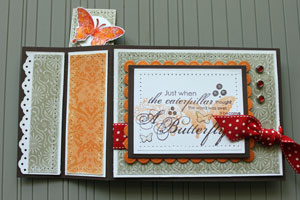
Decorate the front panel.
-
Step 11
Your Wiper Card is done.

Video!
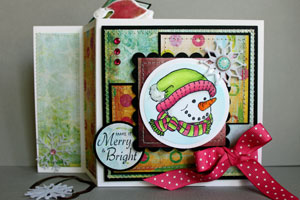
Variations
-
Hip to be Square
To create a square wiper card, start out with two 4 1/4" x 7 1/4" pieces of cardstock, score at 1 1/2" and 3".
Double Wiper
Add a second 1 1/2" x 2 1/2" strip of paper between the score lines of the card back to have two strips (images) pop up.
Your Turn
You've seen the tutorial, now you try it! We've got a section of the gallery set aside for Wiper Card. Try this technique, then upload your artwork to the gallery. Show us your creations!
***Please note - Internet Explorer/Edge is not a supported browser, and will not allow you to see the videos. Please use Chrome, Firefox or Safari to view our tutorial videos.
 *
*
Questions and Comments
We'd love to get your feedback or questions. Leave your comment below.
P.S. Yvonne43 put me on to you.
new to this lovvely hobbie, thankyou to all.
Dawnie
Is there any way to have the pop up without seeing the back paper if that’s clear
Thanks again hugs
Page 4 of 4 pages « First < 2 3 4