Waterfall Card
by Kathy Logan
Try out this new craze! Pull on a paper tab and make secret messages or images appear, while pieces of cardstock fold over and look like a waterfall.
Supplies
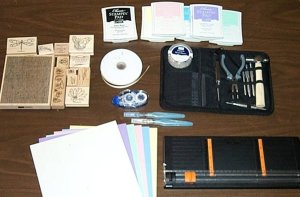
- Neutral-colored cardstock
- Colored cardstock
- Assorted stamps and inks
- Paper Trimmer with a scoring blade (or a ruler and a stylus for making scored lines.)
- Eyelets & eyelet setting tools
- Ribbon or cord (for the pull tab)
- Adhesive
- Scissors
- Aquapainters or other coloring medium (optional, depending on the style of stamps chosen.)
Step-by-Step
-
Step 1
Cut your Neutral Cardstock in the following measurements: 5¼" x 8" (1), 1 7/8" x 1 7/8" (4).
Cut your Colored Cardstock in the following measurements: 2" x 2" (4), 5½" x 4¼" (1), 9" x 2" (1), ¾" x 4" (1).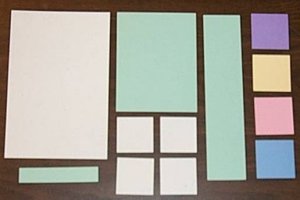
-
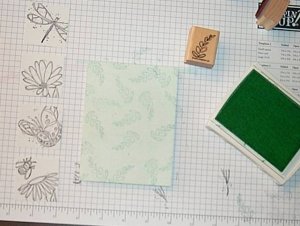
Step 2
Fold the largest piece of neutral colored cardstock in half, and then stamp it as desired. Also stamp the four neutral-colored squares.
-
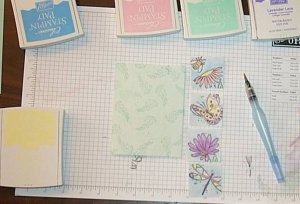
Step 3 (Optional)
Depending on the style of stamps you've selected, color your stamped images with any method you prefer. I chose to watercolor the images for this card with the SU! Aquapainters™ and ink.
-
Step 4
Attach your stamped squares to the slightly larger colored cardstock squares with your adhesive.

-
Step 5
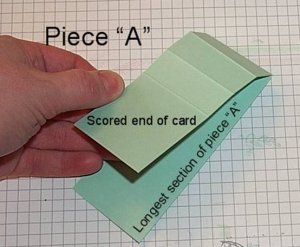
Next you will need to score your 9 x 2 strip of colored cardstock. Starting at end of strip, score 2", 2¾", 3 ½", and 4 ¼" from the end.

-
You can then fold along the scored lines and you should have a strip which looks something like the following picture (let's call this Piece A).
-
Step 6
Attach the horizontal strip (the one which measures ¾" x 4") to front of card with eyelets.
Note: it is very important that you do not use any adhesive in the middle of this piece!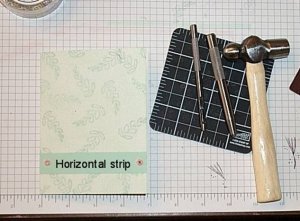
-
Step 7
Next, attach piece A to the horizontal strip you just attached to the card front. To do this, slide the longest section of piece A between the horizontal strip and the card, making sure to center it in the middle of your card. Line up the very edge of the scored end of piece A with bottom of the horizontal strip and attach with adhesive.
Note: the adhesive placement is very important you do not want to attach the scored side and the longest section of piece A together!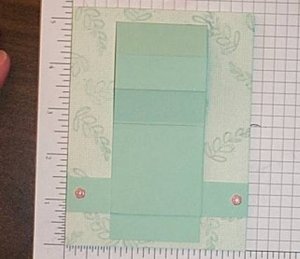
-
Step 8
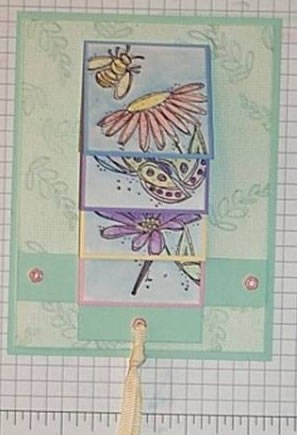
Attach your first stamped image to the bottom 2" x 2" space at the scored end of piece A.

-
Step 9
Apply adhesive to the scored sections of piece A only, and attach remaining stamped pieces.

-
Once you've attached these pieces, you should be able to gently pull the bottom of the longest section of piece A directly down and watch the stamped images flip one at a time and then slide behind piece A.

-
Step 10
Attach eyelet and ribbon to the bottom of piece A. To do this, simply mark where you want to place your eyelet with card in the closed position. Then pull the longest section of piece A until it is fully extended. Punch a hole and place eyelet. Thread ribbon through eyelet and tie. Trim ends with scissors. You're done!
Your Turn
You've seen the tutorial, now you try it! We've got a section of the gallery set aside for Waterfall Card. Try this technique, then upload your artwork to the gallery. Show us your creations!
***Please note - Internet Explorer/Edge is not a supported browser, and will not allow you to see the videos. Please use Chrome, Firefox or Safari to view our tutorial videos.

Questions and Comments
We'd love to get your feedback or questions. Leave your comment below.
Cut your Neutral Cardstock in the following measurements: 5 1/2" x 8 1/2" (1), 1 7/8" x 1 7/8" (4).
Cut your Colored Cardstock in the following measurements: 2" x 2" (4), 5 1/4" x 4" (1), 9" x 2" (1), �" x 4" (1).
(changed the measurements for the two pieces of the base card--the two largest pieces.)
THANKS
Thank You !!
I have been trying to fiqure out something to no avail. Hoping you can help me out.
I want to do your tutorial but instead would like to make it like a photo album. I want to make the waterfall larger to accomadate 3x3 images. I have used the same size of card but cannot fiqure out my score lines.
Any chance you could sell me what size to make the strip and where l should mark my score lines.
I would appreciate any assistance.
Great tutorial.
THanks
Page 2 of 2 pages < 1 2