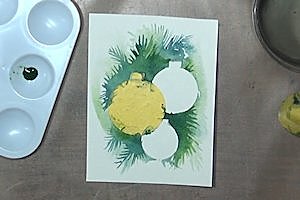
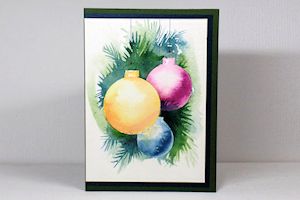
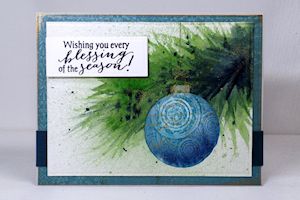
Watercolored Ornament Card
by Dina Kowal
Use basic watercolor techniques to create a holiday vignette.
Supplies
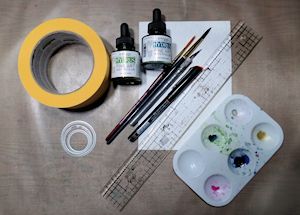
- Wide painter’s tape or other adhesive masking paper (1.88" Frog Tape Delicate Surface used here)
- Circle dies in 3 different sizes (Lifestyle Dies used here – the largest is 1 3/4", smallest is 1 1/8" – sizes do not need to be exact)
- Craft knife
- Die cutting machine
- Watercolor panel, cut to card size (Strathmore 300 Series 140# cold press paper used here)
- Watercolor medium (Dr. Ph. Martin's Hydrus Fine Art Liquid Watercolors used here – watercolor paints, dye inks, Gelatos, watercolor pencils/crayons etc could also be used)
- Watercolor brushes – medium and fine (#4 and #6 used for sample)
- Palette
- Liner pen, black or metallic
- Ruler
- Rubber stamp (Impression Obsession Grunge Circles E13120 used here)
- Paper for masking (Post-It Note used here)
- Paper towel
- Other supplies as needed to complete the project (MISTI, Bazzill textured cardstock, sentiment, Spellbinders rectangle die)
Step-by-Step
-
Step 1
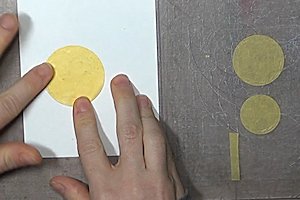
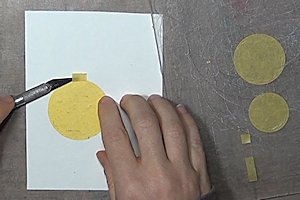
Lay down a strip of wide painter’s tape on a die cutting plate. Cut out three circles of different sizes to use as masks.
NOTE:
Painter’s tape is recommended, as it will give a good seal around all edges. Plain paper masks will not hold up to watercoloring.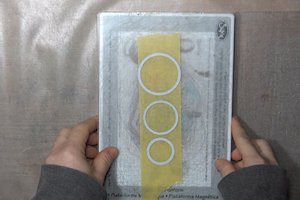
-
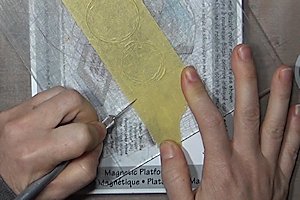
From an uncut section of the tape, use a craft knife to cut three small rectangles, about 1/4" x 3/8". These will be the ornament toppers.
-
Step 2
Place the largest circular mask onto a panel of watercolor paper. This will be the largest ornament, and will appear to be in front of the others.
-
Position a small rectangle of tape at the top of the circle, overlapping the edge. Press all tape down securely.
-
Step 3
Position the other circles on the watercolor panel, overlapping them slightly with the first mask. Put a rectangle of tape at the top of each one as before.

-
Step 4
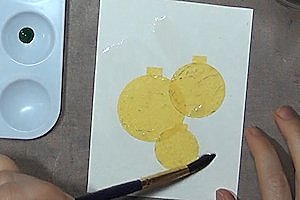
Using clean water, wet the area around the masks with a medium paintbrush.
-
Add green paint or ink to the washed area, allowing the color to bleed and blend in the water.
TIP:
More than one color can be used to add interest (in the sample, Sap Green and Payne’s Grey Hydrus Liquid Watercolors were used).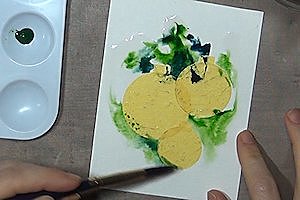
-
Step 5
Using a smaller paintbrush, pull out the color around the edges into the shape of evergreen branches. Begin by pulling a long straight or slightly curved line, then make smaller lines off the sides.
-
Continue around the edge until you reach a look that you like.
-
Step 6
Dry the panel completely using a heat tool, or allow to air dry.
-
Step 7
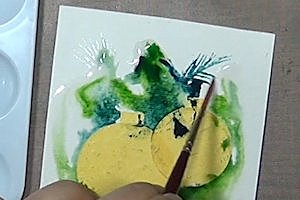
Repeat steps 4-6, creating a clear water wash in a smaller area over the first layer of color. Add in coordinating colors as before. Adding layers gives depth to the background around the ornaments.
-
Pull out the color around the edges into the shape of evergreen branches as before. Use less water to allow for more concentrated color. Angle branches differently from the first layer of color to add dimension and depth.
Heat set or allow to air dry.
Repeat to add more layers or details to the background if you like.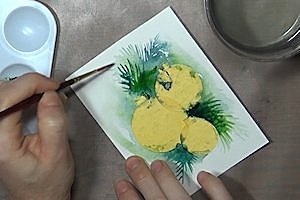
-
Step 8
Remove the two smaller masks, leaving the largest one in place.
-
Step 9
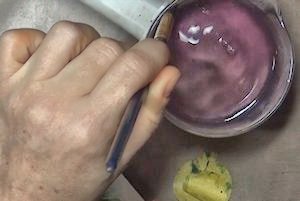
To begin painting an ornament, paint a crescent shape of concentrated color along the bottom curve of the circle. Use plenty of paint, and enough water to keep the paint wet while you do the next steps.

-
Rinse the paint from your brush with clean water, and dab off any drips on a rag or paper towel.
-
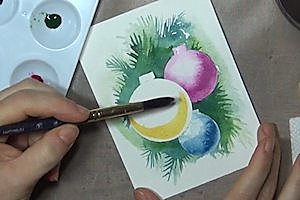
Step 10
Angle the brush so that the wet tip touches the painted area. The paint should begin to spread outward into the uncolored area in a slow blend.

-
Do the same below the painted area, blending to the edge, and also around the edge of the circle shape.

-
Step 11
Rinse the paint from the brush again, and dab off any drips. Complete the blend by brushing clear water into the highlight area of the ornament.
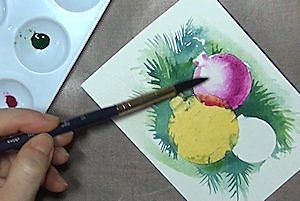
-
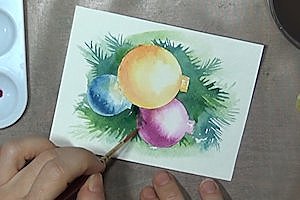
Step 12
Repeat the process for the lower ornament, painting a crescent shape of concentrated color along the bottom curve of the circle, then rinsing the brush to blend color into the surrounding areas with clean water.
-
If too much color bleeds into the highlight area (which should be a bright, whitish circular area), dab it with the corner of a paper towel to absorb the paint.
Heat set or allow the panel to air dry before continuing.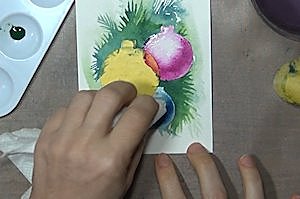
-
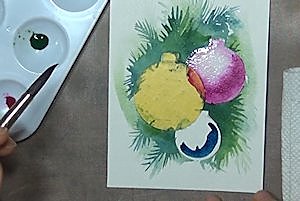
Step 13
Remove the last mask and paint the largest ornament as above. Heat set or allow the panel to air dry before continuing.
-
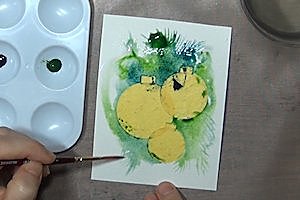
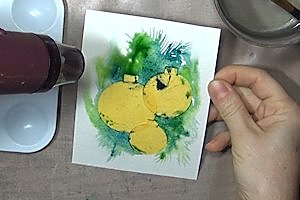
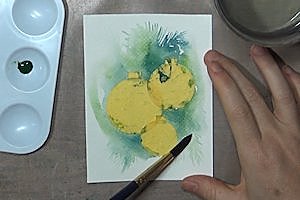
Step 14
Add branches as desired to add dimension to the scene or hide areas of the masked edges that didn’t cover well.
-
Step 15
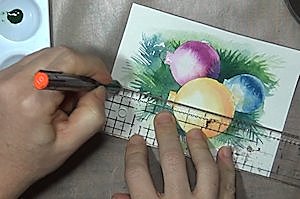
Add a loop and tiny bow to each ornament top using a black or metallic liner pen.
-
From the center of each ring, draw a straight line to the top of the card, using a ruler as a guide. If the center of the ornament topper is behind another ornament, estimate its position, and begin the line where it would be visible.
-
Step 16
Use the panel to complete a card or other project.
-
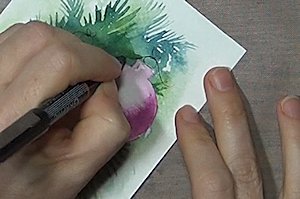
Step 17
For a more decorative look, mask the ornament(s) and create an evergreen background as above. When the panel is dry, lay a reverse mask over the ornament, so that only the masked circle is exposed. (If painting more than one ornament, remove the tape masks and mask each ornament in order from background to foreground as above.)
For a complete tutorial on reverse masking, click HERE.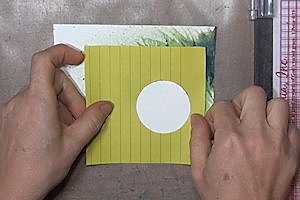
-
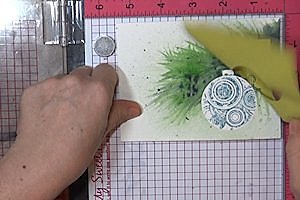
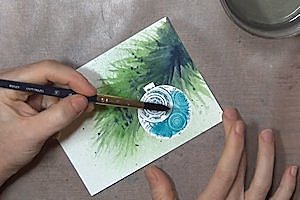
Stamp a design in the opening using a water soluble ink. Dye inks, Distress inks, and some chalk inks can be used. If you are unsure if your ink is water soluble, tap the corner of the inkpad onto a nonporous surface such as a tile or Styrofoam plate. If the ink can be lifted with water, it should work for this technique.
-
Step 18
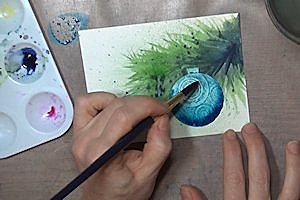
Blend the colors in the open area with a wet brush.
-
Tap more ink onto your craft sheet or use another watercolor medium to add shading to the ornament (Versamagic chalk ink and Hydrus liquid watercolor used for sample).
-
Step 19
Add in more details as desired, and use the panel to complete a finished project.
Video!
Your Turn
You've seen the tutorial, now you try it! We've got a section of the gallery set aside for Watercolored Ornament Card. Try this technique, then upload your artwork to the gallery. Show us your creations!
***Please note - Internet Explorer/Edge is not a supported browser, and will not allow you to see the videos. Please use Chrome, Firefox or Safari to view our tutorial videos.

Questions and Comments
We'd love to get your feedback or questions. Leave your comment below.
Christmas Blessings to you,
Laurie
Page 2 of 3 pages < 1 2 3 >