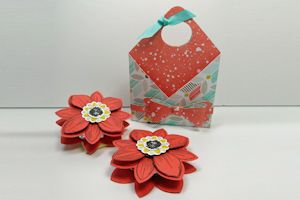
Two Pocket Treat Holder
by Becky Roberts
Fold cardstock into a double-sided treat pouch.
Supplies

- Cardstock (Stampin’ Up! Best Day Ever Designer Series Paper used here)
- Scoring tool
- Circle or oval punch/die
- Corner rounder (optional)
- Other supplies as needed to complete the project (Stampin’ Up! products used here: Calypso Coral & Whisper White cardstock, Petal Potpourri stamp set, Early Espresso ink, Stampin’ Write Markers in Crushed Curry & Sahara Sand, Flower Medallion Punch, Bow Builder Punch, 1/2 Circle, 7/8 Scalloped Circle, Mini Glue Dots, Stampin’ Dimensionals; Peppermint Patty candy)
Step-by-Step
-
Step 1
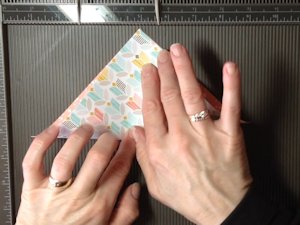
Cut paper to 6" x 6". Fold in half from corner to corner to create a triangle.
-
Place folded edge against the top of the score board and score down at 2 3/4" and 5 5/8".
-
Step 2
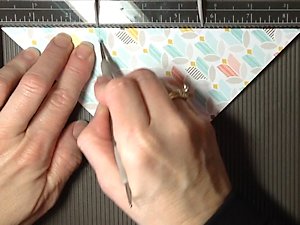
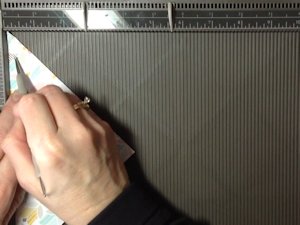
Align the folded edge on the left side of the board and score at 1/2".
-
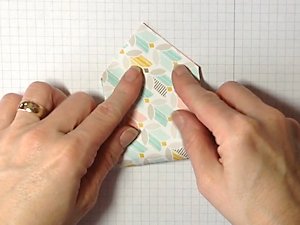
Step 3
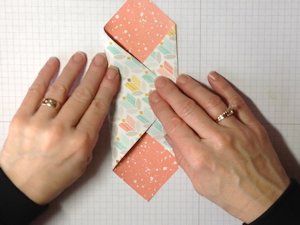
Unfold the paper. Fold the right and left sides in towards the center.
-
Fold in half.
-
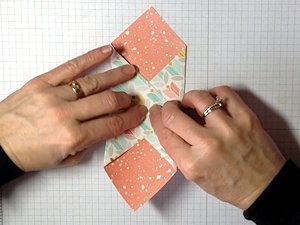
Step 4
Fold each half back on the score lines created in step 2.
-
A small W is created in the center.
-
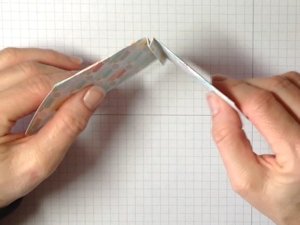
Step 5 (Optional)
Round the top point with a corner rounder if desired.
-
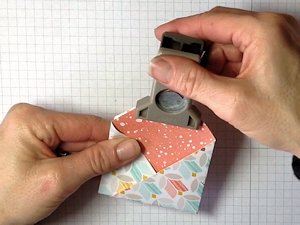
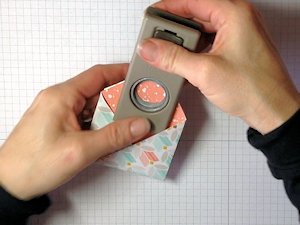
Punch or die cut a small oval for a handle.
-
Step 6
Embellish and complete the project.
Video!
Your Turn
You've seen the tutorial, now you try it! We've got a section of the gallery set aside for Two Pocket Treat Holder. Try this technique, then upload your artwork to the gallery. Show us your creations!
***Please note - Internet Explorer/Edge is not a supported browser, and will not allow you to see the videos. Please use Chrome, Firefox or Safari to view our tutorial videos.

Questions and Comments
We'd love to get your feedback or questions. Leave your comment below.
Thanks for the share!
Stargazer1
I think it is the perfect size for my favorite treats,the Geridelli squares!
Page 1 of 2 pages 1 2 >